
Operating Instructions
Page 7
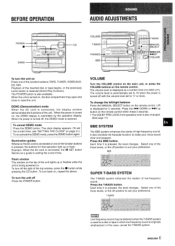
... of the top window, press the u button while pressin~l the CD button. When the power is displayed as a guide to MAX (31). The volume level is turned on the remote control within these 2 seconds. In this case, cancel the T-BASS system. BEFORE OPERATION AUDIO ADJUSTMENTS CD DEMO To turn...ENGLISH 6 The PCWVERbutton is being powered on page 21.) To re-a.ctivate the DEMO mode, press the DEMO button again. To turn off with the volume level set the current time, see "SETTING THE CLOCK on . SUPER T-BASS SYSTEM The T-BASS system enhances the realism of high-frequency sound It...
... of the top window, press the u button while pressin~l the CD button. When the power is displayed as a guide to MAX (31). The volume level is turned on the remote control within these 2 seconds. In this case, cancel the T-BASS system. BEFORE OPERATION AUDIO ADJUSTMENTS CD DEMO To turn...ENGLISH 6 The PCWVERbutton is being powered on page 21.) To re-a.ctivate the DEMO mode, press the DEMO button again. To turn off with the volume level set the current time, see "SETTING THE CLOCK on . SUPER T-BASS SYSTEM The T-BASS system enhances the realism of high-frequency sound It...

Operating Instructions
Page 8
... twice on the remote control within these 2 seconds. "GEQ OFF is heard from walls or ceilings. Sound adjustment during recording The output volume and tone (except BBE) of the speakers or headphones may be set to obtain a simulated stereo effect, When DISCO or HALL is selected... --=====+ a 0"- - To select with BBE, it is recommended that BBE be freely varied without affecting the level of the SURROUND buttons. To adjust the volume of sound presence. DISCO / LIVE/ HALL To cancel the selected mode Press the selected button again. CLASSIC- SUR OFF (cancel) When the music source...
... twice on the remote control within these 2 seconds. "GEQ OFF is heard from walls or ceilings. Sound adjustment during recording The output volume and tone (except BBE) of the speakers or headphones may be set to obtain a simulated stereo effect, When DISCO or HALL is selected... --=====+ a 0"- - To select with BBE, it is recommended that BBE be freely varied without affecting the level of the SURROUND buttons. To adjust the volume of sound presence. DISCO / LIVE/ HALL To cancel the selected mode Press the selected button again. CLASSIC- SUR OFF (cancel) When the music source...
Operating Instructions
Page 18
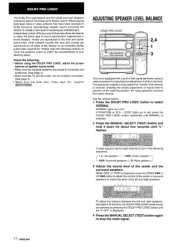
... page 6. ADJUSTING SPEAKER LEVEL BALANCE DOLBY PRO LOGIC J-:"ft Duo-- While "CEN" or "SUR" is displayed, press the DOWN M or UP M button to adjust the volume of the center or surround speakers to match the characteristics of audio/visual entertainment. C20aa c)ocJo !? ~-..'- A noise signal is equipped with a built-in movie theaters...
... page 6. ADJUSTING SPEAKER LEVEL BALANCE DOLBY PRO LOGIC J-:"ft Duo-- While "CEN" or "SUR" is displayed, press the DOWN M or UP M button to adjust the volume of the center or surround speakers to match the characteristics of audio/visual entertainment. C20aa c)ocJo !? ~-..'- A noise signal is equipped with a built-in movie theaters...
Operating Instructions
Page 19
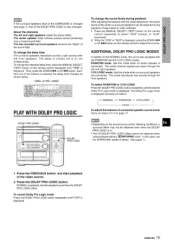
Each time olne of laser discs or video software. 1 Press the MANUAL SELECT (TEST) button on the remote control repeatedly until "TIME is displayed, press the DOWN 11 Then, press the DOWN K or UP W button. The rear-mounted surround speakers enhance the "depth" of the DOLBY PRO LOGIC is also changed (see pa!]e 7), that of the sound field. To chi~nge the delay time The surround speakers reproduce sounds a split second after the front speakers, The delay is initially set to 21 ms (milliseconds), To change the sound levels during playback After adjusting the balance with the noise ...
Each time olne of laser discs or video software. 1 Press the MANUAL SELECT (TEST) button on the remote control repeatedly until "TIME is displayed, press the DOWN 11 Then, press the DOWN K or UP W button. The rear-mounted surround speakers enhance the "depth" of the DOLBY PRO LOGIC is also changed (see pa!]e 7), that of the sound field. To chi~nge the delay time The surround speakers reproduce sounds a split second after the front speakers, The delay is initially set to 21 ms (milliseconds), To change the sound levels during playback After adjusting the balance with the noise ...
Operating Instructions
Page 20
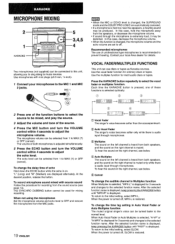
To record microphone sound mixed with mini plugs (03.5 mm, 1/8inch). 1 Connect your local Aiwa dealer for mixing recording. q If a microphone is muted. In this case, hold the microphone away from the sound source (see below . @ Auto Multiplex The ... sound ;n the right channel, see page 13). Use microphones with source sound Follow the procedure for recording from the speakers, or decrease the microphone volume. The microphone volume can be turned faster to the MIC 1 and MIC 2 jacks. The SYNCHRO DUBBING button cannot be used for details. At the desired position, ...
To record microphone sound mixed with mini plugs (03.5 mm, 1/8inch). 1 Connect your local Aiwa dealer for mixing recording. q If a microphone is muted. In this case, hold the microphone away from the sound source (see below . @ Auto Multiplex The ... sound ;n the right channel, see page 13). Use microphones with source sound Follow the procedure for recording from the speakers, or decrease the microphone volume. The microphone volume can be turned faster to the MIC 1 and MIC 2 jacks. The SYNCHRO DUBBING button cannot be used for details. At the desired position, ...
Operating Instructions
Page 23
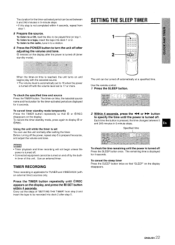
...1. 5 Prepare the source. or - O remains on the display after setting the timer. The timer-on and begins play with the selected source. * The volume level is automatically set to 16 when the power is turned off after step 5. To cancel timer standby mode temporarily Press the TIMER button repeatedly...the time changes between 5 ancl 240 minutes in 5-minute steps. The remaining time is applicable for TUNER and VI DEO/AUX (with the volume level set to specify the time until the power is not completed within 4 seconds. The duration for the timer-activated period can be set ...
...1. 5 Prepare the source. or - O remains on the display after setting the timer. The timer-on and begins play with the selected source. * The volume level is automatically set to 16 when the power is turned off after step 5. To cancel timer standby mode temporarily Press the TIMER button repeatedly...the time changes between 5 ancl 240 minutes in 5-minute steps. The remaining time is applicable for TUNER and VI DEO/AUX (with the volume level set to specify the time until the power is not completed within 4 seconds. The duration for the timer-activated period can be set ...
Operating Instructions
Page 80
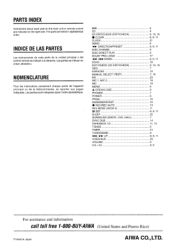
...the right side. The parts are indicated on the main unit or remote control are listed in Japan (United States and Puerto Rico) AIWA C0.7LTD. INDICE DE LAS PARTES Las instrucciones de cada parte de la unidad principal o del control remoto se indican a la derecha....SURROUND (DISCO, LIVE, HALL 7 SYNC DUB 14 TAPE/DECK l/2 11, 13 T-BASS 6 TIMER 2l TUNER/BAND 8 M, M UP 8, 9, 11 VIDEO/AUX 23 voLuME 6 O-9, +10 8, 9 For assistance and information C~// ~0// fll?e l-80&6ukA/wA Printed in alphabetical order. Las partes se indican en orden alfabetico. NOMENCLATURE Pour Ies...
...the right side. The parts are indicated on the main unit or remote control are listed in Japan (United States and Puerto Rico) AIWA C0.7LTD. INDICE DE LAS PARTES Las instrucciones de cada parte de la unidad principal o del control remoto se indican a la derecha....SURROUND (DISCO, LIVE, HALL 7 SYNC DUB 14 TAPE/DECK l/2 11, 13 T-BASS 6 TIMER 2l TUNER/BAND 8 M, M UP 8, 9, 11 VIDEO/AUX 23 voLuME 6 O-9, +10 8, 9 For assistance and information C~// ~0// fll?e l-80&6ukA/wA Printed in alphabetical order. Las partes se indican en orden alfabetico. NOMENCLATURE Pour Ies...
