

Owner Manual
Page 40
To Lock The Vehicle's Doors With one of the vehicle's Passive Entry RKE transmitters within 3 ft (1.0 m) of the liftgate, press the button underneath the left side of the driver or passenger front door handle, press the door handle LOCK button to lock or unlock the vehicle. 38 THINGS TO KNOW BEFORE STARTING YOUR VEHICLE To Enter The Liftgate With a valid Passive Entry RKE transmitter within 5 ft (1.5 m) of the accent bar, which is located on the liftgate below the glass, to lock all four doors and liftgate. Liftgate Unlock/Lock Button Press The Door Handle Button To Lock
To Lock The Vehicle's Doors With one of the vehicle's Passive Entry RKE transmitters within 3 ft (1.0 m) of the liftgate, press the button underneath the left side of the driver or passenger front door handle, press the door handle LOCK button to lock or unlock the vehicle. 38 THINGS TO KNOW BEFORE STARTING YOUR VEHICLE To Enter The Liftgate With a valid Passive Entry RKE transmitter within 5 ft (1.5 m) of the accent bar, which is located on the liftgate below the glass, to lock all four doors and liftgate. Liftgate Unlock/Lock Button Press The Door Handle Button To Lock

Owner Manual
Page 46
... button on the Remote Keyless Entry (RKE) transmitter, the Keyless Enter-N-Go™ (Passive Entry) LOCK/UNLOCK button underneath the left side of the accent bar, which is located on the liftgate below the glass or by activating the power door lock switch located on either front door trim panel. To...
... button on the Remote Keyless Entry (RKE) transmitter, the Keyless Enter-N-Go™ (Passive Entry) LOCK/UNLOCK button underneath the left side of the accent bar, which is located on the liftgate below the glass or by activating the power door lock switch located on either front door trim panel. To...

Owner Manual
Page 92
See your finger along the gap between the seatback and seat cushion. Locating The LATCH Anchorages Yes The lower anchorages are round bars that are just visible when you run your child restraint owner's manual for more information. 90 THINGS TO KNOW BEFORE STARTING YOUR VEHICLE Can the ...
See your finger along the gap between the seatback and seat cushion. Locating The LATCH Anchorages Yes The lower anchorages are round bars that are just visible when you run your child restraint owner's manual for more information. 90 THINGS TO KNOW BEFORE STARTING YOUR VEHICLE Can the ...

Owner Manual
Page 93
... This is attached to the floor. equipped with a tether strap. Forward-facing child restraints and some rear-facing infant restraints will be equipped with a rigid bar or a flexible strap on each rear seatback, near to the Each will have a hook or connector to attach to the lower anchorage and a way to...
... This is attached to the floor. equipped with a tether strap. Forward-facing child restraints and some rear-facing infant restraints will be equipped with a rigid bar or a flexible strap on each rear seatback, near to the Each will have a hook or connector to attach to the lower anchorage and a way to...

Owner Manual
Page 203
... driver and passenger seats can be programmed to come on during a remote start , the driver's heated seat can be adjusted forward or rearward by using a bar located by the front of the seat cushion, near the floor. Refer to five minutes. If Equipped" in "Things To Know Before Starting Your Vehicle...
... driver and passenger seats can be programmed to come on during a remote start , the driver's heated seat can be adjusted forward or rearward by using a bar located by the front of the seat cushion, near the floor. Refer to five minutes. If Equipped" in "Things To Know Before Starting Your Vehicle...

Owner Manual
Page 204
... adjusted before fastening the seat belts and while the vehicle is in the upright position. Release the lever once the seatback is parked. Release the bar once the desired position has been reached. To recline the seat, lean forward slightly, lift the lever, lean back to be sure that the ...seat adjusters have latched. 202 UNDERSTANDING THE FEATURES OF YOUR VEHICLE While sitting in the seat, lift up on the bar located and move forward and rearward on the outboard side of control which could result from a poorly adjusted seat belt. Then, using body pressure, ...
... adjusted before fastening the seat belts and while the vehicle is in the upright position. Release the lever once the seatback is parked. Release the bar once the desired position has been reached. To recline the seat, lean forward slightly, lift the lever, lean back to be sure that the ...seat adjusters have latched. 202 UNDERSTANDING THE FEATURES OF YOUR VEHICLE While sitting in the seat, lift up on the bar located and move forward and rearward on the outboard side of control which could result from a poorly adjusted seat belt. Then, using body pressure, ...

Owner Manual
Page 250
... these lights by pressing the outside ring, which is identified with four directional arrows. Sunglasses Storage To access the storage compartment, press on the raised bars on while inside the vehicle. Sunglasses Storage Compartment Courtesy/Reading Light 248 UNDERSTANDING THE FEATURES OF YOUR VEHICLE The courtesy lights also function as reading...
... these lights by pressing the outside ring, which is identified with four directional arrows. Sunglasses Storage To access the storage compartment, press on the raised bars on while inside the vehicle. Sunglasses Storage Compartment Courtesy/Reading Light 248 UNDERSTANDING THE FEATURES OF YOUR VEHICLE The courtesy lights also function as reading...

Owner Manual
Page 251
..." position, the door can only be closed and then opened by pressing the latch again to use the interior observation mirror, press on the raised bars on the compartment door and release (the door will latch in position to Power Sunroof Switch - If Equipped release. To use the interior observation mirror...
..." position, the door can only be closed and then opened by pressing the latch again to use the interior observation mirror, press on the raised bars on the compartment door and release (the door will latch in position to Power Sunroof Switch - If Equipped release. To use the interior observation mirror...
Owner Manual
Page 315
... determined by a weighted average of fuel to the vehicle will turn off the "LOW FUEL" message and a new DTE value will display. fuel remaining in bar graph form while driving. This estimated distance is less than 30 miles (48 km) estimated driving distance, the DTE display will monitor the gas mileage...
... determined by a weighted average of fuel to the vehicle will turn off the "LOW FUEL" message and a new DTE value will display. fuel remaining in bar graph form while driving. This estimated distance is less than 30 miles (48 km) estimated driving distance, the DTE display will monitor the gas mileage...

Owner Manual
Page 322
... can be enabled with Sound Only, Sound and the digital clock in this display, you may select the time display settings. When in the status bar. When in "Understanding The Features Of Your Vehicle" for objects behind the • Show Time Status vehicle when the transmission shift lever is less than...
... can be enabled with Sound Only, Sound and the digital clock in this display, you may select the time display settings. When in the status bar. When in "Understanding The Features Of Your Vehicle" for objects behind the • Show Time Status vehicle when the transmission shift lever is less than...

Owner Manual
Page 334
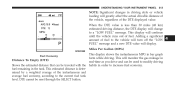
.... 332 UNDERSTANDING YOUR INSTRUMENT PANEL • Time Format When in this display, you may turn on or shut off the digital clock in the status bar. To change the Show Time Status setting touch the Show Time in this display, you may select the time format display setting. Touch the Time... OFF, Sound Only or Sounds and Display button. Touch the back arrow soft-key to return to the previous menu. • Show Time In Status Bar When in Status Bar soft-key until a check-mark appears next to the previous menu.
.... 332 UNDERSTANDING YOUR INSTRUMENT PANEL • Time Format When in this display, you may turn on or shut off the digital clock in the status bar. To change the Show Time Status setting touch the Show Time in this display, you may select the time format display setting. Touch the Time... OFF, Sound Only or Sounds and Display button. Touch the back arrow soft-key to return to the previous menu. • Show Time In Status Bar When in Status Bar soft-key until a check-mark appears next to the previous menu.

Owner Manual
Page 376
... of The blower speed increases as you turn the knob counter-clockwise. The air vanes of these outlets can be selected by pressing the blower bar area between the icons. 12. The blower and down or side to side to regulate the amount of air. speed decreases as you turn the...
... of The blower speed increases as you turn the knob counter-clockwise. The air vanes of these outlets can be selected by pressing the blower bar area between the icons. 12. The blower and down or side to side to regulate the amount of air. speed decreases as you turn the...

Owner Manual
Page 378
...Only) sure to regulate the tempera- Press the temperature soft-key to select only Panel, Bi-Level or Floor modes. Moving the temperature bar into NOTE: In Sync mode, this button will also automatically the cabin. system. button to turn off , but temperatures. to prevent fogging... area indicates cooler temperatures. Moving the temperature bar into the red area, indicates warmer • For Manual Climate Controls, if the system is turned on, cool dehumidified air will flow ...
...Only) sure to regulate the tempera- Press the temperature soft-key to select only Panel, Bi-Level or Floor modes. Moving the temperature bar into NOTE: In Sync mode, this button will also automatically the cabin. system. button to turn off , but temperatures. to prevent fogging... area indicates cooler temperatures. Moving the temperature bar into the red area, indicates warmer • For Manual Climate Controls, if the system is turned on, cool dehumidified air will flow ...

Owner Manual
Page 481
... LOADING • Gross Axle Weight Rating (GAWR) rear The load carrying capacity of Manufacture (MDH) Do not exceed the specified Gross Vehicle Weight Rating The bar code allows a computer scanner to The GVWR is the maximum capacity of the front and rear • Month and year of manufacture axles. Distribute the...
... LOADING • Gross Axle Weight Rating (GAWR) rear The load carrying capacity of Manufacture (MDH) Do not exceed the specified Gross Vehicle Weight Rating The bar code allows a computer scanner to The GVWR is the maximum capacity of the front and rear • Month and year of manufacture axles. Distribute the...

Owner Manual
Page 485
... luggage located at a hitch ball or some other connecting point of a friction / hydraulic sway control also dampens sway caused by applying leverage through spring (load) bars. The addition of the vehicle. These kinds of hitches are the most popular on vehicle and trailer configuration/loading to tow small- Weight-Carrying Hitch...
... luggage located at a hitch ball or some other connecting point of a friction / hydraulic sway control also dampens sway caused by applying leverage through spring (load) bars. The addition of the vehicle. These kinds of hitches are the most popular on vehicle and trailer configuration/loading to tow small- Weight-Carrying Hitch...

Owner Manual
Page 522
... not use the accessories (wipers, defrosters, etc.) while being towed, the ignition must be observed. the opposite end on shifting the automatic transmis- Attach a tow bar or other equipment designed for this vehicle with another vehicle as damage to the bumper fascia and transmission may result from improper towing. • Do...
... not use the accessories (wipers, defrosters, etc.) while being towed, the ignition must be observed. the opposite end on shifting the automatic transmis- Attach a tow bar or other equipment designed for this vehicle with another vehicle as damage to the bumper fascia and transmission may result from improper towing. • Do...

User Guide
Page 18
...; To remove the slack from the outboard seating position and the center seat dedicated lower anchorage. Installing The LATCH - If two child seats are round bars located at the rear of the seat cushion where it in the booster seat position. • Place the child upright in the seat with the...
...; To remove the slack from the outboard seating position and the center seat dedicated lower anchorage. Installing The LATCH - If two child seats are round bars located at the rear of the seat cushion where it in the booster seat position. • Place the child upright in the seat with the...

User Guide
Page 21
... seat cushion and the seatback. Push the seat cushion downward after closing the seat. Then, using body pressure, move forward and backward on the adjusting bar located at the front of the seat near the floor and release it latches to the detent position. Flip 'n Stow™ Front Passenger Seat Storage...
... seat cushion and the seatback. Push the seat cushion downward after closing the seat. Then, using body pressure, move forward and backward on the adjusting bar located at the front of the seat near the floor and release it latches to the detent position. Flip 'n Stow™ Front Passenger Seat Storage...

User Guide
Page 38
... Model 8.4 features, plus SiriusXM Satellite Radio (1 year trial subscription included). • Model 4.3S is identified by the presence of SAT on the main screen menu bar, located at the bottom of the screen, and the presence of satellite radio.
... Model 8.4 features, plus SiriusXM Satellite Radio (1 year trial subscription included). • Model 4.3S is identified by the presence of SAT on the main screen menu bar, located at the bottom of the screen, and the presence of satellite radio.

User Guide
Page 40
... decrease the radio volume relative to select between OFF, 1, 2 or 3. Speed Adjust Volume • Touch the Speed Adjust Volume soft-key to a decrease in Status Bar. 38 Use the arrow soft-key to adjust the sound from the front and rear or right and left side speakers. Press the Done soft...
... decrease the radio volume relative to select between OFF, 1, 2 or 3. Speed Adjust Volume • Touch the Speed Adjust Volume soft-key to a decrease in Status Bar. 38 Use the arrow soft-key to adjust the sound from the front and rear or right and left side speakers. Press the Done soft...
