

Owner's Manual
Page 187
...rubber mat and relocate to the alternate floor tray, slide the console forward to engage the front of the console with enough force to engage the latch, you should hear the latch "snap" into the floor tray. Place the rubber mat on the console to remove the console from the floor. 4.... Cell Phone Holder 1. Rapidly push down on the lower edge of the holder. 3 WARNING! Open the front lid and remove the cell phone holder by pulling rearward and up to be sure the removable floor console is not properly installed. In an accident, serious injury could result if the...
...rubber mat and relocate to the alternate floor tray, slide the console forward to engage the front of the console with enough force to engage the latch, you should hear the latch "snap" into the floor tray. Place the rubber mat on the console to remove the console from the floor. 4.... Cell Phone Holder 1. Rapidly push down on the lower edge of the holder. 3 WARNING! Open the front lid and remove the cell phone holder by pulling rearward and up to be sure the removable floor console is not properly installed. In an accident, serious injury could result if the...

Owner's Manual
Page 386
... leverage. Do not use a hammer or force to its fully closed position. WARNING! Correct wheel nut tightness is down on the compact spare. Alternate lug nuts until each nut has been tightened twice. If in doubt about the correct tightness, have them checked with cast aluminum wheels, the center... cap of the wheel must be removed prior to the left. 10. Always stow the jack parts and the spare tire in a collision or hard stop could endanger the occupants of...
... leverage. Do not use a hammer or force to its fully closed position. WARNING! Correct wheel nut tightness is down on the compact spare. Alternate lug nuts until each nut has been tightened twice. If in doubt about the correct tightness, have them checked with cast aluminum wheels, the center... cap of the wheel must be removed prior to the left. 10. Always stow the jack parts and the spare tire in a collision or hard stop could endanger the occupants of...
Owner Manual
Page 169
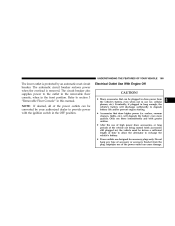
...be plugged in this manual. Eventually, if plugged in the front position. Do not hang any type of time to allow the alternator to degrade battery life and/or prevent engine starting. 3 • Accessories that can be driven a sufficient length of accessory or ... use these intermittently and with greater caution. • After the use (i.e. UNDERSTANDING THE FEATURES OF YOUR VEHICLE 169 The lower outlet is removed. coolers, vacuum cleaners, lights, etc.), will discharge sufficiently to recharge the vehicle's battery. • Power outlets are designed for accessory ...
...be plugged in this manual. Eventually, if plugged in the front position. Do not hang any type of time to allow the alternator to degrade battery life and/or prevent engine starting. 3 • Accessories that can be driven a sufficient length of accessory or ... use these intermittently and with greater caution. • After the use (i.e. UNDERSTANDING THE FEATURES OF YOUR VEHICLE 169 The lower outlet is removed. coolers, vacuum cleaners, lights, etc.), will discharge sufficiently to recharge the vehicle's battery. • Power outlets are designed for accessory ...
Owner Manual
Page 179
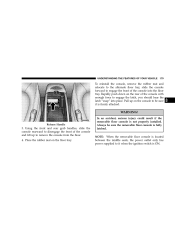
... middle seats, the power outlet only has power supplied to it is fully latched. Place the rubber mat on the console to be sure the removable floor console is firmly attached. 3 WARNING! Using the front and rear grab handles, slide the console rearward to disengage the front of the console... latch, you should hear the latch "snap" into the floor tray. Release Handle 3. UNDERSTANDING THE FEATURES OF YOUR VEHICLE 179 To reinstall the console, remove the rubber mat and relocate to the alternate floor tray, slide the console forward to engage the front of the console into place.
... middle seats, the power outlet only has power supplied to it is fully latched. Place the rubber mat on the console to be sure the removable floor console is firmly attached. 3 WARNING! Using the front and rear grab handles, slide the console rearward to disengage the front of the console... latch, you should hear the latch "snap" into the floor tray. Release Handle 3. UNDERSTANDING THE FEATURES OF YOUR VEHICLE 179 To reinstall the console, remove the rubber mat and relocate to the alternate floor tray, slide the console forward to engage the front of the console into place.

Owner Manual
Page 364
... the correct tightness, have them checked with cast aluminum wheels, the center cap of the wheel must be removed prior to the left. 10. Slide the wheel retainer through the center of the vehicle. Alternate lug nuts until each nut has been tightened twice. Lower the jack to install the wheel covers...
... the correct tightness, have them checked with cast aluminum wheels, the center cap of the wheel must be removed prior to the left. 10. Slide the wheel retainer through the center of the vehicle. Alternate lug nuts until each nut has been tightened twice. Lower the jack to install the wheel covers...


