
eMachines W2260 Support Question
eMachines W2260 Support Question
Find answers below for this question about eMachines W2260.Need a eMachines W2260 manual? We have 2 online manuals for this item!
Question posted by aleggert on May 22nd, 2011
Where Do I Plug This Wire Connector To The Motherboard?
There are three wire connectors coming from the front cover. The black and white wires connector has come unplugged from the motherboard where do I reconnect it? What is happening is the computer comes on for about 5 seconds and then shuts down. the black and whit wire connector come loose but I do not know where to plug it back correctly to the motherboard where in disconnected from.
Current Answers
Related eMachines W2260 Manual Pages
User Guide - Page 1

...
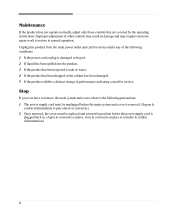
3 Do not use an extension cord with a 3-wire grounding type plug, a plug having a third (grounding) pin. This is eqiupped with... total of all equipment plugged into the main AC power outlet does not exceed 15 amps.
9 Unplug your electrician to the AC... outlet, contact your computer from overheating, do not block or cover these instructions for cleaning.
10 Do not use .
2 Follow...
User Guide - Page 2
... the following precautions: 1 The power supply cord must be unplugged before the main system unit cover is removed. (Separe le
cordon d'alimentation et puis enleve le couvercle.) 2 Once removed, the cover must be replaced and screwed in position before the power supply cord is
plugged back in damage and may result in . (Apres le...
User Guide - Page 8

... Keyboard ...A-4 Mouse ...A-4
Appendix B. Approval Statements
Battery Warning Instruction B-1 Fuse Warning Instruction B-1 Laser Product ...B-2
viii Chapter 4
Installing and Removing Drives
Removing the Cover 4-1 Replacing the Cover 4-3 Installing an Expansion Card 4-4 Installing an Additional Hard Disk Drive 4-6 Installing the 5.25-inch Device in the Peripheral Bay 4-9
Chapter 5
Using...
User Guide - Page 9

...) Power button
Emergency eject hole Load/Eject button Floppy disk drive(optional)
Media reader slots(optional) Power indicator Hard disk drive access indicator
IEEE 1394 connectors (optional)
USB 2.0 connectors (optional)
Headphone jack
Microphone jack USB 2.0 connectors (optional)
NOTE
Chapter 1 Your optical drives may differ from the illustrations described in this user's guide.
User Guide - Page 13
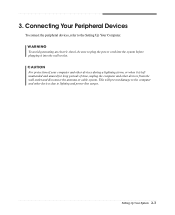
...Setting Up Your System 2-3 Connecting Your Peripheral Devices
To connect the peripheral devices, refer to plug the power cord into the wall socket.
This will prevent damage to the computer and other... devices during a lightning storm, or when it into the system before plugging it is left unattended and unused for long periods of your computer and other devices due...
User Guide - Page 15

... the metal shutter leading into place.
Using Your Computer
To use your computer, you must install the operating system on your system. Windows® may come with your computer. You could lose data. Using Your Computer 3-1
User Guide - Page 18
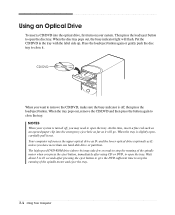
... optical drive (optional) as it out.
The high speed DVD-ROM drive (above 6x) may take few seconds to stop the running of the spindle motor and eject the tray.
3-4 Using Your Computer
Then press the...open the tray. NOTES When your system. then press the load/eject button. Wait about 5 to 10 seconds after using CD or DVD, to open the disc tray. Using an Optical Drive
To insert a CD/...
User Guide - Page 21
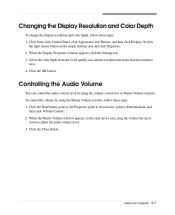
... Display Resolution and Color Depth
To change the display resolution and color depth, follow these steps: 1. Or click
the right mouse button on the empty desktop area and click Properties. 2. Click the Close button. Using Your Computer 3-7
User Guide - Page 23

... cable from the electrical outlet and from any telecommunications links, networks, or modems before performing any cables connected to the computer. Chapter 1 2. To remove the cover, follow these steps: 1.
Installing and Removing Drives
This chapter describes how to access its power source and from the back panel.
User Guide - Page 24
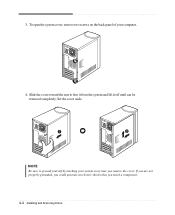
... the system and lift it off until can be removed completely. To open the system cover, remove two screws on the back panel of your system every time you touch a component. 4-2 Installing and Removing Drives Slide the cover toward the rear to ground yourself by touching your computer.
4. If you are not...
User Guide - Page 25
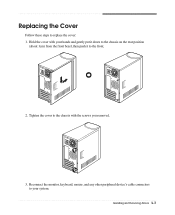
Reconnect the monitor, keyboard, mouse, and any other peripheral device's cable connectors to your hands and gently put it down to the chassis on the rear position
(about 1cm) from the front bezel, then push it to the front.
2. Installing and Removing Drives 4-3 Replacing the Cover
Follow these steps to the chassis with your...
User Guide - Page 26
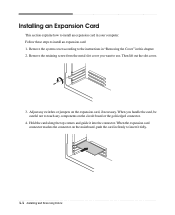
... use. Remove the retaining screw from the metal slot cover you handle the card, be careful not to the instructions in "Removing the Cover" in firmly to install an expansion card: 1. When... along the top corners and guide it fully.
4-4 Installing and Removing Drives Remove the system cover according to touch any switches or jumpers on the expansion card, if necessary. Adjust any components...
User Guide - Page 27
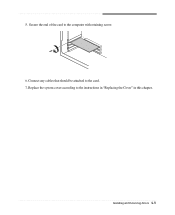
Connect any cables that should be attached to the instructions in "Replacing the Cover" in this chapter.
Replace the system cover according to the card. 7. Secure the end of the card to the computer with retaining screw. 6. Installing and Removing Drives 4-5 5.
User Guide - Page 28
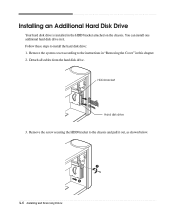
... install one additional hard disk drive in this chapter. 2. HDD bracket
Hard disk drive
3. Remove the system cover according to install the hard disk drive: 1. Follow these steps to the instructions in "Removing the Cover" in it out, as shown below.
4-6 Installing and Removing Drives Installing an Additional Hard Disk Drive
Your...
User Guide - Page 30

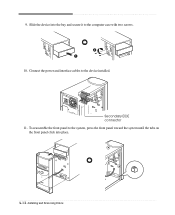
7. Connect the power and hard disk drive cable to the instructions in "Replacing the Cover" in this chapter. 4-8 Installing and Removing Drives Replace the system cover according to your hard disk drive. (If you removed the hard disk drive cable from the motherboard, replace it with the retaining screw, as shown below.
8. Slide the HDD bracket into the chassis and secure it .)
9.
User Guide - Page 33

...faceplate, pressing outward two tabs on both ends of the cable connector that covers the 5.25-inch drive bay you can use the secondary E-IDE drive connector. You must be set to CS (Cable Select). If ...new device. If you can use the spare connector of your computer. Remove the faceplate cover from the chassis using your system recognizes the device according to CS, your finger...
User Guide - Page 34
Slide the device into the bay and secure it to the system, press the front panel toward the system until the tabs on the front panel click into place.
4-12 Installing and Removing Drives
Secondary EIDE connector 11. 9. To reassemble the front panel to the computer case with two screws.
10. Connect the power and interface cables to the device installed.
User Guide - Page 43

... followings: Unplug the power cord to turn off your hard disk may be corrupted.
Wall outlet is not working . When the computer turned down by running Disk Defragmenter. (For more information,refer to a grounded wall outlet. To turn on your computer and wait about 10 seconds for complete discharge and re-plug the...
User Guide - Page 45

...desktop area and click Properties. 2.
Select the color depth from the Color quality area and the resolution from a diskette, slide the small black... properly and securely connected to the video connector of the diskette to cover the hole. Floppy Disk Drive
Cause Floppy...
Screen resolution area. 4.
Make sure that is firmly plugged into the wall outlet and into the monitor.
Make sure...
User Guide - Page 46
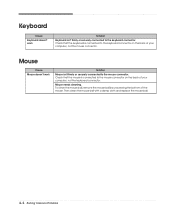
... the mouse ball by unscrewing the bottom of the mouse. Mouse
Cause Mouse doesn't work
Solution
Keyboard isn't firmly or securely connected to the keyboard connector on the back of your computer, not the keyboard connector. Then clean the mouse ball with a damp cloth and replace the mouse ball.
Similar Questions

How Do You Remove The Cpu Fan???
I lifted the two levers on the fan, but I cannot lift the fan out. Please help an old man get his fa...
I lifted the two levers on the fan, but I cannot lift the fan out. Please help an old man get his fa...
(Posted by burt59 1 year ago)

How To Get My Emachine Desktop To Work?
I have all the correct cords but can't get a signal on the monitor.
I have all the correct cords but can't get a signal on the monitor.
(Posted by 44nini37 2 years ago)

Front Panel Hook Up Power Switch
Where do the Power, Power LED, and HD wire plug in on motherboard?
Where do the Power, Power LED, and HD wire plug in on motherboard?
(Posted by crstatton 9 years ago)

How To Wire Power Switch On Emachine W3644 Desktop To Win Fast Motherboard
(Posted by ffmiked2 9 years ago)

E Machine T3958 Cables And Wires.
Emachine T3958 need picture of inside to plug wires and cables into right socket.
Emachine T3958 need picture of inside to plug wires and cables into right socket.
(Posted by dinerdash2001school 10 years ago)