
eMachines C2480 Support Question
eMachines C2480 Support Question
Find answers below for this question about eMachines C2480.Need a eMachines C2480 manual? We have 1 online manual for this item!
Question posted by dirtywhiteboy1106 on December 29th, 2015
Emachine Secondary Hdd.
emachine c2480. I put a secondary drive in,followed direction, and it won't boot,just beeps...one long beep,and another,long beep,that's all it will do.I put jumpers on cs for the slave drive and main for the main,now all that's left is to get to BIOS and make it see it,but I can't even get to cmos,have any input...?
Current Answers
Answer #1: Posted by hzplj9 on January 3rd, 2016 3:13 PM
hzplj9

Member since:
June 25th, 2012 Points: 4,875,710

Member since:
June 25th, 2012 Points: 4,875,710
If you have set the secondary drive to cable select and the master was set for master, then that would the problem. If the cable is a cable select cable as in the user guide then check the master is set to cable select as well. If it still does not work then set the primary to master and the secondary to slave in case the cable has been replaced in the past. Then see how you go. You will need to go into the bios and check for another HDD of course. The user guide downloadable from here may help as it has upgrade instructions.
Hope that helps.
Related eMachines C2480 Manual Pages
User Guide - Page 1

... shock. If you are not sure of the type of any kind into it from the main electrical power outlet before cleaning. If you are unable to insert or replace your obsolete outlet,...this computer near or over a radiator or heat register. Use a damp cloth for later use.
2 Follow all products plugged into a grounding-type power outlet. This is eqiupped with this computer on an unstable...
User Guide - Page 2
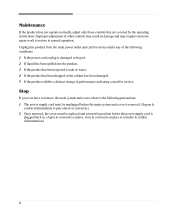
... cabinet has been damaged. 5 If the product exhibits a distinct change in damage and may require extensive repair work to restore to remove the main system unit cover, observe the following conditions: 1 If the power cord or plug is
plugged back in. (Apres le couvercle a enleve, visse le couvercle en place et remettre...
User Guide - Page 5
... figure logo are trademarks of eMachines, Inc. v eMachines, Inc. All rights reserved.
shall not be liable for incidental or consequential damages resulting from the furnishing, performance, or use of this ...the United States and/or other product and brand names are either trademarks or registered trademarks of their respective owners. ©2003 eMachines, Inc. in this material.
User Guide - Page 7
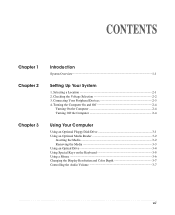
... and Off 2-4
Turning On the Computer 2-4 Turning Off the Computer 2-4
Using Your Computer
Using an Optional Floppy Disk Drive 3-1 Using an Optional Media Reader 3-2
Inserting the Media 3-2 Removing the Media 3-3 Using an Optical Drive 3-4 Using Special Keys on the Keyboard 3-5 Using a Mouse ...3-6 Changing the Display Resolution and Color Depth 3-7 Controlling the Audio...
User Guide - Page 8

... B.
Approval Statements
Battery Warning Instruction B-1 Fuse Warning Instruction B-1 Laser Product ...B-2
viii Chapter 4
Installing and Removing Drives
Removing the Cover 4-1 Replacing the Cover 4-3 Installing an Expansion Card 4-4 Installing an Additional Hard Disk Drive 4-6 Installing the 5.25-inch Device in the Peripheral Bay 4-9
Chapter 5
Using the Restore CDs
Restoring Your...
User Guide - Page 9

...
(optional) Power button
Emergency eject hole Load/Eject button Floppy disk drive(optional)
Media reader slots(optional) Power indicator Hard disk drive access indicator
IEEE 1394 connectors (optional)
USB 2.0 connectors (optional)
Headphone jack
Microphone jack USB 2.0 connectors (optional)
NOTE
Chapter 1 Your optical drives may differ from the illustrations described in this user's guide.
User Guide - Page 11

...additional outlet for a printer and any other peripheral devices. Chapter 1 No electromagnetic interference. Just follow the steps in temperature, humidity, dust, and smoke. Setting Up Your System 2-1 Selecting... Appropriate power sources. Do not place your system. Moderate environment conditions. Avoid direct sunlight or any other source of your computer from extremes in this chapter.
...
User Guide - Page 13
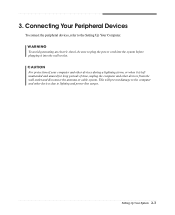
... Your System 2-3
WARNING To avoid generating an electric shock, be sure to plug the power cord into the system before plugging it is left unattended and unused for long periods of your computer and other devices during a lightning storm, or when it into the wall socket. 3. Connecting Your Peripheral Devices
To connect...
User Guide - Page 14

NOTE If the Restore CD is in the optical drive (D:) while your computer is displayed, click Turn Off to turn on the front panel of your... you use. 2. Press the power button on the computer or to your computer, follow these steps: 1. In this case, the "Microsoft Windows Startup Menu" menu will be booted with Restore CD. Click the Start button, and then click Turn Off Computer. 3....
User Guide - Page 15

...
Metal shutter
Chapter 1
Floppy disk
When you must install the operating system on your floppy disk drive, insert the diskette with already installed on your computer. Using Your Computer
To use your computer..., you want to remove the disk, make sure the drive light is on installation and use your system.
Using Your Computer 3-1 Windows® may ...
User Guide - Page 21
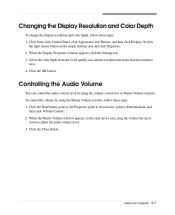
... the resolution from the Screen resolution
area. 4.
To control the volume by using the Master Volume window, follow these steps: 1. Click the Close button. Or click
the right mouse button on the empty desktop area and click Properties. 2. Controlling the Audio Volume
You can control the audio volume level by using the...
User Guide - Page 28
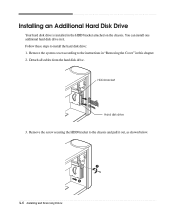
... Drive
Your hard disk drive is installed in this chapter. 2.
Follow these steps to the chassis and pull it . HDD bracket
Hard disk drive
3. Remove the system cover according to the instructions in "Removing the Cover" in the HDD bracket attached on the chassis. Detach all cables from the hard disk drive. Remove the screw securing the HDD...
User Guide - Page 29

With using the screws, secure the hard disk drive to CS (Cable Select). 5. Installing and Removing Drives 4-7 Set the jumper of the new hard disk drive to the HDD bracket. 4. Slide the hard disk drive into the HDD bracket. 6.
User Guide - Page 30

Connect the power and hard disk drive cable to the instructions in "Replacing the Cover" in this chapter. 4-8 Installing and Removing Drives 7. Replace the system cover according to your hard disk drive. (If you removed the hard disk drive cable from the motherboard, replace it with the retaining screw, as shown below.
8. Slide the HDD bracket into the chassis and secure it .)
9.
User Guide - Page 31
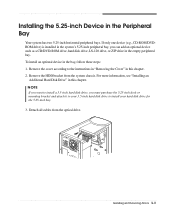
...-inch Device in the empty peripheral bay. Remove the HDD bracket from the optical drive. Detach all cables from the system chassis. Installing and Removing Drives 4-9 For more information, see "Installing an
Additional Hard Disk Drive" in this chapter. 2.
If only one device (e.g., CD-ROM/DVDROM drive) is installed in the system's 5.25-inch peripheral...
User Guide - Page 33

If there is set the jumper of new device to CS, your optional device to location of E-IDE cable marked "SLAVE." You must be set the jumper of your system recognizes the device according to CS (Cable Select). To install an additional device in the empty bay below the optical drive, you set to work properly with...
User Guide - Page 34
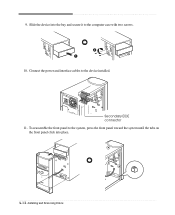
Connect the power and interface cables to the computer case with two screws.
10. To reassemble the front panel to the system, press the front panel toward the system until the tabs on the front panel click into the bay and secure it to the device installed. 9. Slide the device into place.
4-12 Installing and Removing Drives Secondary EIDE connector 11.
User Guide - Page 36
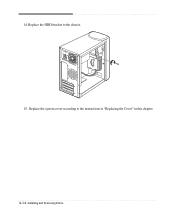
Replace the HDD bracket to the instructions in "Replacing the Cover" in this chapter. 4-14 Installing and Removing Drives Replace the system cover according to the chassis. 15. 14.
User Guide - Page 41
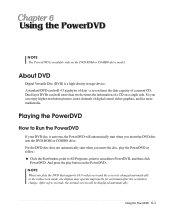
... far more channels of a CD on the DVD-ROM or COMBO drive model. And press the play the DVD that supports 16:9 widescreen...a single side. So you insert the disc, play the PowerDVD as follow:
Click the Start button, point to All Programs, point to the... to Run the PowerDVD
If your DVD disc is changed automatically to emachines PowerDVD, and then click PowerDVD. After a few seconds, the normal...
User Guide - Page 45

... contrast controls aren't set properly Adjust the brightness and contrast controls on
Floppy disk drive can't write to a grounded wall outlet. Click Start, click Control Panel, click... The monitor doesn't work
How do I change the display resolution and color depth, follow these steps: 1. Format the diskette. (Refer to cover the hole. Make sure ...empty desktop area and click Properties. 2.
Similar Questions

Emachines T5010 Dvd Drive Won't Open Why Is There No Manual Eject Hole?
My eMachine T5010 needs system restore via CD but drive won't open. Manual and pic indicate an emerg...
My eMachine T5010 needs system restore via CD but drive won't open. Manual and pic indicate an emerg...
(Posted by pheatherzandbeaques 9 years ago)


Emachine Et13g Computer Turns On But Will Not Boot Up..monitor Is Black And Say
computer turns on but will not boot up..monitor is black and says no signal
computer turns on but will not boot up..monitor is black and says no signal
(Posted by dcunningham15593 11 years ago)

Emachines T3642 In Reboot Loop. Vista. Chged To Boot From Cd In Bios But Won't
I woke up this morning to a continually rebooting desktop. I tried shutting it down and restarting, ...
I woke up this morning to a continually rebooting desktop. I tried shutting it down and restarting, ...
(Posted by DClark4law 11 years ago)

I've Been Trying To Download A Manual For My C 2480 And It's Not Downloading.
How do I download the manual for this machine and wanting especially to know what the sleep button i...
How do I download the manual for this machine and wanting especially to know what the sleep button i...
(Posted by Rams 12 years ago)