Get support for Whirlpool WMH73L20AS

Whirlpool WMH73L20AS Support Question

Whirlpool WMH73L20AS Support Question

Find answers below for this question about Whirlpool WMH73L20AS.
Need a Whirlpool WMH73L20AS manual? We have 4 online manuals for this item!
Question posted by fkoons on November 9th, 2013

Face Piece To Mate The Microwave To The Cabinet.

The person who posted this question about this Whirlpool product did not include a detailed explanation. Please use the "Request More Information" button to the right if more details would help you to answer this question.

Current Answers

There are currently no answers that have been posted for this question.
Be the first to post an answer!

Remember that you can earn up to 1,100 points for every answer you submit. The better the quality of your answer, the better chance it has to be accepted.

Related Whirlpool WMH73L20AS Manual Pages

Installation Instructions - Page 1

... injured if you don't immediately follow instructions. This symbol alerts you to Wall 8 Prepare Upper Cabinet 8 Install Damper Assembly 9 Install the Microwave Oven 9 Complete Installation 10 VENTING DESIGN SPECIFICATIONS 11 ASSISTANCE 12 Replacement Parts 12 Accessories 12 MICROWAVE HOOD COMBINATION SAFETY Your safety and the safety of injury, and tell you what the potential...
Installation Instructions - Page 2

... (2) D. For Roof Venting Installation Only: ■ If you are using a rectangular to round transition piece, the 3" (7.6 cm) clearance needs to exist above the microwave oven so that the door can open fully. ■ Some cabinet and building materials are for cabinet 1/4-20 x 3" bolts ■ Keyhole saw ■ Drill ■ 3/16" (5 mm), 3/8" (10 mm) drill...
Installation Instructions - Page 3

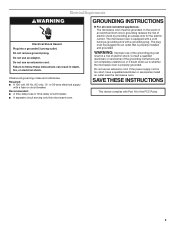
... in death, fire, or electrical shock. Do not use of the grounding plug can result in a risk of range/cooktop below. Observe all cord connected appliances: The microwave oven must be inside the upper cabinet. or 20-amp electrical supply with a grounding plug. Required: ■ A 120 Volt, 60 Hz, AC only, 15- Exact...
Installation Instructions - Page 4

...face the back of microwave oven, and lower blower motor back into the slots in the top of the microwave oven, remove it and set it may be made to the back of the microwave oven. Blower motor 5. Slide damper plate toward the front of microwave... avoid possible damage to top of the microwave oven. NOTE: To avoid damage to back of microwave oven with 2 screws removed in recessed ...
Installation Instructions - Page 5

...: If blower motor is not positioned with flat sides facing the back of the microwave oven (as shown), performance will be reattached to back of microwave oven with 2 screws removed in Step 3 of the microwave oven. Make sure damper plate tabs are inserted into microwave oven. Exhaust port IMPORTANT: If blower motor is not correctly...
Installation Instructions - Page 6

... These depictions show examples of the vertical centerline (see "Mark Rear Wall" section), only recirculation or roof venting installation can be done. Cabinet opening , do not install the microwave oven. 1. Holes for lag screws E. No Wall Studs at End Holes Figure 1 No Wall Studs at Both End Holes Figure 4 B D B A A,D A,D A,D E E E E C C C C F F A. See illustrations...
Installation Instructions - Page 7

... with front edge of the opening. Wall Venting Installation Only Upper cabinet bottom ³⁄₈" (1 cm) 4" (10.2 cm)...wall studs, use 2 lag screws. D A C B A. With the support tabs facing forward (see illustrations in Step 4. See figures 1, 2 and/or 3 in "Possible ...cut out the venting cutout area. Mark Rear Wall The microwave oven must be 14¹⁄₈" (35.9 ...
Installation Instructions - Page 8

...Wall Stud Configurations" in "Locate Wall Stud(s)" section. 3. Place Upper Cabinet Template against the bottom of "Installation for the toggle nuts to go...plate to open . With the support tabs of the mounting plate facing forward, insert 1/4-20 x 3" round-head bolts through the ...10" (25.4 cm) dimension from the back of the microwave oven. Refer to outlet. 2. Push the bolt with ...
Installation Instructions - Page 9

... around the supply cord hole, as shown. IMPORTANT: The control side of mounting plate. Handle the microwave oven gently. 1. Using 2 or more people to the upper cabinet. A. Back of the upper cabinet. 5. Damper assembly C. With front of microwave oven still tilted, thread power supply cord through the wall, make sure the damper assembly fits...
Installation Instructions - Page 10

... off of mounting plate, and set aside on the turntable, and programming a cook time of the damper plate. With the microwave oven centered, and with sheet metal screw. NOTES: ■ Some upper cabinets may warp the top of water on a covered surface. 8. Connect vent to the User Instructions for filter placement. Vent...
Installation Instructions - Page 11

...Recommended Standard Fittings The following length equivalents are for installation are not provided with microwave hood combination. ■ We do not recommend using recirculation installation. Wall cap: 3&#...15.2 cm) rectangular to round transition is used, be sure to round transition piece so that there is intended for the damper to Round Transition" illustration. See ...
Installation Instructions - Page 12

... the microwave oven door on the front facing of the...microwave oven opening . Following is located behind the door. ■ Damper Assembly ■ Mounting Plate ■ Upper Cabinet...C A. Two 90° elbows = 20 ft (6.1 m) B. 1 wall cap = 40 ft (12.2 m) C. 1 rectangular to round transition piece = 5 ft (1.5 m) D. 2 ft (0.6 m) + 6 ft (1.8 m) straight = 8 ft (2.4 m) If the existing vent is 3" ...
Dimension Guide - Page 1

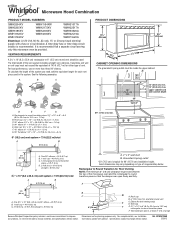
...(401.05 cm" ) ' " (76.0 cm) CABINET OPENING DIMENSIONS The grounded 3-prong outlet must exist between the top of range/cooktop below. Elbow (for each vent piece used . Microwave Hood Combination PRODUCT MODEL NUMBERS GMH3204XV GMH5205XV GMH6185XV WMH1162XV WMH1163XV WMH1164XW WMH2175XV WMH2205XV WMH3205XV WMH31017A WMH32517A WMH53520A WMH32L19A WMH73L20A Electrical: A 120-Volt, 60-Hz...
Warranty Information - Page 1

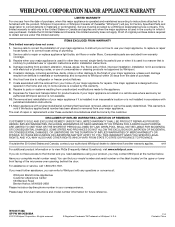
...Factory Specified Parts and repair labor to instruct you on the upper or lower front facing of Whirlpool, U.S.A. 1/12 Printed in materials or workmanship. This major appliance is designed... if your correspondence. All rights reserved. ® Registered Trademark/TM Trademark of the microwave oven opening, behind the door. The cost of repair or replacement under this limited ...
Use & Care Guide - Page 1

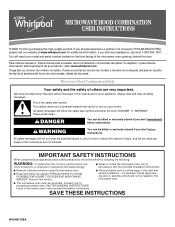
.... Microwave Hood Combination Safety Your safety and the safety of the microwave oven... opening, behind the door. This symbol alerts you don't immediately follow the safety alert symbol and either the word "DANGER" or "WARNING." All safety messages will need assistance, call us at www.whirlpool.com for purchasing this section and in this manual and on the front facing...
Use & Care Guide - Page 2

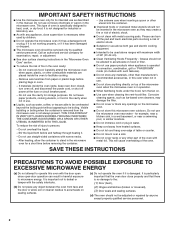
...it . - Pieces can result in the microwave oven as water, coffee, or tea are placed inside the oven ignite, keep oven door closed, turn the fan on. ■ Use care when cleaning the vent-hood filter. Do ... Do not mount over a sink. ■ Do not cover racks or any object between the oven front face and the door or allow the container to heat, cook, or dry food. Do not use straight-sided ...
Use & Care Guide - Page 3

.... Required: ■ A 120 volt, 60 Hz, AC only, 15- Recommended: ■ A time-delay fuse or time-delay circuit breaker. ■ A separate circuit serving only this microwave oven. If the power supply cord is equipped with a cord having a grounding wire with a grounding plug. In the event of an electrical short circuit, grounding...
Use & Care Guide - Page 4

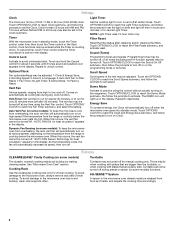
... 2-level cooking. "AUTO FAN ON for heat circulation" appears in the display. Dynamic Fan Sensing (on some models): To keep the microwave oven from the range or cooktop below the microwave oven gets too hot. "AUTO FAN Sensor Technology for heat circulation" appears in the Clock submenu. Sound (Tones) Programming tones and signals...
Use & Care Guide - Page 5

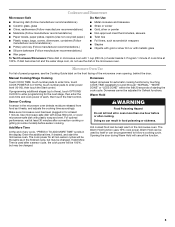
...facing of starting the cook cycle. Add More Time At the end of cook time at least 1 minute. If dish becomes hot and the water stays cool, do not use the dish in the microwave... can be kept warm in oven more than one hour before sensor cooking. Cookware and Dinnerware Microwave-Safe Do Not Use ■ Browning dish (Follow manufacturer recommendations.) ■ Metal cookware and...
Use & Care Guide - Page 8

... TO YOU. For assistance or service, call 1-800-253-1301. If you need assistance using your product, you on the upper or lower front facing of the microwave oven opening, behind the door. All rights reserved. ® Registered Trademark/TM Trademark of your major appliance, to instruct you may contact Whirlpool at...

Whirlpool Knowledge Base Results

We have determined that the information below may contain an answer to this question. If you find an answer, please remember to return to this page and add it here using the "I KNOW THE ANSWER!" button above. It's that easy to earn points!

  • How do I make a baked potato in my microwave oven?
    ..., followed by the Time icon and the actual remaining cook time. Microwave use the timer on my convertible range hood? NOTE: Doneness may be replaced by reminder tones. What should I... the turntable, off to four medium pieces/potatoes, about 1" (2.5 cm) apart. To bake potatoes: Pierce each at a time. "Senses 1-4 Pieces" will appear in the display for preheating...
  • Product Registrations
    ... this information can register your question? Not Helpful Helpful Would you register online. I register my product online? Gas Drying Cabinet Freezer Hood & Vent Hot Water Dispenser Ice Maker (50lb) Ironing Cabinet Jetted Sink Microwave Parts & Accessories Range - Compact Dryer - Answer Yes, you can be willing to take a moment to mail in Oven Combo Washer Dryer...
  • Maintaining your canopy-style range hood
    ...to clean. To remove filter/light lens: Pull firmly on my convertible range hood? Lift tabs and remove charcoal filter pad. Lift tabs and place ...flange and tab faces downward. Maintaining your canopy-style range hood Maintaining your canopy-style range hood (on some models): For best results, it is facing up. To reinstall filter/light lens: Place edge of your range hood often. Discard ...

Similar Questions

Fan And Lights Malfunction.
After cleaning my island mount range hood, the fan and lights are not working. I used a spray to cle...
(Posted by Artevd 5 years ago)
Microwave Runs Will Door Is Open!
My microwave has been continuing to run even when the door is open. The lights flickers when door is...
(Posted by aprilr11 9 years ago)
How To Identify And Order Optional Whirlpool Range Hood Charcoal Filter
Whirlpool range hood model is: UXT5230AYS. I can't locate part # for a 'charcoal' filter needed for ...
(Posted by alfredsimonetti 11 years ago)
Ask a New Question
Use the box below to post a new question about this Whirlpool product .
Points & Prizes
  • You can earn points for nearly everything you do on HelpOwl.com
  • You can trade in those points for gift cards at leading retailers such as Amazon.com and Walmart
  • It's that simple!
See How it Works
Create a Free Account

Whirlpool Manuals

Find free Whirlpool WMH73L20AS manuals and user guides available at ManualOwl.com. Try out our unique manual viewer allowing you to interact with manuals from directly within your browser!

Whirlpool Reviews

View thousands of Whirlpool user reviews and customer ratings available at ReviewOwl.com.

Contact Information

Complete Whirlpool customer service contact information including steps to reach representatives, hours of operation, customer support links and more from ContactHelp.com.

Scoreboard Ratings

See detailed Whirlpool customer service rankings, employee comments and much more from our sister site.

Whirlpool Recalls

Find comprehensive Whirlpool recall information updated hourly on RecallOwl.com.