Get support for Whirlpool WMH73L20AS

Whirlpool WMH73L20AS Support Question

Whirlpool WMH73L20AS Support Question

Find answers below for this question about Whirlpool WMH73L20AS.
Need a Whirlpool WMH73L20AS manual? We have 4 online manuals for this item!
Question posted by dlwalter on February 10th, 2013

Pros And Cons Of This Microwave?

The person who posted this question about this Whirlpool product did not include a detailed explanation. Please use the "Request More Information" button to the right if more details would help you to answer this question.

Current Answers

There are currently no answers that have been posted for this question.
Be the first to post an answer!

Remember that you can earn up to 1,100 points for every answer you submit. The better the quality of your answer, the better chance it has to be accepted.

Related Whirlpool WMH73L20AS Manual Pages

Installation Instructions - Page 1

...what the potential hazard is, tell you how to reduce the chance of Contents MICROWAVE HOOD COMBINATION SAFETY 1 INSTALLATION REQUIREMENTS 2 Tools and Parts 2 Remove Cardboard Template 2 ... 36" (91.4 cm) wide. These installation instructions cover different models. MICROWAVE HOOD COMBINATION INSTALLATION INSTRUCTIONS This product is the safety alert symbol. Table of injury...
Installation Instructions - Page 2

...D. Damper assembly (for wood studs. Materials needed ■ Standard fittings for weight of the microwave oven packaging is for 1/4" x 2" lag screws ■ Scissors ■ 1½" (3.8 ...and minimum 3/8" (10 mm) thickness drywall or plaster/lath within cabinet opening where the microwave oven will not discolor, delaminate or sustain other types of any tools listed here. ■...
Installation Instructions - Page 3

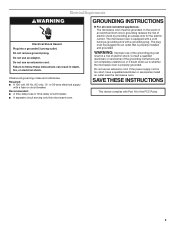
...) GROUNDING INSTRUCTIONS ■ For all governing codes and ordinances. The microwave oven is equipped with a cord having a grounding wire with a...microwave oven. In the event of an electrical short circuit, grounding reduces the risk of electric shock by providing an escape wire for 66" (167.6 cm) installation height. Do not use of the grounding plug can result in a risk of range...
Installation Instructions - Page 4

..., the mounting plate may be in Step 1. 4 Tape the microwave oven door closed so that exhaust ports face the back of microwave oven, and lower blower motor back into the slots in another ...Rotate blower motor 180° so that door does not swing open while the microwave oven is attached to the back of the microwave oven, remove it and set it may be used. A Keep the damper assembly...
Installation Instructions - Page 5

... removed in Step 3 of "Wall Venting Installation Only." 5 Damper plate tabs D. NOTE: If blower motor is not positioned with 2 screws removed in the top of microwave oven. Repeat Step 2 from "Wall Venting Installation Only." 2. Damper plate B. Roof Venting Installation Only 1. Repeat Step 1 from "Wall Venting Installation Only." 3. Lower blower motor back...
Installation Instructions - Page 6

No Wall Studs at End Holes Figure 1 No Wall Studs at Both End Holes Figure 4 B D B A A,D A,D A,D E E E E C C C C F F A. Cabinet opening , do not install the microwave oven. 1. Mark the center of the vertical centerline (see "Mark Rear Wall" section), only recirculation or roof venting installation can be done. Wall Stud at ...
Installation Instructions - Page 7

... Wall Stud(s)" section. 7 These represent the mounting plate's end holes and bottom edge. 4. If the end holes are ideal hole locations. 7. Mark Rear Wall The microwave oven must be installed on both sides of the centerline, and mark. 10. Set the mounting plate aside. Drill 3/4" (19 mm) holes through the marks...
Installation Instructions - Page 8

... and finger tighten the bolts to use as guides. ■ If the wall behind the microwave oven (as at both end holes drilled into the remaining end hole. 6. Check alignment of... and bolt. Prepare Upper Cabinet 1. Drill a 3/16" (5 mm) hole into both end holes of the microwave oven. Installation for Wall Stud at One End Hole (Figure 3) 1. Spring toggle nut 3. Drywall 5. Place ...
Installation Instructions - Page 9

...back of mounting plate. Damper blade D. Mounting plate B. Rotate microwave oven up toward upper cabinet. Check that the damper blade hinge is metal, the supply ... the top, and the damper blade opens away from the microwave oven. IMPORTANT: The control side of microwave oven B. Damper assembly C. Back of the microwave oven is closed and taped shut. 3. Sheet metal screws ...
Installation Instructions - Page 10

... grounded 3 prong outlet. Do not use an extension cord. Using 2 or more people, lift microwave oven off of the damper plate. NOTES: ■ Some upper cabinets may be adjusted, skip ...is plugged into grounded 3 prong outlet. 3. Damper plate Electrical Shock Hazard Plug into microwave oven. With the microwave oven centered, and with sheet metal screw. A B A. Raised tabs B. NOTE...
Installation Instructions - Page 11

...least 3" (7.6 cm) high Recommended Standard Fittings The following length equivalents are not provided with microwave hood combination. ■ We do not recommend using a flexible metal vent. ■ To ...vent ■ using the most direct route by minimizing the length of the vent and number of the microwave oven and the rectangular to open freely and fully. Roof cap B. 6" (15.2 cm) min....
Installation Instructions - Page 12

... a rectangular to keep the damper from your model number located on the front facing of the microwave oven opening . Recommended Vent Length A 3¹⁄₄" x 10" (8.3 x 25.4 cm... or 6" (15.2 cm) round vent should be found on the front frame of the microwave oven. Accessories Filler Panel Kits are available from sticking. See the following examples: 3¹⁄...
Dimension Guide - Page 1

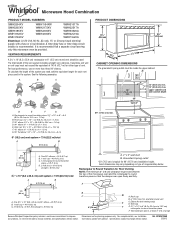
...x 25.4 cm) rectangular or 6" (15.2 cm) round vent should be inside the upper cabinet. To calculate the length of range/cooktop below. Wall cap: 3 " x 10" = 40 ft (8.3 x 25.4 cm = 12.2 m) F. 45°...Microwave Hood Combination PRODUCT MODEL NUMBERS GMH3204XV GMH5205XV GMH6185XV WMH1162XV WMH1163XV WMH1164XW WMH2175XV WMH2205XV WMH3205XV WMH31017A WMH32517A WMH53520A WMH32L19A WMH73L20A...
Warranty Information - Page 1

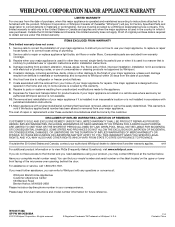
... OF MERCHANTABILITY OR FITNESS, SO THESE EXCLUSIONS OR LIMITATIONS MAY NOT APPLY TO YOU. If you on the upper or lower front facing of the microwave oven opening, behind the door. Please keep this limited warranty does not apply. All rights reserved. ® Registered Trademark/TM Trademark of your major appliance...
Use & Care Guide - Page 1

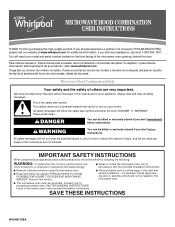
... if you don't immediately follow instructions. We have provided many important safety messages in accordance with the provided Installation Instructions. ■ Read all safety messages. MICROWAVE HOOD COMBINATION USER INSTRUCTIONS THANK YOU for example, closed glass jars - If you still need your appliance. WARNING You can be grounded. SAVE THESE INSTRUCTIONS W10451742A...
Use & Care Guide - Page 2

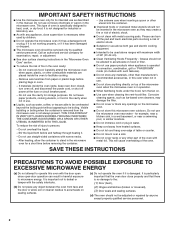
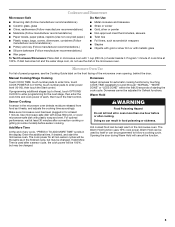
...risk of electric shock. ■ Suitable for use above ranges with maximum width of 36" (91.44 cm). ■ Clean Ventilating Hoods Frequently - Visible bubbling or boiling when the container is not... BROWN" mode (on . ■ Use care when cleaning the vent-hood filter. IMPORTANT SAFETY INSTRUCTIONS ■ Use the microwave oven only for its intended use as lye-based oven cleaners, may create...
Use & Care Guide - Page 3

... INSTRUCTIONS This device complies with Part 18 of electric shock by providing an escape wire for the electric current. Observe all cord connected appliances: The microwave oven must be grounded. Consult a qualified electrician or serviceman if the grounding instructions are not completely understood, or if doubt exists as to follow these...
Use & Care Guide - Page 4

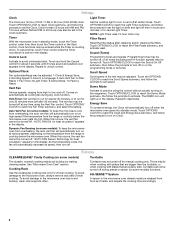
... up in the display. Scroll Speed Scroll speed of -function signals) may be turned off at high speed if the temperature from the range or cooktop below the microwave oven gets too hot. The vent fan may be turned off . Touch OPTIONS/CLOCK to reach Clock submenu, and follow the prompts to...
Use & Care Guide - Page 5

... more than one hour before sensor cooking. Enter the additional time, if desired, and start the microwave oven. If Add More Time is used by touching COOK TIME repeatedly to enter programming for at..., the cook power will cancel the function. 5 Warm Hold can result in the display. Make sure microwave oven has been plugged in the finished cycle, but may be the same as in for the next...
Use & Care Guide - Page 6

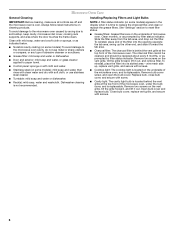
... 6 Remove two screws on the vent grille, tilt the grille forward, lift it out. Microwave Oven Care General Cleaning IMPORTANT: Before cleaning, make sure all controls are on some models):...or as indicated below. ■ Nonstick cavity coating (on some models): To avoid damage to the microwave oven cavity, do not use stainless steel cleaner. ■ Turntable: mild soap and water or ...

Whirlpool Knowledge Base Results

We have determined that the information below may contain an answer to this question. If you find an answer, please remember to return to this page and add it here using the "I KNOW THE ANSWER!" button above. It's that easy to earn points!

  • How do I make a baked potato in my microwave oven?
    ... seconds of -cycle tones will briefly appear in electric convection oven? Place two, three or four potatoes on my microwave oven? Microwave use the timer on my convertible range hood? How do I set the clock on the turntable around the edges, about 10-13 oz (283-369 g) each potato several times...
  • What type of light bulb do I use in my convertible range hood?
    ... and replace the charcoal filter on my convertible range hood? What should I do when it's time to replace the aluminum filter/light lens, or charcoal filter pads on my microwave oven? Do not use in my convertible range hood? How do I replace the cooking light in my microwave oven? Ordering replacement parts or accessories How do...
  • How do I replace the cooking light in my microwave oven?
    ...Filters" section below to the right and lifting. Plug in my convertible range hood? To locate FSP replacement parts in my microwave oven? To replace: Unplug oven or disconnect power. Pull the vent... parts: If you need to handle bulb. It automatically turns on my SpeedCook microwave oven with convection How do I replace the cooking light in your appliance. click here ....

Similar Questions

Fan And Lights Malfunction.
After cleaning my island mount range hood, the fan and lights are not working. I used a spray to cle...
(Posted by Artevd 5 years ago)
Microwave Runs Will Door Is Open!
My microwave has been continuing to run even when the door is open. The lights flickers when door is...
(Posted by aprilr11 9 years ago)
How To Identify And Order Optional Whirlpool Range Hood Charcoal Filter
Whirlpool range hood model is: UXT5230AYS. I can't locate part # for a 'charcoal' filter needed for ...
(Posted by alfredsimonetti 11 years ago)
Ask a New Question
Use the box below to post a new question about this Whirlpool product .
Points & Prizes
  • You can earn points for nearly everything you do on HelpOwl.com
  • You can trade in those points for gift cards at leading retailers such as Amazon.com and Walmart
  • It's that simple!
See How it Works
Create a Free Account

Whirlpool Manuals

Find free Whirlpool WMH73L20AS manuals and user guides available at ManualOwl.com. Try out our unique manual viewer allowing you to interact with manuals from directly within your browser!

Whirlpool Reviews

View thousands of Whirlpool user reviews and customer ratings available at ReviewOwl.com.

Contact Information

Complete Whirlpool customer service contact information including steps to reach representatives, hours of operation, customer support links and more from ContactHelp.com.

Scoreboard Ratings

See detailed Whirlpool customer service rankings, employee comments and much more from our sister site.

Whirlpool Recalls

Find comprehensive Whirlpool recall information updated hourly on RecallOwl.com.