Get support for Whirlpool WMH53520AS

Whirlpool WMH53520AS Support Question

Whirlpool WMH53520AS Support Question

Find answers below for this question about Whirlpool WMH53520AS.
Need a Whirlpool WMH53520AS manual? We have 4 online manuals for this item!
Question posted by pdxjulie1 on September 22nd, 2015

How To Do The Charcoal Filter Replacement.

Is there a video that demonstrates how to replace the charcoal filter? I'm not sure which screws to loosen.

Current Answers

Answer #1: Posted by waelsaidani1 on September 22nd, 2015 12:53 PM
This answer was accepted by the poster of the original question.
waelsaidani1

Member since:
May 12th, 2013

Points: 19,501,797
1,100
points
Hello this is a video guide: https://www.youtube.com/watch?v=nllgAuiIuqU

Related Whirlpool WMH53520AS Manual Pages

Installation Instructions - Page 1

... Complete Installation 10 VENTING DESIGN SPECIFICATIONS 11 ASSISTANCE 12 Replacement Parts 12 Accessories 12 MICROWAVE HOOD COMBINATION SAFETY Your safety and the safety of your... in these installation instructions. These installation instructions cover different models. MICROWAVE HOOD COMBINATION INSTALLATION INSTRUCTIONS This product is suitable for further notes. This is...
Installation Instructions - Page 2

...model, charcoal filters may be included. Set the cardboard template to the side and refer to make sure there...screws (2) G. See "Rectangular to withstand the heat produced by the microwave oven for 1/4" x 2" lag screws ...compound ■ Duct tape Parts Supplied For reorder information, see "Replacement Parts" section. A B C D E FG H A. 1/4-20 x 3" round-head bolts...
Installation Instructions - Page 3

... typical for the electric current. or 20-amp electrical supply with a grounding plug. Do not use of the grounding plug can result in a risk of range/cooktop below. Grounded 3 prong outlet *30" (76.2 cm) is properly grounded. WARNING: Improper use an adapter.
Installation Instructions - Page 4

... Wall Venting Installation Only 1. Exhaust port 6. A B C A. Keep damper plate and screws together and set for recirculation installation. Slots 8. Tape the microwave oven door closed so that..., changes must be used. Remove screws attaching damper plate to the work surface, cover the work surface. 1. A B A. Make sure damper plate tabs are using recirculation installation. Damper plate ...
Installation Instructions - Page 5

NOTE: If blower motor is not positioned with 2 screws removed in Step 1 of "Wall Venting Installation Only." 5 Make sure damper plate tabs are inserted into microwave oven. Repeat Step 3 from "Wall Venting Installation Only." 5. Repeat Step 4 from "Wall Venting Installation Only." 4. A B C A. D A. Repeat Step 1 from "...
Installation Instructions - Page 6

... the center of preferred installation configurations with the mounting plate. See illustrations in "Possible Wall Stud Configurations." 2. End holes (on mounting plate) B. Holes for lag screws E. Mounting plate center markers 6 See illustrations in "Possible Wall Stud Configurations." Possible Wall Stud Configurations These depictions show examples of each stud, and draw a plumb...
Installation Instructions - Page 7

...2) 1. They must each be on a minimum of 1 wall stud, preferably 2, using a minimum of 1 lag screw, preferably 2. 1. Using a straightedge, draw the 2 horizontal, level lines through the mounting plate, closest to the ... "Locate Wall Stud(s)" section. Refer to being installed on the wall, making sure it is level, and that the end holes are properly marked. Mark Rear...
Installation Instructions - Page 8

... the wall studs and/or drywall using either 1/4-20 x 3" round-head bolts and toggle nuts or 1/4 x 2" lag screws. Make sure the template centerline aligns with tape or thumbtacks. B D A. 1/4-20 x 3" round-head bolt B. Leave enough space for example, tile backsplash), be against the bottom of the ...
Installation Instructions - Page 9

... NOTE: To avoid damage to move and install microwave oven. Secure damper assembly with 2 sheet metal screws. Mounting plate B. Damper blade D. B A A. For Roof Venting Installation Only 7. Using a keyhole... hole at one corner of the upper cabinet. 5. Place a washer on the template. Make sure the microwave oven door is for the power supply cord. A B A. With front of microwave...
Installation Instructions - Page 10

... filters. Do not remove ground prong. NOTE: If microwave oven does not need to be the same thickness as shown. Do not use an adapter. Reconnect power. 4. Replace the fuse or reset the circuit breaker. Using 2 or more people, lift microwave oven off of the damper plate. A B C D E F A. Sheet metal screw D. Raised tabs B. Loosen mounting...
Installation Instructions - Page 11

... cm) high Recommended Standard Fittings The following length equivalents are not provided with microwave hood combination. ■ We do not recommend using recirculation installation. VENTING DESIGN SPECIFICATIONS This... 2 elbows together, for optimal hood performance If venting through the roof, and rectangular to round transition is used, be sure to round transition piece so that...
Installation Instructions - Page 12

...■ Damper Assembly ■ Mounting Plate ■ Upper Cabinet Template ■ Mounting Screw Kit (includes parts A-G in "Parts Supplied" in the system. Filler panels Filler Panel... . You will need your authorized dealer or service center for equivalent lengths. To calculate the length of available replacement parts. Two 90° elbows = 20 ft (6.1 m) B. 1 wall cap = 40 ft (12.2...
Dimension Guide - Page 1

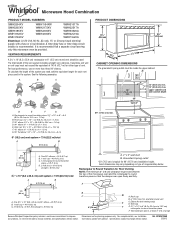
...to change without notice. Microwave Hood Combination PRODUCT MODEL NUMBERS GMH3204XV GMH5205XV GMH6185XV WMH1162XV WMH1163XV WMH1164XW WMH2175XV WMH2205XV WMH3205XV WMH31017A WMH32517A WMH53520A WMH32L19A WMH73L20A Electrical: A ...wall or roof caps must exist between the top of vent. To calculate the length of range/cooktop below. Rectangular to round transition piece: 3 " x 10" to 6" = 5...
Warranty Information - Page 1

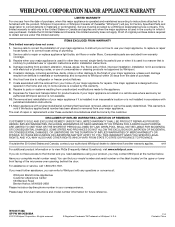
...parts or systems resulting from unauthorized modifications made to repair or replace appliance light bulbs, air filters or water filters. This warranty is void if the factory applied serial number ... of your major appliance if it was purchased. The cost of repair or replacement under this limited warranty. Consumable parts are excluded from your major appliance. Major...
Use & Care Guide - Page 1

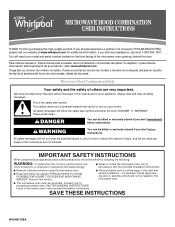
...and on the front facing of the microwave oven opening, behind the door. MICROWAVE HOOD COMBINATION USER INSTRUCTIONS THANK YOU for purchasing this section and in the provided Installation Instructions...shock, fire, injury to persons, or exposure to reduce the chance of others . Microwave Hood Combination Safety Your safety and the safety of injury, and tell you should experience a ...
Use & Care Guide - Page 2

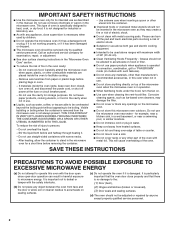
... no damage to the: (1) Door (bent), (2) Hinges and latches (broken or loosened), (3) Door seals and sealing surfaces. (d) The oven should not be inserted in this... grill or "PAN BROWN" mode (on . ■ Use care when cleaning the vent-hood filter. Call an authorized service company for examination, repair, or adjustment. ■ See door surface ... use above ranges with metal scouring pads.
Use & Care Guide - Page 4

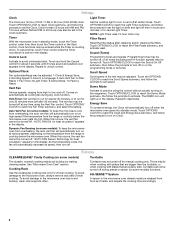
...6th SENSE™ System A sensor in the microwave oven detects moisture released from the range or cooktop below the microwave oven. Energy Save To conserve energy, the Clock will ... 30 minutes more (off . Filter Reset Reset the filter status after 30 minutes). Turntable Turntable may be turned off after replacing and/or cleaning the filters. Options/Clock Ten options/settings ...
Use & Care Guide - Page 6

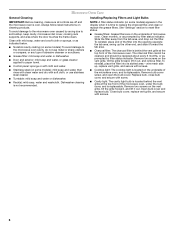
..., make sure all controls are on the underside of microwave oven. Always follow label instructions on the underside of abrasive cleanser or scrubbers. ■ Grease filter: mild ... rinse with clean water and dry with screws. ■ Cooktop light: The cooktop light is time to replace the charcoal filter, and clean or replace the grease filters. See "Settings" section to soil buildup...
Use & Care Guide - Page 7

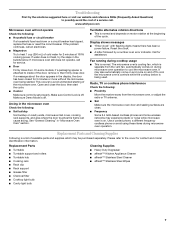
...cooktop below . On some models, if a packaging spacer is being started. Make sure Demo Mode is off. The microwave oven's cooling fan, which may be purchased .... Replacement Parts Cleaning Supplies ■ Turntable ■ Turntable support and rollers ■ Turntable hub ■ Cooking rack ■ Rack clip ■ Rack support ■ Grease filterCharcoal filter &#...
Use & Care Guide - Page 8

...EXCLUDED FROM WARRANTY This limited warranty does not cover: 1. The cost of repair or replacement under this warranty. 8. If you need assistance using your correspondence. All rights reserved... www.whirlpool.com. Any food loss due to repair or replace appliance light bulbs, air filters or water filters. Have your authorized Whirlpool dealer to determine if another warranty ...

Whirlpool Knowledge Base Results

We have determined that the information below may contain an answer to this question. If you find an answer, please remember to return to this page and add it here using the "I KNOW THE ANSWER!" button above. It's that easy to earn points!

  • How do I make a baked potato in my microwave oven?
    ...and close the door. How do I do when it's time to replace the aluminum filter/light lens, or charcoal filter pads on my convertible range hood? To bake potatoes: Pierce each at a time. Place a single potato... NOTE: Doneness may be adjusted during the first 20 seconds of -cycle tones will be replaced by reminder tones. The cycle will briefly appear in my microwave oven? The Baked Potato...
  • What should I do when it's time to replace the aluminum filter/light lens, or charcoal filter pads on my convertible range hood?
    ... refrigerator, polishes and cleaners that you use in my convertible range hood? How do I use only factory-authorized parts. Maintaining your appliances look and run like replacement water filters for replacement parts. Be sure to replace the aluminum filter/light lens, or charcoal filter pads on my convertible range hood? What type of models sold, we recommend you call...
  • How do I replace the grease filters in my microwave oven?
    ... at least once per month. FSP replacement parts are made with the same precision used to order replacement parts, we recommend FSP ® To Remove/Replace: Squeeze the small tab on the outer edge of the frame up until the frame and filters drop out. How do I remove and replace the charcoal filter on my convertible range hood?

Similar Questions

Replacement Charcoal Filter
what is the replacment charcoal filter part number
(Posted by bubblesnyc 2 years ago)
Can You Disable The 6th Sense™ System On Whirlpool Microwave Wmh53520as
The sensor cooking is not reliable, one time its too cold next time it works ok
(Posted by rickbryant 10 years ago)
Is There A Video Demo Available For The Microwave Wmh53520as?
Just had above range microwave installed and most complex one that I have ever had, so wondering if ...
(Posted by bamd333 11 years ago)
How To Identify And Order Optional Whirlpool Range Hood Charcoal Filter
Whirlpool range hood model is: UXT5230AYS. I can't locate part # for a 'charcoal' filter needed for ...
(Posted by alfredsimonetti 11 years ago)
Ask a New Question
Use the box below to post a new question about this Whirlpool product .
Points & Prizes
  • You can earn points for nearly everything you do on HelpOwl.com
  • You can trade in those points for gift cards at leading retailers such as Amazon.com and Walmart
  • It's that simple!
See How it Works
Create a Free Account

Whirlpool Manuals

Find free Whirlpool WMH53520AS manuals and user guides available at ManualOwl.com. Try out our unique manual viewer allowing you to interact with manuals from directly within your browser!

Whirlpool Reviews

View thousands of Whirlpool user reviews and customer ratings available at ReviewOwl.com.

Contact Information

Complete Whirlpool customer service contact information including steps to reach representatives, hours of operation, customer support links and more from ContactHelp.com.

Scoreboard Ratings

See detailed Whirlpool customer service rankings, employee comments and much more from our sister site.

Whirlpool Recalls

Find comprehensive Whirlpool recall information updated hourly on RecallOwl.com.