Get support for Whirlpool WMH53520AS

Whirlpool WMH53520AS Support Question

Whirlpool WMH53520AS Support Question

Find answers below for this question about Whirlpool WMH53520AS.
Need a Whirlpool WMH53520AS manual? We have 4 online manuals for this item!
Question posted by bamd333 on April 17th, 2013

Is There A Video Demo Available For The Microwave Wmh53520as?

Just had above range microwave installed and most complex one that I have ever had, so wondering if there is a video demo. I did not find the booklet helpful.

Current Answers

Answer #1: Posted by Gugurekas on May 24th, 2013 10:29 AM
This answer was accepted by the poster of the original question.
Gugurekas

Member since:
July 31st, 2012

Points: 1,797,420
1,100
points
I entered the microwave's serial number in Youtube search, and got this video. I hope it is of benefit to you:

http://www.youtube.com/watch?v=_goMV_CDezA

Related Whirlpool WMH53520AS Manual Pages

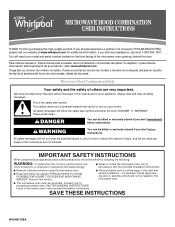
Installation Instructions - Page 1

... instructions. Table of injury, and tell you don't follow the safety alert symbol and either the word "DANGER" or "WARNING." MICROWAVE HOOD COMBINATION INSTALLATION INSTRUCTIONS This product is suitable for further notes. These installation instructions cover different models. WARNING You can be killed or seriously injured if you what the potential hazard is, tell...
Installation Instructions - Page 2

... blade opens freely and fully. The location must be combined. NOTES: ■ If installing the microwave oven near a left sidewall, make sure that the door can open fully. ■... the template from the top of clearance between the wall and the microwave oven, so that the materials used will be installed. Power supply cord bushing (1) H. Check with any obstructions so that...
Installation Instructions - Page 3

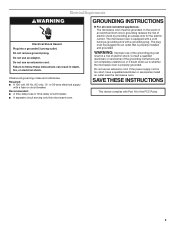
...installation height. The microwave...installed and grounded. Do not use of the grounding plug can result in a risk of electric shock. Observe all cord connected appliances: The microwave...only this microwave oven. ...install an outlet near the microwave...Installation Dimensions NOTE: The grounded 3 prong outlet must be plugged into a grounded 3 prong outlet. Failure to whether the microwave...
Installation Instructions - Page 4

... be used. For wall or roof venting, changes must be made to the back of the microwave oven. Wall Venting Installation Only 1. Make sure damper plate tabs are using recirculation installation. Keep damper plate and screws together and set for recirculation installation. Blower motor 5. NOTE: Skip this section if you are inserted into the...
Installation Instructions - Page 5

... motor is not correctly oriented, the 2 screws removed in Step 1 of "Wall Venting Installation Only." 5 A 6. Damper plate tabs D. Slots 8. Damper plate B. Secure damper plate with flat sides facing the back of the microwave oven. Repeat Step 1 from "Wall Venting Installation Only." 5. NOTE: If blower motor is not positioned with 2 screws removed in Step...
Installation Instructions - Page 6

... 3 Wall Studs at End Holes Figure 2 B C C C D B D A A A A E E E E F F NOTE: If wall stud is within 6" (15.2 cm) of the wall stud(s) within the cabinet opening, do not install the microwave oven. 1. Holes for lag screws E. Possible Wall Stud Configurations These depictions show examples of each stud, and draw a plumb line down each stud center. Mounting...
Installation Instructions - Page 7

... complete the 12" x 4" (30.5 x 10.2 cm) rectangle. Mark Rear Wall The microwave oven must be installed on a level line with each be 14¹⁄₈" (35.9 cm) from the ...bottom edge is over a wall stud, use two 1/4-20 x 3" round-head bolts with toggle nuts; Wall Venting Installation Only Upper cabinet bottom ³⁄₈" (1 cm) 4" (10.2 cm) Centerline 6" (15.2 cm) 6" ...
Installation Instructions - Page 8

... the wall behind the microwave oven (as at the end hole marked in Step 3 of the microwave oven. Make sure the 10" (25.4 cm) dimension from the back of "Installation for Wall Stud at... wall stud at both end holes. 3. Position mounting plate on the wall. 2. Prepare Upper Cabinet 1. Installation for Wall Studs at Both End Holes (Figure 4) 1. Insert lag screws into the wall studs and/or...
Installation Instructions - Page 9

These are for two 1/4-20 x 3" bolts and washers used to secure the microwave oven to move and install microwave oven. A B C D Install the Microwave Oven WARNING Excessive Weight Hazard Use two or more people, lift microwave oven and hang it on support tabs at one corner of the shaded rectangular area "F" on the template. NOTE: If venting through...
Installation Instructions - Page 10

... the fuse or reset the circuit breaker. NOTE: If microwave oven does not need to damper assembly. Longer or shorter bolts are available at least one person holding it in death, fire, or...and exhaust by placing 1 cup (250 mL) of the damper assembly slides under vent) Complete Installation 1. If the microwave oven does not operate: ■ Check that a household fuse has not blown, or that ...
Installation Instructions - Page 11

... Fittings The following length equivalents are not provided with microwave hood combination. ■ We do not recommend using recirculation installation. Vent extension piece, at least 3" (7.6 cm) of clearance between the top of the microwave oven and the transition piece. NOTES: ■ Vent materials needed for installation are for wall venting only) D. Rectangular to Round Transition...
Installation Instructions - Page 12

....2 cm) round vent should be found on the front frame of the microwave oven. ASSISTANCE Call your model number located on the front facing of vent. Accessories Filler Panel Kits are available from sticking. Replacement Parts If any of the installation hardware needs to round transition piece must not exceed the equivalent of...
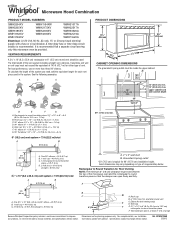
Dimension Guide - Page 1

...installation height. For complete details, see Installation our products, we reserve the right to round transition piece so that a separate circuit serving only this microwave... E. Microwave Hood Combination PRODUCT MODEL NUMBERS GMH3204XV GMH5205XV GMH6185XV WMH1162XV WMH1163XV WMH1164XW WMH2175XV WMH2205XV WMH3205XV WMH31017A WMH32517A WMH53520A WMH32L19A ...range/cooktop below.
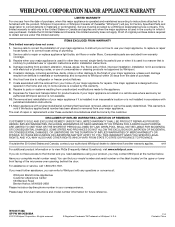
Warranty Information - Page 1

...installed in a remote area where service by the customer. Expenses for travel and transportation for product service if your major appliance for Factory Specified Parts and repair labor to correct defects in an inaccessible location or is not available... your product, you on the upper or lower front facing of the microwave oven opening, behind the door. If you do not have been removed...
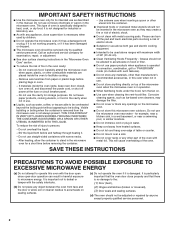
Use & Care Guide - Page 1

... potential hazard is the safety alert symbol. are very important. Microwave Hood Combination Safety Your safety and the safety of burns, electric shock, fire, injury to persons, or exposure to excessive microwave energy: ■ Install or locate the microwave oven only in accordance with the provided Installation Instructions. ■ Read all safety messages. All safety messages...
Use & Care Guide - Page 2

... over a sink. ■ Do not cover racks or any materials, other part of the microwave oven when the microwave oven is not working properly, or if it is operated in convection, combination, grill or "PAN BROWN" mode (on hood or filter. ■ Do not use corrosive chemicals or vapors in harmful exposure to...
Use & Care Guide - Page 3

... or time-delay circuit breaker. ■ A separate circuit serving only this microwave oven. WARNING: Improper use an extension cord. If the power supply cord ...microwave oven is properly grounded. Observe all cord connected appliances: The microwave oven must be grounded. The microwave oven is too short, have a qualified electrician or serviceman install an outlet near the microwave...
Use & Care Guide - Page 4

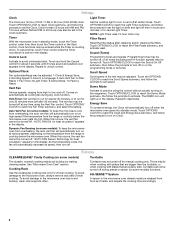
... from the range or cooktop below the microwave oven. NOTE: Light Timer uses 12-hour clock only. Touch OPTIONS/CLOCK to unlock control. Touch OPTIONS/CLOCK to reach the Demo Mode submenu, the... any cook function. See "Microwave Oven Care" section. This is active in the display. To cancel timer, touch Timer control while the Timer countdown is helpful when cooking with plates that ...
Use & Care Guide - Page 7

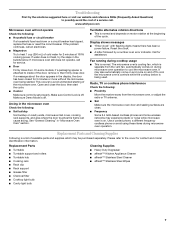
... Make sure Demo Mode is an error indicator. See "General Cleaning" in the microwave oven Check the following: ■ Soil buildup Soil buildup on cavity walls, microwave inlet cover, ...avoid unintended starting of available parts and supplies which is normal and depends on during microwave oven operation to possibly avoid the cost of the cycle. Arcing in "Microwave Oven Care" section. ...
Use & Care Guide - Page 8

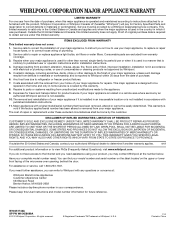
...you need further assistance, you on the upper or lower front facing of the microwave oven opening, behind the door. ITEMS EXCLUDED FROM WARRANTY This limited warranty does ... from accident, alteration, misuse, abuse, fire, flood, acts of God, improper installation, installation not in materials or workmanship and is reported to Whirlpool with any questions or concerns...available. 10.

Whirlpool Knowledge Base Results

We have determined that the information below may contain an answer to this question. If you find an answer, please remember to return to this page and add it here using the "I KNOW THE ANSWER!" button above. It's that easy to earn points!

  • Braille overlays
    ... for most models. Enlarged copies of washers, dryers, dishwashers, microwaves, ranges and refrigerators. Braille knobs are available for washers and dryers. Large print use and care manuals are available for most models of control panel overlays are available for washers, dryers, microwaves and ranges. To order Special Needs accessories or literature for Whirlpool brand products...
  • My ice maker runs but doesn't produce ice
    ... the drain tube? Find a local service provider: Product Category Washer or Dryer Refrigerator or Freezer Dishwasher Electric Range, Oven or Cooktop Gas Range, Oven or Cooktop Microwave Trash Compactor Window Air Conditioner Hot Water Dispenser Vent Hood Ice Machine Commercial Laundry Vacuum Cleaner Central Vac Dehumidifier My ice maker runs but doesn't produce ice...
  • Water leak
    ... provider: Product Category Washer or Dryer Refrigerator or Freezer Dishwasher Electric Range, Oven or Cooktop Gas Range, Oven or Cooktop Microwave Trash Compactor Window Air Conditioner Hot Water Dispenser Vent Hood Ice Machine Commercial Laundry Vacuum Cleaner Central Vac Dehumidifier Answers others found helpful Water dispenser dripping. Side by side refrigerator Leaking from behind...

Similar Questions

Electric Arcing Inside The Microwave
What could be the cause of a black spot in the back of the microwave where the rack attaches on the ...
(Posted by jpsalidas13 8 years ago)
Can You Disable The 6th Sense™ System On Whirlpool Microwave Wmh53520as
The sensor cooking is not reliable, one time its too cold next time it works ok
(Posted by rickbryant 10 years ago)
Ask a New Question
Use the box below to post a new question about this Whirlpool product .
Points & Prizes
  • You can earn points for nearly everything you do on HelpOwl.com
  • You can trade in those points for gift cards at leading retailers such as Amazon.com and Walmart
  • It's that simple!
See How it Works
Create a Free Account

Whirlpool Manuals

Find free Whirlpool WMH53520AS manuals and user guides available at ManualOwl.com. Try out our unique manual viewer allowing you to interact with manuals from directly within your browser!

Whirlpool Reviews

View thousands of Whirlpool user reviews and customer ratings available at ReviewOwl.com.

Contact Information

Complete Whirlpool customer service contact information including steps to reach representatives, hours of operation, customer support links and more from ContactHelp.com.

Scoreboard Ratings

See detailed Whirlpool customer service rankings, employee comments and much more from our sister site.

Whirlpool Recalls

Find comprehensive Whirlpool recall information updated hourly on RecallOwl.com.