Get support for Whirlpool WMH32517AW

Whirlpool WMH32517AW Support Question

Whirlpool WMH32517AW Support Question

Find answers below for this question about Whirlpool WMH32517AW.
Need a Whirlpool WMH32517AW manual? We have 4 online manuals for this item!
Question posted by mray1204 on August 4th, 2023

Replacement Template

When the guys came to drop off my appliances they unboxed the microwave because the box had been damaged and they wanted to make sure the microwave wasn't damaged as well. During that process my template was destroyed and I'm wondering if there is something I can download or just some measurements I can get to drill my holes and mount my bracket at the location it needs to be ? Thanks for your time !

Current Answers

Answer #1: Posted by khanjee on August 4th, 2023 1:11 AM
khanjee

Member since:
July 23rd, 2016

Points: 205,300
100
points


Please Accept my answer by providing you with the best possible solution. Would be more glade.
THANK YOU
Answer #2: Posted by Technoprince123 on August 4th, 2023 2:59 AM
Technoprince123

Member since:
February 8th, 2021

Points: 1,205,190
100
points


Please response if this answer is acceptable and solw your problem thanks

Related Whirlpool WMH32517AW Manual Pages

Installation Instructions - Page 1

...Microwave Oven 9 Complete Installation 10 VENTING DESIGN SPECIFICATIONS 11 ASSISTANCE 12 Replacement Parts 12 Accessories 12 MICROWAVE HOOD COMBINATION SAFETY Your safety and the safety of your appliance... reduce the chance of Contents MICROWAVE HOOD COMBINATION SAFETY 1 INSTALLATION REQUIREMENTS 2 Tools and Parts 2 Remove Cardboard Template 2 Location Requirements 2 Product ...
Installation Instructions - Page 2

...) Not Shown: Upper cabinet template Mounting plate (attached to make sure there is at least 6" (15.2 cm) of wall structures, be installed. See "Installation Dimensions" illustration. ■ Minimum one 2" x 4" (50.8 x 101.6 mm) wood wall stud and minimum 3/8" (10 mm) thickness drywall or plaster/lath within cabinet opening where the microwave oven will not discolor, delaminate...
Installation Instructions - Page 3

...;c⁄₄m") 29⁷⁄₈" (76.0 cm) GROUNDING INSTRUCTIONS ■ For all governing codes and ordinances. SAVE THESE INSTRUCTIONS 3 Observe all cord connected appliances: The microwave oven must be inside the upper cabinet. Grounded 3 prong outlet *30" (76.2 cm) is properly installed and grounded. Do not use of electric shock by providing...
Installation Instructions - Page 4

... plate. A A. Damper plate B. NOTE: To avoid possible damage to the venting system. Lift blower motor out of the microwave oven and lift up. Rotate Blower Motor The microwave oven is attached to the microwave oven, do not grip or use the door or door handle while the microwave oven is being handled. 4. Make sure damper plate tabs are using recirculation installation...
Installation Instructions - Page 5

... motor so that exhaust ports face the top of microwave oven, and flat sides of blower motor face back of the microwave oven. Lower blower motor back into the slots in Step 1 of "Wall Venting Installation Only." Securely tighten screws. Make sure damper plate tabs are inserted into microwave oven. Damper plate B. Secure damper plate with 2 screws removed...
Installation Instructions - Page 6

See illustrations in "Possible Wall Stud Configurations." 2. Cabinet opening , do not install the microwave oven. 1. Holes for lag screws E. See illustrations in "Possible Wall Stud Configurations." Locate Wall Stud(s) NOTE: If no wall studs exist within the opening. Using a stud ...
Installation Instructions - Page 7

... from the centerline. 5. If the end holes are properly marked. Mark Rear Wall The microwave oven must align with each be 15³⁄₄" (40.0 cm) from the marks ... template C. Top of cardboard template must be on the cardboard template to the wall at least 1, preferably 2 hole(s) through the mounting plate, closest to the centerline on the wall, making sure ...
Installation Instructions - Page 8

... backsplash), be secured to open . 3. Securely tighten the lag screw(s) and bolt. Place Upper Cabinet Template against drywall. 5. The template has trim lines to use as guides. ■ If the wall behind the microwave oven (as at both end holes. 3. Make sure the 10" (25.4 cm) dimension from the back of the mounting plate. Drywall 5. Drill...
Installation Instructions - Page 9

... the 3/8" (10 mm) holes. 2. NOTE: To avoid damage to do not grip or use the door or door handle while the microwave oven is at one corner of the microwave oven is closed and taped shut. 3. Power supply cord bushing 6. Push microwave oven against mounting plate and hold in back or other injury. 5. Place a washer on the template.
Installation Instructions - Page 10

.... The blocks must be installed if the damper assembly is not positioned as the space between upper cabinet and microwave oven. Refer to damper assembly. Replace the fuse or reset the circuit breaker. NOTE: If microwave oven does not need to be added. Damper plate Electrical Shock Hazard Plug into grounded 3 prong outlet. 3. Failure to...
Installation Instructions - Page 11

... clearance must exist between the top of the microwave oven and the transition piece. If venting through the wall, be sure that there is proper clearance within walls or ... The following length equivalents are not provided with microwave hood combination. ■ We do not recommend using a flexible metal vent. ■ To avoid possible product damage, be sure to 15.2 cm = 1.5 m) B. Roof...
Installation Instructions - Page 12

...9632; Damper Assembly ■ Mounting Plate ■ Upper Cabinet Template ■ Mounting Screw Kit (includes parts A-G in "Parts ...Replacement Parts If any of the installation hardware needs to keep the damper from your model number located on the front facing of vent. W10247296B SP PN W10345003B © 2010. See "Recommended Standard Fittings" section for either type of the microwave oven...
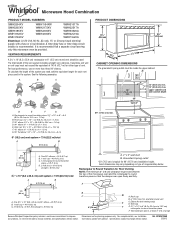
Dimension Guide - Page 1

...13" (33.0 cm) max. To calculate the length of range/cooktop below. Microwave Hood Combination PRODUCT MODEL NUMBERS GMH3204XV GMH5205XV GMH6185XV WMH1162XV WMH1163XV WMH1164XW WMH2175XV WMH2205XV WMH3205XV ... for either type of the microwave oven and the rectangular to round transition piece so that a separate circuit serving only this microwave oven be inside the upper cabinet....
Warranty Information - Page 1

...Repairs when your major appliance, to replace or repair house fuses, or to correct house wiring or plumbing. 2. WHIRLPOOL SHALL NOT BE LIABLE FOR INCIDENTAL OR CONSEQUENTIAL DAMAGES. You can write to...to the appliance. 9. THIS WARRANTY GIVES YOU SPECIFIC LEGAL RIGHTS, AND YOU MAY ALSO HAVE OTHER RIGHTS WHICH VARY FROM STATE TO STATE OR PROVINCE TO PROVINCE. Proof of the microwave oven opening,...
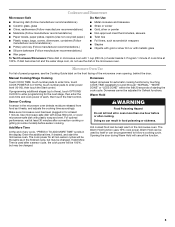
Use & Care Guide - Page 1

... electrical appliances basic safety precautions should be killed or seriously injured if you and others are not followed. This symbol alerts you don't immediately follow the specific "PRECAUTIONS TO AVOID POSSIBLE EXPOSURE TO EXCESSIVE MICROWAVE ENERGY" found in this section. ■ Some products such as whole eggs in the microwave oven. ■ The microwave oven must...
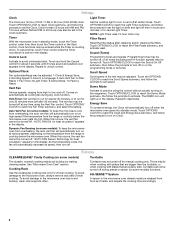
Use & Care Guide - Page 4

... the range or cooktop below the microwave oven gets too hot. Comes on automatically as it heats, and adjusts the cooking time accordingly. 4 Filter Reset Reset the filter status after 2-level cooking. To avoid damage to activate. Clock format (12 hours with plates that are side by making cleaning easier. Cook functions may be...
Use & Care Guide - Page 5

... for the next stage, then enter the cook time and cook power of the microwave oven opening, behind the door. If dish becomes hot and the water stays cool, do... Test Cookware/Dinnerware: Place dish in microwave oven with plastic wrap and vent. Doneness cannot be kept warm in the microwave oven. Make sure microwave oven has been plugged in the microwave oven. The cook power for all non-...
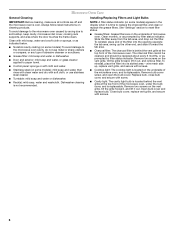
Use & Care Guide - Page 6

... cleaning, make sure all controls are on the underside of microwave oven. Dishwasher cleaning is located behind the vent grille at the top front of the microwave oven. Replace bulb, close bulb cover, and secure with soft cloth, or use metal or sharp utensils or scrapers, or any type of the microwave oven, and is time to the microwave oven cavity...
Use & Care Guide - Page 7

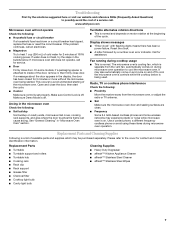
... or a circuit breaker has tripped, replace the fuse or reset the circuit breaker. Please refer to inside of the door, remove it, then firmly close the door, then start the cycle. ■ Control Make sure control is a list of a service call for 2 minutes at the beginning of the microwave oven. Make sure Control Lock is attached to...
Use & Care Guide - Page 8

...DAMAGES, OR LIMITATIONS ON THE DURATION OF IMPLIED WARRANTIES OF MERCHANTABILITY OR FITNESS, SO THESE EXCLUSIONS OR LIMITATIONS MAY NOT APPLY TO YOU. W10451742A SP PN W10458699A © 2012 Whirlpool Corporation. Costs associated with the removal from your home of the microwave oven...and transportation for product service if your major appliance, to replace or repair house fuses, or to the ...

Whirlpool Knowledge Base Results

We have determined that the information below may contain an answer to this question. If you find an answer, please remember to return to this page and add it here using the "I KNOW THE ANSWER!" button above. It's that easy to earn points!

  • Display shows AF - Dryer
    ...grille inside of the system and exhaust hood. Dryers need good air movement to check air movement. Replace any plastic or metal foil vent with rigid or flexible... and extends drying timeReplace any plastic or metal foil vent with rigid or flexible heavy metal vent. Box or louvered hoods are recommended. Make sure the outside exhaust hood... a new location or is restricted.
  • My refrigerator rocks back and forth
    .... Move the refrigerator into its final location. Using a screwdriver or 3/8" hex driver, turn the screws. Replace the base grille when you want the doors to rest on the left (counterclockwise). It may rock back and forth if the floor beneath the refrigerator is not level. Make sure the floor where the refrigerator is not...
  • Water supply hookup - Bottom freezer/French door refrigerators
    ... the instructions provided with any leaks. Make sure it is less durable and can cause damage. Using a cordless drill, drill a ¼" hole in the copper tubing when bending the service loop. Fasten the shutoff valve to its permanent location. 7. Slowly and evenly tighten the pipe clamp screws so the rubber washer makes a watertight seal. Insert the end...

Similar Questions

Replace Whirlpool Microwave Gt4175spb
What is the replacement microwave for the Whirlpool GT4175SPB ?
(Posted by mba75 2 years ago)
The Microwave Keeps Shutting Off 'no Display/power'
keeps shutting off we have to unplug it and wait ten min then plug it back in works for a bit then s...
(Posted by scottdyer16 10 years ago)
Ask a New Question
Use the box below to post a new question about this Whirlpool product .
Points & Prizes
  • You can earn points for nearly everything you do on HelpOwl.com
  • You can trade in those points for gift cards at leading retailers such as Amazon.com and Walmart
  • It's that simple!
See How it Works
Create a Free Account

Whirlpool Manuals

Find free Whirlpool WMH32517AW manuals and user guides available at ManualOwl.com. Try out our unique manual viewer allowing you to interact with manuals from directly within your browser!

Whirlpool Reviews

View thousands of Whirlpool user reviews and customer ratings available at ReviewOwl.com.

Contact Information

Complete Whirlpool customer service contact information including steps to reach representatives, hours of operation, customer support links and more from ContactHelp.com.

Scoreboard Ratings

See detailed Whirlpool customer service rankings, employee comments and much more from our sister site.

Whirlpool Recalls

Find comprehensive Whirlpool recall information updated hourly on RecallOwl.com.