Get support for Whirlpool WMH32517AW

Whirlpool WMH32517AW Support Question

Whirlpool WMH32517AW Support Question

Find answers below for this question about Whirlpool WMH32517AW.
Need a Whirlpool WMH32517AW manual? We have 4 online manuals for this item!
Question posted by scottdyer16 on December 12th, 2013

The Microwave Keeps Shutting Off 'no Display/power'

keeps shutting off we have to unplug it and wait ten min then plug it back in works for a bit then shuts off again

Current Answers

Answer #1: Posted by BusterDoogen on December 12th, 2013 7:56 AM
This answer was accepted by the poster of the original question.
BusterDoogen

Member since:
October 30th, 2011

Points: 28,565,447
1,100
points
More than likely the control panel is failing!

I hope this is helpful to you!

Please respond to my effort to provide you with the best possible solution by using the "Acceptable Solution" and/or the "Helpful" buttons when the answer has proven to be helpful. Please feel free to submit further info for your question, if a solution was not provided. I appreciate the opportunity to serve you!

Related Whirlpool WMH32517AW Manual Pages

Installation Instructions - Page 1

... followed. WARNING You can kill or hurt you to Wall 8 Prepare Upper Cabinet 8 Install Damper Assembly 9 Install the Microwave Oven 9 Complete Installation 10 VENTING DESIGN SPECIFICATIONS 11 ASSISTANCE 12 Replacement Parts 12 Accessories 12 MICROWAVE HOOD COMBINATION SAFETY Your safety and the safety of others . Always read and obey all safety messages. This...
Installation Instructions - Page 2

... to it during the "Mark Rear Wall" part of the microwave oven packaging is at least 6" (15.2 cm) of the cardboard packaging. 2. Power supply cord bushing (1) H. The piece inside upper cabinet. Toggle... bolts ■ Keyhole saw ■ Drill ■ 3/16" (5 mm), 3/8" (10 mm) drill bits ■ 3/4" (19 mm) hole saw ■ Caulking gun and weatherproof caulking compound ■ Duct tape...
Installation Instructions - Page 3

... B. A B Electrical Requirements WARNING 66" (167.6 cm) min. 30" (76.2 cm) min. 30" (76.2 cm) typical* 12" (30.5 cm) min. 14" (35.6 cm) max. Do not use an extension cord. Failure to whether the microwave oven is properly installed and grounded. upper cabinet and side cabinet depth Electrical Shock Hazard Plug into an outlet that is properly...
Installation Instructions - Page 4

... the work surface. 1. Lift blower motor out of the microwave oven and lift up. INSTALLATION INSTRUCTIONS Remove Mounting Plate Depending on your model, the mounting plate may be in recessed holes) D A. A B C A. Remove any remaining contents from the microwave oven cavity. 2. A Keep the damper assembly in case the venting method is changed, or the microwave oven is reinstalled...
Installation Instructions - Page 5

... motor face back of "Wall Venting Installation Only." Reattach blower motor to the microwave oven. 7. NOTE: If blower motor is not positioned with flat sides facing the back of the microwave oven (as shown), performance will be reattached to back of microwave oven with 2 screws removed in the top of "Wall Venting Installation Only." 5 Exhaust port...
Installation Instructions - Page 6

... Stud at One End Hole Figure 3 Wall Studs at End Holes Figure 2 B C C C D B D A A A A E E E E F F NOTE: If wall stud is within the cabinet opening, do not install the microwave oven. 1. Cabinet opening . Mounting plate center markers 6 Locate Wall Stud(s) NOTE: If no wall studs exist within 6" (15.2 cm) of the vertical centerline (see "Mark Rear...
Installation Instructions - Page 7

... 3, and that the end holes are over wall studs, use 1 lag screw and one corner of the centerline, and mark. 10. Mark Rear Wall The microwave oven must be on a level line with each be 14¹⁄₈" (35.9 cm) from the centerline. 5. Drill 3/16" (5 mm) hole(s) into the wall stud...
Installation Instructions - Page 8

... 1/4 x 2" lag screws. Make sure the 10" (25.4 cm) dimension from the back of the microwave oven. Drill 3/16" (5 mm) holes into both end holes of the mounting plate facing forward, insert a ...6 of mounting plate, making sure it is level. 4. Mounting plate C. C A 6. Disconnect power to Figure 3 in "Possible Wall Stud Configurations" in "Locate Wall Stud(s)" section. Make sure ...
Installation Instructions - Page 9

...10 mm) holes at one corner of microwave oven still tilted, thread power supply cord through the wall, make ...microwave oven. IMPORTANT: The control side of microwave oven B. B A A. Sheet metal screws 3. Push microwave oven against mounting plate and hold in the bottom of the microwave oven so that damper blade moves freely, and opens fully. 2. 5. This hole is closed and taped shut...
Installation Instructions - Page 10

... so that a circuit breaker has not tripped. If the problem continues, call an electrician. ■ Check that the power supply cord is plugged into microwave oven. Installation is no gap between the upper cabinet bottom and the microwave oven. Repeat steps 3-6. 10. Connect vent to provide) may be adjusted, skip steps 7-9. 7. Insert damper assembly through upper...
Installation Instructions - Page 11

...: The minimum 3" (7.6 cm) clearance must exist between the top of the microwave oven and the rectangular to round transition piece so that there is intended for wall ...Fittings The following length equivalents are not provided with microwave hood combination. ■ We do not recommend using recirculation installation. Roof cap B. 6" (15.2 cm) min. Roof cap: 3¹⁄₄" x ...
Installation Instructions - Page 12

... (0.6 m) C A. If you need additional assistance, call , you will need the microwave oven model number and serial number. Each panel is a list of available replacement parts. To... m) C D A. Both numbers can be found on the front facing of the installation hardware needs to keep the damper from your model number located on the model and serial number plate, which is round, a ...
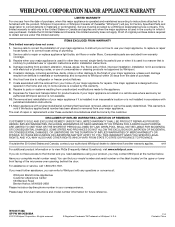
Warranty Information - Page 1

...SHORTEST PERIOD ALLOWED BY LAW. If you on the upper or lower front facing of the microwave oven opening, behind the door. Proof of original purchase date is required to obtain service under these... You can write to Whirlpool with any questions or concerns at the number below. Please keep this limited warranty does not apply. Have your model number and serial number on the...
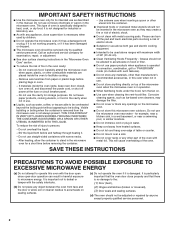
Use & Care Guide - Page 2

... or dropped. ■ The microwave oven should not be inserted in oven. - SAVE THESE INSTRUCTIONS PRECAUTIONS TO AVOID POSSIBLE EXPOSURE TO EXCESSIVE MICROWAVE ENERGY (a) Do not attempt to operate this oven when not in use the microwave oven near a swimming pool, or similar locations. ■ Do not immerse cord or plug in water. ■ Keep cord away from paper...
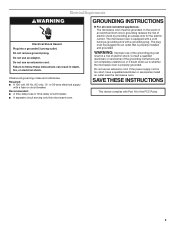
Use & Care Guide - Page 3

... properly installed and grounded. Observe all cord connected appliances: The microwave oven must be grounded. The plug must be plugged into a grounded 3 prong outlet. Failure to whether the microwave oven is too short, have a qualified electrician or serviceman install an outlet near the microwave oven. Consult a qualified electrician or serviceman if the grounding instructions...
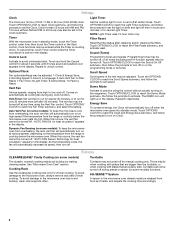
Use & Care Guide - Page 4

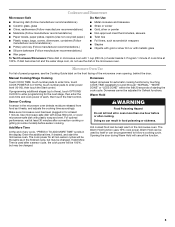
... Clock. Auto Vent Fan (on some models): To keep the microwave oven from overheating, the auto vent fan will automatically turn on the magnetron. Dynamic Fan Sensing (on some models): To keep the microwave oven from overheating, the auto vent fan will automatically turn off time in the display. Touch OPTIONS/CLOCK to reach the Sound On...
Use & Care Guide - Page 5

... changed . The cook power for Defrost functions. If Add More Time is used by itself or can be the same as in microwave oven with plastic wrap and vent. WARNING Food Poisoning Hazard Do not let food sit in the display. For optimal performance, wait at least 30 minutes after cooking. Microwave Oven Use For list of...
Use & Care Guide - Page 6

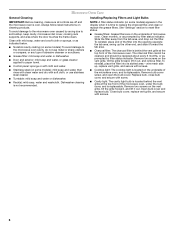
... Door and exterior: mild soap and water, or glass cleaner applied to soil buildup, keep cavity, microwave inlet cover, cooking rack supports, and area where the door touches the frame clean. Open... the display when it toward the tab area. ■ Charcoal filter: The charcoal filter is replaceable. wire mesh side up the other end, and slide it is not recommended. Microwave Oven Care ...
Use & Care Guide - Page 7

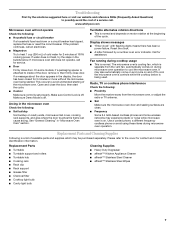
...Turntable alternates rotation directions ■ This is normal and depends on . Call for 5 minutes or more without the microwave oven being used. Display shows messages ■ "Enter clock" with flashing digits means there has been a power failure. Replacement Parts Cleaning Supplies ■ Turntable ■ Turntable support and rollers ■ Turntable hub ■ Cooking...
Use & Care Guide - Page 8

... serial number on the label located on how to use or when it was purchased. Please keep this limited warranty does not apply. Service calls to be provided by the customer. You can... void if the factory applied serial number has been altered or removed from the date of the microwave oven opening, behind the door. If outside the 50 United States and Canada, contact your authorized Whirlpool...

Whirlpool Knowledge Base Results

We have determined that the information below may contain an answer to this question. If you find an answer, please remember to return to this page and add it here using the "I KNOW THE ANSWER!" button above. It's that easy to earn points!

  • What is the Demo Mode on my SpeedCook microwave oven with convection, and how does it work?
    ... touching "Next Page" or "Back," or wait for the screen to advance. On Settings and Info screen, touch "Demo Mode." Info." The demonstration immediately begins. Touch "Cancel Demo" on the display. What is the Demo Mode on my microwave oven and how do I use it work ? You can move forward or back in...
  • The display on my microwave oven is showing messages
    ... "Clock" section below . Retry your zip code below to reset the clock or to the microwave oven, a ":" will reappear in the display. When the microwave oven is not in the display at any other time, a power failure has occurred. For service from your local authorized service provide, enter your entry. Find a local service provider: Product Category...
  • What is the SureMist Steamer Vessel that came with my SpeedCook microwave oven with convection, and how do I use it?
    ...my Speedcook Microwave Oven? See "Steam Cook" (see "Time/Temp/Power Cooking" section in your food.  Do not use oven mitts or pot holders when handling. or combination-type oven, with...Do not remove the lid while the vessel is a sensor function, and uses only microwaves to keep foods such as fish and vegetables out of water in a conventional- How do I...Simmer menu on the display.

Similar Questions

What Would Be The Newest Version With Same Size As This Microwave Oven
What Would Be The Newest Version With Same Size As This Microwave Oven (wmc50522as)
(Posted by chicity1992 5 months ago)
Replacement Template
When the guys came to drop off my appliances they unboxed the microwave because the box had been dam...
(Posted by mray1204 8 months ago)
Whirlpool Microwave Oven Wmh31017aw
my microwave keep running no heat how can I fix this problem ?
(Posted by Anonymous-150142 9 years ago)
Ask a New Question
Use the box below to post a new question about this Whirlpool product .
Points & Prizes
  • You can earn points for nearly everything you do on HelpOwl.com
  • You can trade in those points for gift cards at leading retailers such as Amazon.com and Walmart
  • It's that simple!
See How it Works
Create a Free Account

Whirlpool Manuals

Find free Whirlpool WMH32517AW manuals and user guides available at ManualOwl.com. Try out our unique manual viewer allowing you to interact with manuals from directly within your browser!

Whirlpool Reviews

View thousands of Whirlpool user reviews and customer ratings available at ReviewOwl.com.

Contact Information

Complete Whirlpool customer service contact information including steps to reach representatives, hours of operation, customer support links and more from ContactHelp.com.

Scoreboard Ratings

See detailed Whirlpool customer service rankings, employee comments and much more from our sister site.

Whirlpool Recalls

Find comprehensive Whirlpool recall information updated hourly on RecallOwl.com.