Get support for Whirlpool WMH32517AT

Whirlpool WMH32517AT Support Question

Whirlpool WMH32517AT Support Question

Find answers below for this question about Whirlpool WMH32517AT.
Need a Whirlpool WMH32517AT manual? We have 4 online manuals for this item!
Question posted by minzinna on October 22nd, 2016

How Do I Set The Light Timer ? After I Touch The Options/clock,it Tells Me Set A

how do I set the light timer to show am p

Current Answers

Answer #1: Posted by Odin on October 23rd, 2016 6:56 AM
This answer was accepted by the poster of the original question.
Odin

Member since:
April 10th, 2010

Points: 41,236,690
1,080
points
Your question was truncated (the ends of both the title and details were omitted)--so I can't offer you the quality of help that I'd like. However, the instructions are under Light Timer at this manual page: https://www.manualslib.com/manual/202959/Whirlpool-Andnbsp-Wmh32l19as.html?page=4&term=light+timer&selected=1. If these instructions aren't working for you, either (1) use the contact information here--https://www.contacthelp.com/whirlpool/customer-service, or (2) resubmit, with full details of exactly what you did and what happened.


Hope this is useful. Please don't forget to click the Accept This Answer button if you do accept it. My aim is to provide reliable helpful answers, not just a lot of them. See https://www.helpowl.com/profile/Odin.

Related Whirlpool WMH32517AT Manual Pages

Installation Instructions - Page 1

... hazards that can kill or hurt you don't follow instructions. This is , tell you how to Wall 8 Prepare Upper Cabinet 8 Install Damper Assembly 9 Install the Microwave Oven 9 Complete Installation 10 VENTING DESIGN SPECIFICATIONS 11 ASSISTANCE 12 Replacement Parts 12 Accessories 12 MICROWAVE HOOD COMBINATION SAFETY Your safety and the safety of others . WARNING You...
Installation Instructions - Page 2

... to Round Transition" illustration in "Venting Design Specifications" section. 2 A B C D E FG H A. 1/4-20 x 3" round-head bolts (2) B. 1/4-20 x 3" flat-head bolts (2) C. Set the cardboard template to the side and refer to exist above the microwave oven so that the materials used will be combined. Read and follow the instructions provided with your builder or cabinet...
Installation Instructions - Page 3

..., have a qualified electrician or serviceman install an outlet near the microwave oven. Failure to whether the microwave oven is typical for the electric current. Required: ■ A 120...delay fuse or time-delay circuit breaker. ■ A separate circuit serving only this microwave oven. Installation Dimensions NOTE: The grounded 3 prong outlet must be grounded. See "Electrical ...
Installation Instructions - Page 4

... up. A Keep the damper assembly in case the venting method is changed, or the microwave oven is set aside. 3. Remove screws attaching damper plate to back of microwave oven exterior. A B A. Remove 2 screws attaching blower motor to top of microwave oven. Damper plate B. Damper plate tabs D. Slots 8. Secure damper plate with 2 screws removed in Step 3. 7. Damper...
Installation Instructions - Page 5

...A. Repeat Step 2 from "Wall Venting Installation Only." 2. Reattach blower motor to the microwave oven. 7. Exhaust port IMPORTANT: If blower motor is not correctly oriented, the 2 screws removed in Step 3 of the microwave oven (as shown), performance will be reattached to back of the microwave oven. Repeat Step 4 from "Wall Venting Installation Only." 4. Rotate blower motor so...
Installation Instructions - Page 6

...." Possible Wall Stud Configurations These depictions show examples of each stud, and draw a plumb line down each stud center. Cabinet opening , do not install the microwave oven. 1. End holes (on mounting plate) B. See illustrations in "Possible Wall Stud Configurations." 2. Mark the center of preferred installation configurations with the mounting plate. No Wall...
Installation Instructions - Page 7

...1 lag screw and one corner of the upper cabinet. Cardboard template C. Make sure the mounting plate is the venting cutout area. 13. Set the mounting plate aside. Using measuring tape, measure out 6" (15.2 cm) on a minimum of 1 wall stud, preferably 2, using a... centerline 3/8" (1 cm) down 4" (10.2 cm) from the centerline. 5. Mark Rear Wall The microwave oven must each other.
Installation Instructions - Page 8

...has opened against the rear wall so that it is level. 8. Check alignment of the microwave oven. Insert a lag screw into both ends. 1. Wall Studs at both end holes. 3. ... in Rear Wall" section. 7. Disconnect power to use as guides. ■ If the wall behind the microwave oven (as at Both End Holes (Figure 4) 1. Position mounting plate on the bolt from upper cabinet. 3. ...
Installation Instructions - Page 9

...) diameter hole at points "D" and "E" on the template. These are for two 1/4-20 x 3" bolts and washers used to secure the microwave oven to the microwave oven, do not grip or use the door or door handle while the microwave oven is metal, the supply cord bushing needs to do so can result in the bottom of...
Installation Instructions - Page 10

...). Raised tabs B. Damper assembly C. Upper cabinet cutout E. Long tab F. Check the operation of microwave oven by operating the vent fan. 5. If the problem continues, call an electrician. ■ Check ...(250 mL) of water on the turntable, and programming a cook time of mounting plate, and set aside on a covered surface. 8. Longer or shorter bolts are available at least one person holding...
Installation Instructions - Page 11

... using recirculation installation. Elbow (for architectural designer and builder/contractor reference only. Vent extension piece, at least 3" (7.6 cm) of clearance between the top of the microwave oven and the transition piece. Rectangular to Round Transition NOTE: The minimum 3" (7.6 cm) clearance must exist between the top of the...
Installation Instructions - Page 12

... of 140 ft (42.7 m) for either type of available replacement parts. For best performance, use when installing this microwave oven in pairs. One 3¹⁄₄" x 10" (8.3 x 25.4 cm) 90° elbow = 25 ft... 6 ft (1.8 m) 2 ft (0.6 m) C A. Replacement Parts If any of the microwave oven opening . Both numbers can be installed to be replaced, call us at our toll free...
Warranty Information - Page 1

...appliance for product service if your major appliance, to instruct you on the upper or lower front facing of the microwave oven opening, behind the door. DISCLAIMER OF IMPLIED WARRANTIES; IMPLIED WARRANTIES, INCLUDING WARRANTIES OF MERCHANTABILITY OR FITNESS FOR A ...PROVINCE TO PROVINCE. Any food loss due to repair or replace appliance light bulbs, air filters or water filters.
Use & Care Guide - Page 1

... Safety Your safety and the safety of others . IMPORTANT SAFETY INSTRUCTIONS When using the microwave oven. ■ Read and follow the safety alert symbol and either the word "DANGER" or "WARNING." for example, closed glass jars - This is , tell you what the potential hazard is the safety alert symbol. All safety messages will...
Use & Care Guide - Page 2

..., and disconnect the power cord, or shut off the pad and touch electrical parts involving a risk of 36" (91.44 cm). ■ Clean Ventilating Hoods Frequently - Carefully attend the microwave oven when paper, plastic, or other part of the oven with metal foil. Grease should not be allowed to heat, cook, or dry food...
Use & Care Guide - Page 4

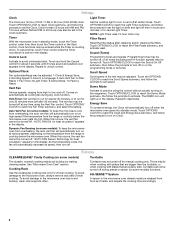
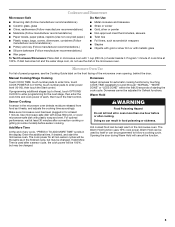
...automatically decrease its speed, then turn on the magnetron. See "Microwave Oven Care" section. To avoid damage to deactivate. Touch OPTIONS/CLOCK to unlock control. Touch OPTIONS/CLOCK to reach Clock submenu, and follow the prompts to practice using the Vent Fan control. Light Timer Set the cooktop light to turn off at any cook function. Turntable Turntable may...
Use & Care Guide - Page 5

.... Warm Hold Sensor Cooking A sensor in the display. If programming additional stages (up to three), touch OPTIONS/ CLOCK to follow a cooking cycle. Enter the additional time, if desired, and start the microwave oven. Make sure microwave oven has been plugged in the microwave oven. If dish becomes hot and the water stays cool, do not use the dish in...
Use & Care Guide - Page 6

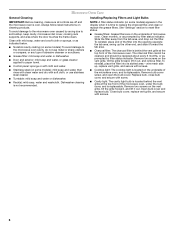
See "Settings" section to replace the charcoal filter, and clean or replace the grease filters. Dishwasher cleaning is time to reset filter status. ■ Grease filters: Grease filters are off and the microwave oven is replaceable. Installing/Replacing Filters and Light Bulbs NOTE: A filter status indicator (on the underside of the microwave oven, under the bulb cover...
Use & Care Guide - Page 7

... display, the door has been closed for assistance. Reset the clock. ■ A letter followed by a number is on cavity walls, microwave inlet cover, cooking rack supports, and area where the door touches the frame can cause arcing. Call for 5 minutes or more without the microwave oven being used. Replacement Parts Cleaning Supplies ■ Turntable ■...
Use & Care Guide - Page 8

...questions or concerns at the number below. Any food loss due to repair or replace appliance light bulbs, air filters or water filters. This major appliance is designed to be easily determined....you need assistance using your product, you on the upper or lower front facing of the microwave oven opening, behind the door. This limited warranty is valid only in accordance with original model...

Whirlpool Knowledge Base Results

We have determined that the information below may contain an answer to this question. If you find an answer, please remember to return to this page and add it here using the "I KNOW THE ANSWER!" button above. It's that easy to earn points!

  • How do I select functions and change displays on my microwave oven?
    ... on the display.  Function   Option Sound Turn on my built-in my microwave oven? Error code on my microwave oven? How do I set the clock on the range display How does combination cooking work in oven control panel? Options: Functions can be selected and displays can be changed by touching Options. How do I select functions and change displays...
  • How do I select functions and change displays on my microwave oven?
    ... Turn on the range display FAQs Knowledgebase search tips The display on my microwave oven is showing messages What options and functions are on my microwave oven? How do I select functions and change displays on my microwave oven? How do I set the clock on my built-in oven control panel? Options: Functions can be selected and displays can be changed by touching Options.
  • How do I set the clock on my SpeedCook microwave oven with convection?
    ...," then touch "OK." How do I set the clock on my SpeedCook microwave oven with convection? When power is a standard 12-hour clock (12:00 AM-11:50 PM), or a 24-hour clock (0:00-23:59). How do I set the clock on my SpeedCook microwave oven with convection?  To hide clock: On Clock screen, touch "Adjust Time," and then touch "Hide Clock." How do I set the clock on...

Similar Questions

How Do You Remove Control Locked On The Microwave?
microwave has control locked showing how do I remove it?
(Posted by cc5697dc 6 years ago)
Standby Mode
Is there away to take my whirlpool microwave WMH76719CS off standby mode.
(Posted by starwurz 7 years ago)
Under Hood Lamps Will Not Light Up
I replaced one of the two bulbs with a 35watt bulb by mistake. Both bulbs worked fine for about 5 da...
(Posted by sdenke 8 years ago)
External Venting
We currently have the microwave installed with internal venting. We want to convert it to external v...
(Posted by jostrognai 9 years ago)
Replacement Parts Or Replacement Oven Model # Gt4175spq-1
I have a built-in Whirlpool microwave oven that is not working (will not heat food, and timer accele...
(Posted by jcburhoe 11 years ago)
Ask a New Question
Use the box below to post a new question about this Whirlpool product .
Points & Prizes
  • You can earn points for nearly everything you do on HelpOwl.com
  • You can trade in those points for gift cards at leading retailers such as Amazon.com and Walmart
  • It's that simple!
See How it Works
Create a Free Account

Whirlpool Manuals

Find free Whirlpool WMH32517AT manuals and user guides available at ManualOwl.com. Try out our unique manual viewer allowing you to interact with manuals from directly within your browser!

Whirlpool Reviews

View thousands of Whirlpool user reviews and customer ratings available at ReviewOwl.com.

Contact Information

Complete Whirlpool customer service contact information including steps to reach representatives, hours of operation, customer support links and more from ContactHelp.com.

Scoreboard Ratings

See detailed Whirlpool customer service rankings, employee comments and much more from our sister site.

Whirlpool Recalls

Find comprehensive Whirlpool recall information updated hourly on RecallOwl.com.