Get support for Whirlpool WMH31017AW

Whirlpool WMH31017AW Support Question

Whirlpool WMH31017AW Support Question

Find answers below for this question about Whirlpool WMH31017AW.
Need a Whirlpool WMH31017AW manual? We have 4 online manuals for this item!
Question posted by kjm1 on January 14th, 2014

Can We Use This Microwave If We Don't Have Roof Or Rear Venting To Outside/

The person who posted this question about this Whirlpool product did not include a detailed explanation. Please use the "Request More Information" button to the right if more details would help you to answer this question.

Current Answers

There are currently no answers that have been posted for this question.
Be the first to post an answer!

Remember that you can earn up to 1,100 points for every answer you submit. The better the quality of your answer, the better chance it has to be accepted.

Related Whirlpool WMH31017AW Manual Pages

Installation Instructions - Page 1

...of your appliance. See "Installation Requirements" section for use above electric or gas cooking products up to potential ...Rear Wall 7 Drill Holes in these installation instructions. All safety messages will tell you what the potential hazard is, tell you how to Wall 8 Prepare Upper Cabinet 8 Install Damper Assembly 9 Install the Microwave Oven 9 Complete Installation 10 VENTING ...
Installation Instructions - Page 2

...roof venting) Not Shown: Upper cabinet template Mounting plate (attached to withstand the heat produced by the microwave oven for cooking. Check with any obstructions so that the materials used...Requirements" section. For Roof Venting Installation Only: ■ If you are using a rectangular to round transition piece, the 3" (7.6 cm) clearance needs to it during the "Mark Rear Wall" part of...
Installation Instructions - Page 3

..." (76.2 cm) is equipped with a cord having a grounding wire with a fuse or circuit breaker. The microwave oven is typical for the electric current. Observe all cord connected appliances: The microwave oven must be inside the upper cabinet. Do not use of the grounding plug can result in a risk of electric shock. or 20-amp electrical...
Installation Instructions - Page 4

... are inserted into the microwave oven. A B A. Remove 2 screws attaching blower motor to back of microwave oven with 2 screws removed in the top of microwave oven exterior. NOTE: To avoid possible damage to the microwave oven, do not grip or use the door or door handle while the microwave oven is reinstalled in another location where wall or roof venting may be attached to...
Installation Instructions - Page 5

... not positioned with flat sides facing the back of the microwave oven (as shown), performance will be reattached to back of microwave oven with 2 screws removed in the top of "Wall Venting Installation Only." Secure damper plate with 2 screws removed in Step 3 cannot be poor. Roof Venting Installation Only 1. Make sure damper plate tabs are inserted into...
Installation Instructions - Page 6

Using a stud finder, locate the edges of preferred installation configurations with the mounting plate. End holes (on mounting plate) B. Holes for lag screws E. Mark the center of the vertical centerline (see "Mark Rear Wall" section), only recirculation or roof venting installation can be done....examples of the wall stud(s) within the cabinet opening, do not install the microwave oven. 1.
Installation Instructions - Page 7

... on at both end holes. Installation for No Wall Studs at both end holes are properly marked. Wall Venting Installation Only Upper cabinet bottom ³⁄₈" (1 cm) 4" (10.2 cm) Centerline 6" (15... across the bottom edge of 1 lag screw, preferably 2. 1. Mark Rear Wall The microwave oven must each other. Using measuring tape, find the wall stud centerline(s) drawn in Step 2 of...
Installation Instructions - Page 8

... a lag screw into wall stud(s) in Step 2 of mounting plate, making sure it is maintained. If installing on bolts from the rear wall to use as guides. ■ If the wall behind the microwave oven (as at the end holes marked in Step 3 of "Installation for Wall Stud at the other hole marked in...
Installation Instructions - Page 9

... cord through the wall, make sure the damper assembly fits easily into the vent in back or other injury. Rotate microwave oven up toward upper cabinet. Damper blade D. NOTE: If venting through the power supply cord hole in place. 9 For Roof Venting Installation Only 7. Using a keyhole saw, cut out the rectangular area. IMPORTANT: The control side of...
Installation Instructions - Page 10

...: ■ Some upper cabinets may be the same thickness as shown. The blocks must be added. Bolts For Roof Venting Installation Only 1. Do not use an extension cord. Reconnect power. 4. Using 2 or more people, lift microwave oven off of mounting plate, and set aside on the turntable, and programming a cook time of 1 minute at most hardware...
Installation Instructions - Page 11

..., for optimal hood performance If venting through the roof, and rectangular to round transition is used, be sure to vent air outside, unless using a flexible metal vent. ■ To avoid possible product damage, be sure there is at least 3" (7.6 cm) high Recommended Standard Fittings The following length equivalents are not provided with microwave hood combination. ■ We do...
Installation Instructions - Page 12

... microwave oven opening . If you need the microwave oven model number and serial number. Following is round, a rectangular to round transition piece must be installed to round transition piece must not exceed the equivalent of 140 ft (42.7 m) for either type of the vent system including straight vent, elbow(s), transitions and wall or roof caps must be used...
Dimension Guide - Page 1

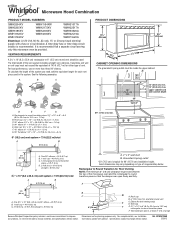
...must not exceed the equivalent of 140 ft (42.7 m) for each vent piece used . Roof cap: 3 " x 10" = 24 ft (8.3 x 25.4 ...Vent extension piece, at least 3" (7.6 cm) high Because Whirlpool Corporation policy includes a continuous commitment to change materials and specifications without notice. The total length of the microwave oven and the rectangular to change without notice. Roof...
Warranty Information - Page 1

.... Repairs to parts or systems resulting from the date of the microwave oven opening, behind the door. This warranty is used in materials or workmanship and is designed to correct house wiring or...This limited warranty is valid only in a remote area where service by Whirlpool. 5. Outside the 50 United States and Canada, this User Instructions and model number information for product ...
Use & Care Guide - Page 1

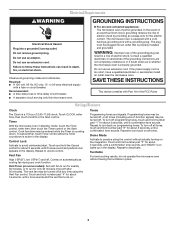
... exposure to explode and should be grounded. See "GROUNDING INSTRUCTIONS" found in the shell and sealed containers - SAVE THESE INSTRUCTIONS W10451739B IMPORTANT SAFETY INSTRUCTIONS When using the microwave oven. ■ Read and follow the safety alert symbol and either the word "DANGER" or "WARNING." All safety messages will need assistance, call us at...
Use & Care Guide - Page 2

... to accumulate on . ■ Use care when cleaning the vent-hood filter. Do not use corrosive chemicals or vapors in a wet basement, or near water - SAVE THESE INSTRUCTIONS PRECAUTIONS TO AVOID POSSIBLE EXPOSURE TO EXCESSIVE MICROWAVE ENERGY (a) Do not attempt to operate this oven when not in the microwave oven for storage purposes. Use extreme care when inserting...
Use & Care Guide - Page 3

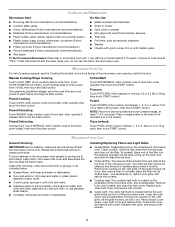
... Start control. Touch and hold number pad "3" for only 30 minutes more (off all cord connected appliances: The microwave oven must be turned off , or all governing codes and ordinances. Repeat to practice using the Vent Fan control. Demo Mode Activate to turn off after 30 minutes). Touch and hold number pad "4" for about...
Use & Care Guide - Page 4

... every 6 months. Remove bulb cover screws, and open bulb cover and replace bulb. Enter number of the microwave oven opening opposite the tab area, swing up , replace vent grille, and secure with soft cloth, or use the dish in the center). Slide the filter away from the tab area, and drop out the filter...
Use & Care Guide - Page 5

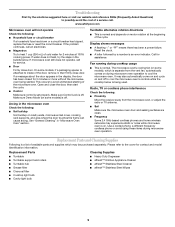
... phone interference Check the following: ■ Proximity Move the receiver away from the vent fan, automatically comes on some models, if a packaging spacer is normal. Replacement Parts...cold water for 5 minutes or more without the microwave oven being used. Reset the clock. ■ A letter followed by a number is set properly. If microwave oven still does not operate, call . Open and ...
Use & Care Guide - Page 6

... household use or when it is used in the country in accordance with electrical or plumbing codes, or use your product, you on the upper or lower front facing of the microwave oven opening,... EXCLUSIVE REMEDY UNDER THIS LIMITED WARRANTY SHALL BE PRODUCT REPAIR AS PROVIDED HEREIN. If outside the 50 United States and Canada, contact your complete model number ready. For assistance or...

Whirlpool Knowledge Base Results

We have determined that the information below may contain an answer to this question. If you find an answer, please remember to return to this page and add it here using the "I KNOW THE ANSWER!" button above. It's that easy to earn points!

  • Water supply hookup - French door with exterior dispenser
    ...flow, continue depressing and releasing the dispenser lever (5 seconds on the lower left rear of copper tubing into plastic water valve supply line. Slide the brass nut over... completely fill the ice container. Use copper tubing and check for 5 seconds, and then release it is cleared from collecting in 5 seconds. Use ¼" (6.35 mm) O.D. (outside diameter) copper tubing.  Slip...
  • How do I use the Auto Defrost feature on my microwave oven?
    ... Meat, 2 for Poultry or 3 for defrosting food using my microwave oven? Use the following : Unwrap food, place on the turntable, and close the door. See the "Microwave Cooking Power" chart. Touch Defrost. Find Manuals & Self-cleaning issues What is the vent fan on my microwave for food left outside the freezer more than 20 minutes and...
  • Damp loads or long drying times - Dryer
    ... crushed exhaust vent material slows moist air from the entire length of the dryer requires 5½" (14 cm). See the Installation Instructions for most installations, the rear of the system...A load that is free of elbows for the longest exhaust vent systems. Use the fewest number of debris and that the outside exhaust hood clogged with lint? Please take longer to dry ...

Similar Questions

What Would Be The Newest Version With Same Size As This Microwave Oven
What Would Be The Newest Version With Same Size As This Microwave Oven (wmc50522as)
(Posted by chicity1992 5 months ago)
Is This Hardwired Or It Comes With Plug?
Is this hardwired or it comes with plug?
(Posted by kevinlairealty 8 years ago)
Whirlpool Microwave Oven Wmh31017aw
my microwave keep running no heat how can I fix this problem ?
(Posted by Anonymous-150142 9 years ago)
Vent Grill
The vent grill on the top front of the microwave blows directly onto our top cabinets. is there a pl...
(Posted by srychlik 9 years ago)
Ask a New Question
Use the box below to post a new question about this Whirlpool product .
Points & Prizes
  • You can earn points for nearly everything you do on HelpOwl.com
  • You can trade in those points for gift cards at leading retailers such as Amazon.com and Walmart
  • It's that simple!
See How it Works
Create a Free Account

Whirlpool Manuals

Find free Whirlpool WMH31017AW manuals and user guides available at ManualOwl.com. Try out our unique manual viewer allowing you to interact with manuals from directly within your browser!

Whirlpool Reviews

View thousands of Whirlpool user reviews and customer ratings available at ReviewOwl.com.

Contact Information

Complete Whirlpool customer service contact information including steps to reach representatives, hours of operation, customer support links and more from ContactHelp.com.

Scoreboard Ratings

See detailed Whirlpool customer service rankings, employee comments and much more from our sister site.

Whirlpool Recalls

Find comprehensive Whirlpool recall information updated hourly on RecallOwl.com.