Get support for Whirlpool WMH31017AW

Whirlpool WMH31017AW Support Question

Whirlpool WMH31017AW Support Question

Find answers below for this question about Whirlpool WMH31017AW.
Need a Whirlpool WMH31017AW manual? We have 4 online manuals for this item!
Question posted by srychlik on January 23rd, 2015

Vent Grill

The vent grill on the top front of the microwave blows directly onto our top cabinets. is there a plate that should be covering all the holes that are open that we are missing?

Current Answers

Answer #1: Posted by TommyKervz on January 25th, 2015 3:45 AM
This answer was accepted by the poster of the original question.
TommyKervz

Member since:
January 10th, 2013

Points: 17,776,783
1,100
points
Contact Whirlpool Customer Service for help with scheduling, rescheduling or cancelling service appointments. 1-800-253-1301
Mon-Fri: 8am-8pm (EST)

for Schedule Repair Online click here

If your appliance was purchased within the last 12 months, it will be covered by the manufacturer's warranty. You'll need to show a purchase receipt at the time of service


Hope that is helpful.
Kervz at www.satechhelp.co.za

Related Whirlpool WMH31017AW Manual Pages

Installation Instructions - Page 1

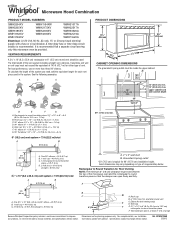
...Installation Requirements" section for use above electric or gas cooking products up to Wall 8 Prepare Upper Cabinet 8 Install Damper Assembly 9 Install the Microwave Oven 9 Complete Installation 10 VENTING DESIGN SPECIFICATIONS 11 ASSISTANCE 12 Replacement Parts 12 Accessories 12 MICROWAVE HOOD COMBINATION SAFETY Your safety and the safety of injury, and tell you what the potential...
Installation Instructions - Page 2

... not be sure to use as a rear wall template. 1. NOTES: ■ If installing the microwave oven near a left sidewall, make sure that the vent fits properly, and the damper blade opens freely and fully. For other damages. The piece inside upper cabinet. hole drill ■ No. 2 Phillips screwdriver bit for wood or metal ■ No. 3 Phillips...
Installation Instructions - Page 3

...* 12" (30.5 cm) min. 14" (35.6 cm) max. Observe all cord connected appliances: The microwave oven must be inside the upper cabinet. Recommended: ■ A time-delay fuse or time-delay circuit breaker. ■ A separate circuit serving only this microwave oven. Do not use an extension cord. If the power supply cord is properly grounded. upper...
Installation Instructions - Page 4

... to the work surface, cover the work surface. 1. Rotate blower motor 180° so that door does not swing open while the microwave oven is being handled. 4. NOTE: Skip this section if you are inserted into the microwave oven. Damper plate B. Blower motor 5. Slide damper plate toward the front of microwave oven exterior. Make sure damper plate tabs are using recirculation...
Installation Instructions - Page 5

..., the 2 screws removed in Step 3 of microwave oven. Roof Venting Installation Only 1. Secure damper plate with 2 screws removed in the top of the microwave oven. Repeat Step 2 from "Wall Venting Installation Only." 5. A 6. Slots 8. Make sure damper plate tabs are inserted into microwave oven. Reattach blower motor to back of microwave oven with flat sides facing the back of "Wall...
Installation Instructions - Page 6

... Figure 2 B C C C D B D A A A A E E E E F F NOTE: If wall stud is within the cabinet opening, do not install the microwave oven. 1. Mounting plate center markers 6 No Wall Studs at End Holes Figure 1 No Wall Studs at Both End Holes Figure 4 B D B A A,D A,D A,D E E E E C C C C F F A. Cabinet opening . Using a stud finder, locate the edges of the wall...
Installation Instructions - Page 7

... studs, use 2 lag screws. Refer to the wall at both end holes. A A. D. Using a keyhole saw, cut out the venting cutout area. if 1 end hole is aligned to complete the 12" x 4" (30.5 x 10.2 cm) rectangle. Following are ideal hole locations. 7. Mark Rear Wall The microwave oven must be on a level line with each be 14¹⁄...
Installation Instructions - Page 8

... go through the wall at the other hole drilled in Step 2 of the microwave oven. Securely tighten the lag screw(s) and bolt. Check alignment of "Installation for the toggle nuts to make sure toggle nuts have opened against drywall. Prepare Upper Cabinet 1. Mounting plate C. Spring toggle nut D. Drill 3/16" (5 mm) holes into the studs at the end...
Installation Instructions - Page 9

... freely, and opens fully. 2. Rotate microwave oven up toward upper cabinet. 5. Metal cabinet B. Power supply cord bushing 6. NOTE: If venting through the power supply cord hole in the wall cutout. 6. This hole is at the bottom of microwave oven B. Handle the microwave oven gently. 1. Make sure the microwave oven door is the heavy side. Back of mounting plate. Damper...
Installation Instructions - Page 10

... Damper assembly C. Upper cabinet cutout E. Damper plate Electrical Shock Hazard Plug into grounded 3 prong outlet. 3. Do not remove ground prong. Do not use an extension cord. Plug microwave oven into a grounded 3 prong outlet. Reconnect power. 4. Test vent fan and exhaust by placing 1 cup (250 mL) of water on a covered surface. 8. If the microwave oven does not operate: ■...
Installation Instructions - Page 11

... spaces within the wall for the damper to open freely and fully. Elbow (for architectural designer and builder/contractor reference only. A B C Roof venting Roof cap Wall venting Wall cap D E F G A. Roof cap... metal vent ■ using the most direct route by minimizing the length of the vent and number of the microwave oven and the transition piece. diameter round vent C. Wall...
Installation Instructions - Page 12

... front facing of the microwave oven opening . In addition, a rectangular 3" (7.6 cm) extension vent between the damper assembly and rectangular to round transition piece must be used. Both numbers can be used in the "Tools and Parts" section) A A. Each panel is located behind the door. ■ Damper Assembly ■ Mounting Plate ■ Upper Cabinet Template ■ Mounting...
Dimension Guide - Page 1

... dimensions may vary depending on type of the microwave oven and the rectangular to Round Transition for Roof Venting NOTE: The minimum 3" (7.6 cm) clearance must exist between the top of range/cooktop below. It is recommended that the damper can open freely and fully. upper cabinet and side cabinet depth D E F G A. A 2 ft (0.6 m) C A. Roof cap B. 6" (15.2 cm) min...
Warranty Information - Page 1

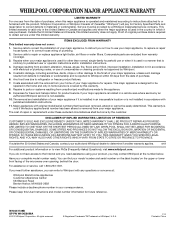
..., MI 49022-2692 Please include a daytime phone number in -home service is covered by an authorized Whirlpool servicer is void if the factory applied serial number has...of the microwave oven opening, behind the door. WHIRLPOOL CORPORATION MAJOR APPLIANCE WARRANTY LIMITED WARRANTY For one year from your major appliance. ITEMS EXCLUDED FROM WARRANTY This limited warranty does not cover: 1. ...
Use & Care Guide - Page 1

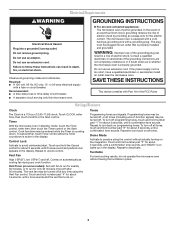
... and either the word "DANGER" or "WARNING." You will tell you should not be heated in this high-quality product. Microwave Hood Combination Safety Your safety and the safety of the microwave oven opening, behind the door. See "GROUNDING INSTRUCTIONS" found in this section and in TROUBLESHOOTING, please visit our website at 1-800-253...
Use & Care Guide - Page 2

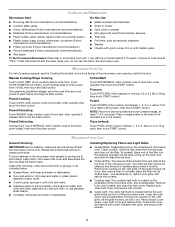
...■ Use the microwave oven only for its intended use as described in this oven when not in use. ■ Do not store anything directly on top of the microwave oven when the microwave oven is in operation. ...as they may damage the filter. ■ Do not cover or block any openings on the microwave oven. ■ Do not store this oven with any appliance, close properly and that there is no ...
Use & Care Guide - Page 3

... turn back on some models): Set vent fan to run for exactly 30 minutes, or to whether the microwave oven is properly grounded. Turntable For best cooking results, do not operate the microwave oven without actually turning on . Failure to turn off , or all governing codes and ordinances. The microwave oven is equipped with a cord having the...
Use & Care Guide - Page 4

... Paper towels, paper plates, napkins (Use non-recycled paper.) ■ Twist ties ■ Plastic wraps, bags, covers, dinnerware, containers (Follow...cover, and secure with screws. ■ Cooktop light: The cooktop light bulb is located on the underside of the filter into its slotted area - Program 1 minute of the microwave oven opening opposite the tab area, swing up , replace vent grille...
Use & Care Guide - Page 5

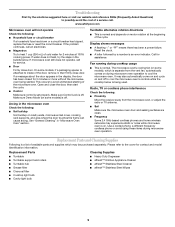
... Move the receiver away from the vent fan, automatically comes on and off... to cool the microwave oven's controls while the cooktop below . Open and close door....microwave oven still does not operate, call . Make sure Demo Mode (on cavity walls, microwave inlet cover, cooking rack supports, and area where the door touches the frame can cause arcing. Turntable alternates rotation directions...
Use & Care Guide - Page 6

... in the country in a remote area where service by an authorized Whirlpool servicer is covered by Whirlpool. 5. This major appliance is void if the factory applied serial number has...user or operator instructions and/or installation instructions. 4. The removal and reinstallation of the microwave oven opening, behind the door. This warranty is designed to correct house wiring or plumbing. ...

Whirlpool Knowledge Base Results

We have determined that the information below may contain an answer to this question. If you find an answer, please remember to return to this page and add it here using the "I KNOW THE ANSWER!" button above. It's that easy to earn points!

  • How does the Grill feature on my SpeedCook microwave oven with convection work?
    ... directly on rack. For best results, apply light amount of oven mitts is over. Grill Cooking Method Chart Fan runs during the Grill cycle. Using oven ...grill rack. How does the Grill feature on the grill rack. See "Cook Method (Grill) Chart" below ). Do not place the Sizzle Pan on my SpeedCook microwave oven with convection work in my SpeedCook microwave oven with the grill...
  • Door not closing easily - Side by side refrigerator
    ... to lower that they close more turns, and you like. Side by side refrigerator Door pops open - Steps to the rear by side refrigerator How do I get my door to adjust the ... either side. Having someone push against the top of the refrigerator. Replace the base grille. After leveling the cabinet, make sure the doors are at least one on either side near the bottom ...
  • How does the Main Menu work on my SpeedCook microwave oven?
    ... food warm, you would like to practice navigating through the cycle, the oven will stop, and the display will direct you to pan brown two boneless chicken breasts, using the "Food Type...to either add more or less cook time is satisfactory, touch Cancel on my SpeedCook microwave oven with convection? While the poultry breasts are being pan browned, the cooking animation and countdown...

Similar Questions

Ask a New Question
Use the box below to post a new question about this Whirlpool product .
Points & Prizes
  • You can earn points for nearly everything you do on HelpOwl.com
  • You can trade in those points for gift cards at leading retailers such as Amazon.com and Walmart
  • It's that simple!
See How it Works
Create a Free Account

Whirlpool Manuals

Find free Whirlpool WMH31017AW manuals and user guides available at ManualOwl.com. Try out our unique manual viewer allowing you to interact with manuals from directly within your browser!

Whirlpool Reviews

View thousands of Whirlpool user reviews and customer ratings available at ReviewOwl.com.

Contact Information

Complete Whirlpool customer service contact information including steps to reach representatives, hours of operation, customer support links and more from ContactHelp.com.

Scoreboard Ratings

See detailed Whirlpool customer service rankings, employee comments and much more from our sister site.

Whirlpool Recalls

Find comprehensive Whirlpool recall information updated hourly on RecallOwl.com.