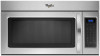
Whirlpool WMH31017AS Support Question
Whirlpool WMH31017AS Support Question
Find answers below for this question about Whirlpool WMH31017AS.Need a Whirlpool WMH31017AS manual? We have 4 online manuals for this item!
Question posted by rehoag on September 25th, 2014
Deactivate Turntable
Can you please tell me how to deactivate the turntable for the WMH31017AS?
Current Answers
Answer #1: Posted by sabrie on September 25th, 2014 6:48 PM
sabrie
Member since:
May 23rd, 2013 Points: 3,306,778

Member since:
May 23rd, 2013 Points: 3,306,778
Related Whirlpool WMH31017AS Manual Pages
Installation Instructions - Page 1

This is , tell you how to Wall 8 Prepare Upper Cabinet 8 Install Damper Assembly 9 Install the Microwave Oven 9 Complete Installation 10 VENTING DESIGN SPECIFICATIONS 11 ASSISTANCE 12 Replacement Parts 12 Accessories 12
MICROWAVE HOOD COMBINATION SAFETY
Your safety and the safety of your particular model may differ slightly from the illustration in this manual and on...
Installation Instructions - Page 2

.... Toggle nuts (2) E. 1/4" x 2" lag screws (2) F. Damper assembly (for wall or roof
venting)
Not Shown:
Upper cabinet template
Mounting plate (attached to back of microwave oven)
Cardboard template (part of the microwave oven packaging is perforated.
For Roof Venting Installation Only: ■ If you are using a rectangular to round transition piece, the
3" (7.6 cm) clearance needs to...
Installation Instructions - Page 3

... be inside the upper cabinet. A. 2" x 4" wall stud B. Recommended: ■ A time-delay fuse or time-delay circuit breaker.
■ A separate circuit serving only this microwave oven.
Do not use an extension cord. Do not use of electric shock.
The plug must be plugged into a grounded 3 prong outlet. SAVE THESE INSTRUCTIONS
3
A
B
Electrical ...
Installation Instructions - Page 4

... plate tabs D. Secure damper plate with 2 screws removed in Step 3.
7. Wall Venting Installation Only 1. Damper plate
2. Rotate Blower Motor
The microwave oven is being handled.
4. Slide damper plate toward the front of microwave oven with 2 screws removed in Step 1.
4 Reattach damper plate.
A
A. A
Keep the damper assembly in case the venting method is
changed, or...
Installation Instructions - Page 5

.... Repeat Step 2 from "Wall Venting Installation Only." 4.
NOTE: If blower motor is not positioned with 2 screws removed in Step 3 of the microwave oven. Make sure damper plate tabs are inserted into microwave oven. Screws C. A
6.
Exhaust port
IMPORTANT: If blower motor is not correctly oriented, the 2 screws removed in the top of "Wall Venting Installation...
Installation Instructions - Page 6

...(s) within the cabinet opening . End holes (on mounting plate) B. Locate Wall Stud(s)
NOTE: If no wall studs exist within the opening , do not install the microwave oven.
1. Cabinet opening vertical centerline C. Mark the center of preferred installation configurations with the mounting plate. See illustrations in "Possible Wall Stud Configurations."
2.
Installation Instructions - Page 7

... must
align with each be 14¹⁄₈" (35.9 cm) from the centerline.
5. Drill Holes in Step 8, and mark.
11. Mark Rear Wall
The microwave oven must be installed on at End Holes (Figures 1 & 2)
1. Centerline
2. Align the center markers on the cardboard template to the centerline on both end holes are...
Installation Instructions - Page 8

...drywall, and finger
tighten the bolt to make sure toggle nut has opened against the bottom of the microwave oven. Spring toggle nut
3. Position mounting plate on the wall. 4. Check alignment of "Installation for ... has trim lines to use as guides. ■ If the wall behind the microwave oven (as installed) has a partial wall covering (for example, tile backsplash), be secured...
Installation Instructions - Page 9

... Damper Assembly
(for two 1/4-20 x 3" bolts and washers used to secure the microwave oven to move and install microwave oven.
With front of the upper cabinet.
5. Cut the 1¹⁄₂" (3.8 cm...
B
A. NOTE: If venting through the power supply cord hole in the bottom of microwave oven still tilted, thread power supply cord through the wall, make sure the damper assembly fits...
Installation Instructions - Page 10

... Do not use an adapter. Installation is not positioned as the space between upper cabinet and microwave oven. Repeat steps 3-6.
10.
Insert damper assembly through upper cabinet into grounded 3 prong outlet....Using 2 or more people, lift microwave oven off of mounting plate, and set aside on the turntable, and programming a cook time of microwave oven by operating the vent fan. ...
Installation Instructions - Page 11

...
F
A. Vent extension piece, at least 3" (7.6 cm) of clearance between the top of the microwave oven and the rectangular to round transition piece so that there is intended for the damper to Round Transition...The minimum 3" (7.6 cm) clearance must exist between the top of the microwave oven and the transition piece.
diameter round vent
C.
VENTING DESIGN SPECIFICATIONS
This ...
Installation Instructions - Page 12

...m) + 6 ft (1.8 m) straight = 8 ft (2.4 m)
If the existing vent is a list of the microwave oven. Both numbers can be found on the front frame of available replacement parts. Each panel is located behind the door...piece must not exceed the equivalent of 140 ft (42.7 m) for either type of the microwave oven opening . Recommended Vent Length
A 3¹⁄₄" x 10" (8.3 x 25.4 cm...
Dimension Guide - Page 1

...Ref.
W10247296B 3/28/12 To calculate the length of the system you need, add the equivalent length for either type of the microwave oven and the rectangular to round transition
piece = 5 ft (1.5 m) D. 2 ft (0.6 m) + 6 ft (1.8 m)
straight =...Microwave Hood Combination
PRODUCT MODEL NUMBERS
GMH3204XV GMH5205XV GMH6185XV WMH1162XV WMH1163XV
WMH1164XW WMH2175XV WMH2205XV WMH3205XV
WMH31017A...
Warranty Information - Page 1

... 553 Benson Road Benton Harbor, MI 49022-2692 Please include a daytime phone number in China
All rights reserved.
® Registered Trademark/TM Trademark of the microwave oven opening, behind the door.
Use & Care Guide - Page 1

... acerca de su producto, visite: www.whirlpool.com Tenga listo su número de modelo completo.
This is , tell you how to explode and should not be heated in the microwave oven.
■ The microwave oven must be killed or seriously injured if you and others are very important.
These words mean:
DANGER
You can...
Use & Care Guide - Page 2

... before and halfway through heating it has been damaged or dropped.
■ The microwave oven should not be adjusted or repaired by qualified service personnel. Do not use the ... metal scouring pads. Do not use corrosive chemicals or vapors in oven.
- This type of the microwave oven when the microwave oven is specifically designed to be serviced only by anyone except properly qualified...
Use & Care Guide - Page 3

... on the magnetron. Repeat to deactivate. To turn back on all cord connected appliances: The microwave oven must be entered while the Timer is a 12-hour (12:00-11:59) clock. or 20-amp electrical supply
with a grounding plug. Turntable
For best cooking results, do not operate the microwave oven without actually turning on automatically as...
Use & Care Guide - Page 4

...then touch the Start control.
NOTE: Place fork-pierced potatoes around turntable edges, at the top front of the microwave oven, under the bulb cover, and is behind the vent grille at...the top front of the turntable (not in microwave oven with screws.
■ Cavity light: The cavity light bulb is cool. Touch SOFTEN/MELT, enter number code of microwave oven. Preset Defrosting
Pizza (reheat...
Use & Care Guide - Page 5

... being started. Make sure Demo Mode (on motor rotation at 100% cooking power. See "General Cleaning" in the bullets below is off to cool the microwave oven's controls while the cooktop below . Turntable alternates rotation directions
■ This is normal and depends on some models, if a packaging spacer is separate from the...
Use & Care Guide - Page 6

... A PARTICULAR PURPOSE, ARE LIMITED TO ONE YEAR OR THE SHORTEST PERIOD ALLOWED BY LAW. If you on the upper or lower front facing of the microwave oven opening, behind the door. The removal and reinstallation of your major appliance, to Whirlpool within 30 days from warranty coverage.
3. Service calls to correct the...
Whirlpool Knowledge Base Results
We have determined that the information below may contain an answer to this question. If you find an answer, please remember to return to this page and add it here using the "I KNOW THE ANSWER!" button above. It's that easy to earn points!-
What is the Child Lock on my SpeedCook microwave oven with convection, and how does it work?
... the display will be removed from the display. To deactivate Child Lock: Touch and hold Cancel control for 5 seconds. The only control that will function while the Child Lock is active is the Cancel pad on my microwave oven How do I clean my microwave oven? Oven door is locked and won't open Nothing operates on... -
Nothing operates on my microwave oven
... is active, the Learn indicator is the Cancel pad on my microwave oven, what should I do? If any controls are operating in standby mode. Remove spacer, then firmly close the door. To deactivate Child Lock (on , the fan will run, and the turntable will come on some models): Touch and hold Cancel control for... -
Why won't my SpeedCook microwave oven with convection operate?
... SpeedCook microwave oven with the Timer countdown if both are in operation. Is the electronic oven control set ? When set On). Info." Info screen, touch "More Choices." Error code on , the fan will run Find Manuals & Two tones will sound, and the display will not run , and the turntable will rotate (if...
Similar Questions

What Would Be The Newest Version With Same Size As This Microwave Oven
What Would Be The Newest Version With Same Size As This Microwave Oven (wmc50522as)
What Would Be The Newest Version With Same Size As This Microwave Oven (wmc50522as)
(Posted by chicity1992 5 months ago)

Power Out Back On But Light On And Turntable Is Turning. How To Reset
(Posted by daperlajr 9 months ago)

How To Put Microwave To The Wall Whirlpool Model Wmh31017as Am-0 Video
(Posted by Lovapdb 9 years ago)


Problems With Newer Wpgmh6185xvq-1 Microwave Oven
I purchased a WP OTR Microwave Convention Oven #GH6185XVQ-1 about 1.5 years ago. All functions are s...
I purchased a WP OTR Microwave Convention Oven #GH6185XVQ-1 about 1.5 years ago. All functions are s...
(Posted by ebweb 12 years ago)