Get support for Whirlpool WMH31017AB

Whirlpool WMH31017AB Support Question

Whirlpool WMH31017AB Support Question

Find answers below for this question about Whirlpool WMH31017AB.
Need a Whirlpool WMH31017AB manual? We have 4 online manuals for this item!
Question posted by brendasmith84590 on January 7th, 2013

How To Change The Lightbulb Shining In The Micowave Even When Not In Use?

The person who posted this question about this Whirlpool product did not include a detailed explanation. Please use the "Request More Information" button to the right if more details would help you to answer this question.

Current Answers

There are currently no answers that have been posted for this question.
Be the first to post an answer!

Remember that you can earn up to 1,100 points for every answer you submit. The better the quality of your answer, the better chance it has to be accepted.

Related Whirlpool WMH31017AB Manual Pages

Installation Instructions - Page 1

... to Wall 8 Prepare Upper Cabinet 8 Install Damper Assembly 9 Install the Microwave Oven 9 Complete Installation 10 VENTING DESIGN SPECIFICATIONS 11 ASSISTANCE 12 Replacement Parts 12 Accessories 12 MICROWAVE HOOD COMBINATION SAFETY Your safety and the safety of others . See "Installation Requirements" section for use above electric or gas cooking products up to reduce the chance...
Installation Instructions - Page 2

...) Aluminum grease filters Charcoal filters (Depending on model, aluminum grease filter and charcoal filter may not be sure to withstand the heat produced by the microwave oven for use appropriate fasteners. Toggle nuts (2) E. 1/4" x 2" lag screws (2) F. The piece inside upper cabinet. Special Requirements For Wall Venting Installation Only: ■ Cutout must provide: ■ Minimum...
Installation Instructions - Page 3

... (76.2 cm) typical* 12" (30.5 cm) min. 14" (35.6 cm) max. Do not use an extension cord. Do not use an extension cord. or 20-amp electrical supply with a grounding plug. A. 2" x 4" wall stud B. The...Plug into an outlet that is properly grounded. Observe all cord connected appliances: The microwave oven must be inside the upper cabinet. If the power supply cord is equipped with a...
Installation Instructions - Page 4

... D. For wall or roof venting, changes must be used. Remove screws attaching damper plate to the back of microwave oven with 2 screws removed in recessed holes) D A. NOTE: To avoid damage to the microwave oven, do not grip or use the door or door handle while the microwave oven is attached to top of microwave oven, and lower blower motor back into...
Installation Instructions - Page 5

... Installation Only." 2. Repeat Step 3 from "Wall Venting Installation Only." 5. Rotate blower motor so that exhaust ports face the top of microwave oven, and flat sides of blower motor face back of the microwave oven. A 6. D A. Slots 8. Secure damper plate with 2 screws removed in Step 1 of "Wall Venting Installation Only." Repeat Step 4 from "Wall Venting Installation...
Installation Instructions - Page 6

...4 B D B A A,D A,D A,D E E E E C C C C F F A. Wall stud centerlines D. Using a stud finder, locate the edges of the wall stud(s) within 6" (15.2 cm) of the vertical centerline (see "Mark...on mounting plate) B. Cabinet opening , do not install the microwave oven. 1. Holes for lag screws E. Locate Wall Stud(s) NOTE: If no wall studs exist within the...
Installation Instructions - Page 7

...centerline of the opening. If the end holes are 3 installation configurations. Using measuring tape, find the wall stud centerline(s) drawn in steps 8 and...use 1 lag screw and one corner of the cutout area. 14. Using measuring tape, measure out 6" (15.2 cm) on the cardboard template to the wall at End Holes (Figures 1 & 2) 1. They must each other. Mark Rear Wall The microwave oven...
Installation Instructions - Page 8

...16" (5 mm) hole into the upper cabinet align with the holes in Step 3 of the microwave oven. Remove all lag screws and bolts. If installing on the template is level. 8. Attach Mounting Plate...round-head bolts through the drywall, and finger tighten the bolts to use as guides. ■ If the wall behind the microwave oven (as at the other end hole. Mounting plate C. Start a toggle...
Installation Instructions - Page 9

... "E" on the back of the upper cabinet. 5. Metal cabinet B. Install Damper Assembly (for two 1/4-20 x 3" bolts and washers used to secure the microwave oven to the microwave oven, do so can result in the bottom of the microwave oven so that damper blade moves freely, and opens fully. 2. A. Damper assembly C. A B A. Support tabs 4. NOTE: If venting through the...
Installation Instructions - Page 10

... the cabinet cutout so that a circuit breaker has not tripped. Install filters. A B C D E F A. Do not use an extension cord. Do not use an adapter. Failure to damper assembly. Check the operation of microwave oven by operating the vent fan. 5. If the microwave oven does not operate: ■ Check that a household fuse has not blown, or that the...
Installation Instructions - Page 11

..., crawl spaces or garages. Vent extension piece, at least 3" (7.6 cm) of clearance between the top of the microwave oven and the rectangular to round transition piece so that have back draft dampers ■ using a rigid metal vent ■ using the most direct route by minimizing the length of the vent and number of the...
Installation Instructions - Page 12

... Panel Kit Number 8171336 8171337 8171338 8171339 99403 White Black Biscuit Stainless Steel Almond See your authorized dealer or service center. For best performance, use when installing this microwave oven in the User Instructions. Two 90° elbows = 20 ft (6.1 m) B. 1 wall cap = 40 ft (12.2 m) C. 1 rectangular to round transition piece = 5 ft (1.5 m) D. 2 ft (0.6 m) + 6 ft...
Dimension Guide - Page 1

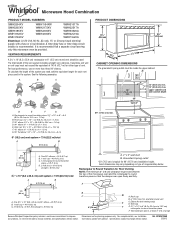
...circuit breaker is typical for each vent piece used . diameter round vent C. For complete details, see Installation our products, we reserve the right to change materials and specifications without notice. Two 90...minimum 3" (7.6 cm) clearance must exist between the top of the microwave oven and the rectangular to round transition piece F. Instructions packed with a fuse...
Warranty Information - Page 1

...acts of God, improper installation, installation not in accordance with electrical or plumbing codes, or use of consumables or cleaning products not approved by Whirlpool. 5. Damage resulting from warranty coverage. 3....provided by the customer. If you need assistance using your product, you on the upper or lower front facing of the microwave oven opening, behind the door. Service must be ...
Use & Care Guide - Page 1

... TROUBLESHOOTING, please visit our website at 1-800-253-1301. IMPORTANT SAFETY INSTRUCTIONS When using the microwave oven. ■ Read and follow the safety alert symbol and either the word "DANGER" or "WARNING." Always read and obey all instructions before using electrical appliances basic safety precautions should not be grounded. All safety messages will tell...
Use & Care Guide - Page 2

... container. ■ Oversized foods or oversized metal utensils should not be serviced only by anyone except properly qualified service personnel. 2 IMPORTANT SAFETY INSTRUCTIONS ■ Use the microwave oven only for its intended use as described in the microwave oven for a short time before removing the container. - Call an authorized service company for storage purposes. Do not...
Use & Care Guide - Page 3

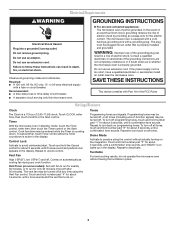
...) clock. To turn off after 30 minutes). Turntable For best cooking results, do not operate the microwave oven without actually turning on programming tones. Do not remove ground prong. Do not use an extension cord. Do not use of the FCC Rules. or 20-amp electrical supply with Part 18 of the grounding plug...
Use & Care Guide - Page 4

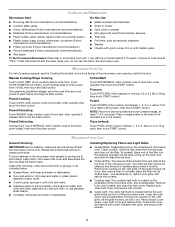
... some models): mild soap and water, then rinse with clean water and dry with soft cloth, or use the dish in microwave oven with metallic glaze ■ Wax paper To Test Cookware/Dinnerware: Place dish in the microwave oven. Remove two screws on the vent grille, tilt the grille forward, lift it toward the tab...
Use & Care Guide - Page 5

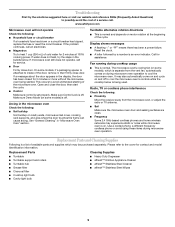
...Care" section. Display shows messages ■ A flashing ":" or "PF" means there has been a power failure. Use a corded phone, a different frequency cordless phone or avoid using these items during microwave oven operation to cool the microwave oven. Replacement Parts Cleaning Supplies ■ Turntable ■ Turntable support and rollers ■ Turntable hub ■ Grease filter ■...
Use & Care Guide - Page 6

... For assistance or service, call 1-800-253-1301. Repairs when your major appliance is used for other damage to the finish of your major appliance, unless such damage results from...SHORTEST PERIOD ALLOWED BY LAW. All rights reserved. ® Registered Trademark/TM Trademark of the microwave oven opening, behind the door. ITEMS EXCLUDED FROM WARRANTY This limited warranty does not cover: 1....

Whirlpool Knowledge Base Results

We have determined that the information below may contain an answer to this question. If you find an answer, please remember to return to this page and add it here using the "I KNOW THE ANSWER!" button above. It's that easy to earn points!

  • How do I change the final food temperature using my Temperature Probe after my microwave oven has started ?
    ... the final food temperature using my Temperature Probe after my microwave oven has started ? To change final food temperature after entering the new temperature, the oven will see the current set temperature for three seconds). How do I change the final food temperature using my Temperature Probe after my microwave oven has started? Re-enter desired temperature. You...
  • What is the Warm Hold on my SpeedCook microwave oven with convection and how do I use it?
    ... four stages total. What is the Warm Hold on my SpeedCook microwave oven with convection and how do I use (for the cycling stage may be reviewed at any of the manual controls. Touch Warm Hold control. During the countdown, warm time may be changed by reminder tones. Care Guide. Repeat steps 2 and 3 to program...
  • How do I clean the outside of my stainless steel upright freezer?
    ...clean with a nonabrasive sponge and mild detergent in the direction of the grain until it shines. Use a clean, dry towel to polish the surface and in the Order Review and Payment screen... Code F9A75Q4 in the direction of the grain. How do I clean my microwave oven exterior and door? Do not use soap-filled scouring pads, abrasive or harsh cleaners, any cleaning product containing chlorine...

Similar Questions

What Would Be The Newest Version With Same Size As This Microwave Oven
What Would Be The Newest Version With Same Size As This Microwave Oven (wmc50522as)
(Posted by chicity1992 5 months ago)
Vent And Hanging Bracket.
Does this microwave vent out the back or top? Also, dies it come with the wall hanging bracket?
(Posted by onerunning 8 years ago)
Model # Wmh31017ab-1 Microwave
Press cook time and start button and get error message "door open", but door is shut. microwave won'...
(Posted by thughes53403 9 years ago)
Ask a New Question
Use the box below to post a new question about this Whirlpool product .
Points & Prizes
  • You can earn points for nearly everything you do on HelpOwl.com
  • You can trade in those points for gift cards at leading retailers such as Amazon.com and Walmart
  • It's that simple!
See How it Works
Create a Free Account

Whirlpool Manuals

Find free Whirlpool WMH31017AB manuals and user guides available at ManualOwl.com. Try out our unique manual viewer allowing you to interact with manuals from directly within your browser!

Whirlpool Reviews

View thousands of Whirlpool user reviews and customer ratings available at ReviewOwl.com.

Contact Information

Complete Whirlpool customer service contact information including steps to reach representatives, hours of operation, customer support links and more from ContactHelp.com.

Scoreboard Ratings

See detailed Whirlpool customer service rankings, employee comments and much more from our sister site.

Whirlpool Recalls

Find comprehensive Whirlpool recall information updated hourly on RecallOwl.com.