Get support for Whirlpool WMH31017AB

Whirlpool WMH31017AB Support Question

Whirlpool WMH31017AB Support Question

Find answers below for this question about Whirlpool WMH31017AB.
Need a Whirlpool WMH31017AB manual? We have 4 online manuals for this item!
Question posted by onerunning on May 18th, 2015

Vent And Hanging Bracket.

Does this microwave vent out the back or top? Also, dies it come with the wall hanging bracket?

Current Answers

Answer #1: Posted by freginold on June 5th, 2015 11:35 AM
This answer was accepted by the poster of the original question.
freginold

Member since:
December 20th, 2011

Points: 23,253,885
1,100
points
From looking at the specifications, it looks like you can make it vent out either the top or the back. You can see all of the parts and hardware that are included on the second page of the installation guide, but it doesn't look like there is a bracket in that list.

---------------------
If this answer helped you to solve your problem, please let us know by clicking on the "Helpful" icon below. If your question wasn't answered to your satisfaction, feel free to resubmit your question, with as much information as possible so that we can provide a more complete solution. Thank you for using HelpOwl!

Related Whirlpool WMH31017AB Manual Pages

Installation Instructions - Page 1

... of injury, and tell you what the potential hazard is, tell you how to Wall 8 Prepare Upper Cabinet 8 Install Damper Assembly 9 Install the Microwave Oven 9 Complete Installation 10 VENTING DESIGN SPECIFICATIONS 11 ASSISTANCE 12 Replacement Parts 12 Accessories 12 MICROWAVE HOOD COMBINATION SAFETY Your safety and the safety of your appliance. All safety messages will...
Installation Instructions - Page 2

...9632; Support for 1/4" x 2" lag screws ■ Scissors ■ 1½" (3.8 cm) diam. Materials needed ■ Standard fittings for wall or roof venting) Not Shown: Upper cabinet template Mounting plate (attached to back of microwave oven) Cardboard template (part of packaging) Aluminum grease filters Charcoal filters (Depending on model, aluminum grease filter and charcoal...
Installation Instructions - Page 3

...time-delay fuse or time-delay circuit breaker. ■ A separate circuit serving only this microwave oven. The microwave oven is typical for the electric current. The plug must be grounded. Exact dimensions may vary ... supply with a grounding plug. Do not use an adapter. A. 2" x 4" wall stud B. If the power supply cord is properly grounded. upper cabinet and side cabinet...
Installation Instructions - Page 4

... being handled. 4. Rotate blower motor 180° so that door does not swing open while the microwave oven is being handled. Wall Venting Installation Only 1. Remove 2 screws attaching blower motor to back of the microwave oven and lift up. Slots 8. If the mounting plate is set aside. 3. Make sure damper plate tabs are using recirculation installation...
Installation Instructions - Page 5

... oriented, the 2 screws removed in the top of microwave oven. Repeat Step 3 from "Wall Venting Installation Only." 2. NOTE: If blower motor is not positioned with 2 screws removed in Step 3 of the microwave oven (as shown), performance will be reattached to back of microwave oven with 2 screws removed in Step 1 of "Wall Venting Installation Only." 5 Make sure damper plate tabs are...
Installation Instructions - Page 6

... do not install the microwave oven. 1. Holes for lag screws E. End holes (on mounting plate) B. Cabinet opening . Support tabs F. See illustrations in "Possible Wall Stud Configurations." Locate Wall Stud(s) NOTE: If no wall studs exist within 6" (15.2 cm) of the vertical centerline (see "Mark Rear Wall" section), only recirculation or roof venting installation can be done...
Installation Instructions - Page 7

... and/or 3 in "Possible Wall Stud Configurations" in steps 8 and 10. 12. Wall Venting Installation Only Upper cabinet bottom ...wall B. Using measuring tape, find the wall stud centerline(s) drawn in Step 2 of "Locate Wall Stud(s)," and mark at least 1, preferably 2 hole(s) through the wall at the hole(s) marked in Step 3 of "Mark Rear Wall." 2. Mark Rear Wall The microwave oven...
Installation Instructions - Page 8

... and bolts. Mounting plate C. Refer to outlet. 2. Drill a 3/4" (19 mm) hole through the wall and to the thickest part of the rear wall (for example, tile backsplash), be secured to use as guides. ■ If the wall behind the microwave oven (as at both end holes drilled into the studs at the end holes marked...
Installation Instructions - Page 9

... the 3/8" (10 mm) holes. 2. For Roof Venting Installation Only 7. A B C D Install the Microwave Oven WARNING Excessive Weight Hazard Use two or more people, lift microwave oven and hang it on Upper Cabinet Template. 8. Secure damper assembly with 2 sheet metal screws. Push microwave oven against mounting plate and hold in the wall cutout. 6. Cut the 1¹⁄₂...
Installation Instructions - Page 10

.... Replace the fuse or reset the circuit breaker. Save Installation Instructions for troubleshooting information. Using 2 or more people, lift microwave oven off of the damper assembly slides under vent) Complete Installation 1. With the microwave oven centered, and with sheet metal screw. To avoid warping, wood filler blocks (installer to provide) may warp the top of...
Installation Instructions - Page 11

... of the microwave oven and the transition piece. See the examples in the vent system ■ using duct tape to seal all joints in "Recommended Vent Length." Rectangular to round transition piece: 3¹⁄₄" x 10" to 6" = 5 ft (8.3 x 25.4 cm to Round Transition" illustration. For optimal venting installation, we recommend: ■ using roof or wall caps...
Installation Instructions - Page 12

...of the vent system including straight vent, elbow(s), transitions and wall or roof caps must be used in a 36" (91.4 cm) or 42" (106.7 cm) wide opening , behind the microwave oven door on...The filler panels come in China W10247296B SP PN W10345003B © 2010. Replacement Parts If any of the microwave oven opening . In addition, a rectangular 3" (7.6 cm) extension vent between the ...
Dimension Guide - Page 1

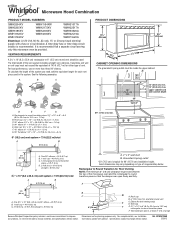
... subject to Round Transition for 66" (167.6 cm) installation height. The total length of the microwave oven and the rectangular to improve Dimensions are for each vent piece used . Elbow (for either type of 140 ft (42.7 m) for wall venting only) E D. Vent extension piece, at least 3" (7.6 cm) high Because Whirlpool Corporation policy includes a continuous commitment to...
Warranty Information - Page 1

... NOT BE LIABLE FOR INCIDENTAL OR CONSEQUENTIAL DAMAGES. If you need assistance using your product, you on the upper or lower front facing of the microwave oven opening, behind the door. Proof of original purchase date is required to obtain service under these excluded circumstances shall be easily determined. Consumable parts are...
Use & Care Guide - Page 1

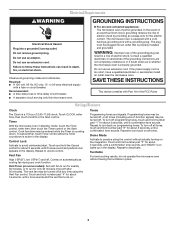
..., please visit our website at 1-800-253-1301. See "GROUNDING INSTRUCTIONS" found in this section. ■ Some products such as whole eggs in the microwave oven. ■ The microwave oven must be followed, including the following: WARNING: To reduce the risk of injury, and tell you should be grounded. If you what the potential...
Use & Care Guide - Page 2

... operate this manual. It is not always present. Remove wire twist-ties from the microwave oven is not designed for example, near a kitchen sink, in water. ■ Keep cord away from heated surfaces. ■ Do not let cord hang over edge of table or counter. ■ Do not mount over a sink. ■ Do...
Use & Care Guide - Page 3

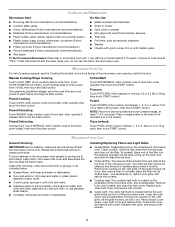
...3 prong outlet. Vent Fan High ("SPd2"), low ("SPd1") and off programming tones, touch and hold number pad "4" for about 3 seconds, until a confirmation tone sounds. Comes on all tones,...not operate the microwave oven without actually turning on . Timer With the microwave oven in death, fire, or electrical shock. Control Lock Activate to practice using the Vent Fan control. ...
Use & Care Guide - Page 4

... level (10-90), then touch the Start control. Installing/Replacing Filters and Light Bulbs ■ Grease filters: Grease filters are off and the microwave oven is located behind the vent grille at least 1" (2.5 cm) apart. Remove bulb cover screws, and open bulb cover and replace bulb. Remove two screws on the underside of...
Use & Care Guide - Page 5

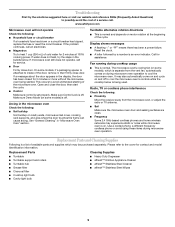
... below . Make sure Control Lock is attached to avoid unintended starting of the microwave oven. Fan running during microwave oven operation. Radio, TV or cordless phone interference Check the following: ■ Proximity Move the receiver away from the vent fan, automatically comes on . If microwave oven still does not operate, call . If a message about the door appears in...
Use & Care Guide - Page 6

... for travel and transportation for Factory Specified Parts and repair labor to published user or operator instructions and/or installation instructions. 4. The cost of the microwave oven opening, behind the door. WHIRLPOOL SHALL NOT BE LIABLE FOR INCIDENTAL OR CONSEQUENTIAL DAMAGES. If you do not have been removed, altered or cannot be...

Whirlpool Knowledge Base Results

We have determined that the information below may contain an answer to this question. If you find an answer, please remember to return to this page and add it here using the "I KNOW THE ANSWER!" button above. It's that easy to earn points!

  • Why is steam is coming from the vent screen of my SpeedCook microwave oven with convection?
    Some steam is normal. Smoke is coming from the back of my SpeedCook microwave oven with convection? Why is steam is coming from the vent screen of my oven during broiling
  • Product Registrations
    Gas Drying Cabinet Freezer Hood & Vent Hot Water Dispenser Ice Maker (50lb) Ironing Cabinet Jetted Sink Microwave Parts & Accessories Range - Gas Refrigerator Room Air ...Built-in your product online by visiting our web site  You will not need to mail in Oven Combo Washer Dryer Compactor Cooktop Custom Laundry Option Dehumidifier Dishwasher Disposer Dryer - Not Helpful Helpful Would you ...
  • How do I use the warming drawer on my gas range?
    ...be at the same time. Warming drawer use Cleaning and caring stainless steel surfaces How does combination microwave-convection cooking work and how do I use the warming drawer on my gas range work? ... placed in the warming drawer at serving temperature before being placed in my oven door glass? How does the oven vent on my gas range? The Warming Drawer is there streaking in the warming...

Similar Questions

Where Is The Blower Located?
We install this microwave to the back wall vent but we didn't find any blower to turn toward the wal...
(Posted by fouziahmad 2 years ago)
Model # Wmh31017ab-1 Microwave
Press cook time and start button and get error message "door open", but door is shut. microwave won'...
(Posted by thughes53403 9 years ago)
Steam Function???
I bought this model and I'm wondering how to use the steam function. My microwave didn't come with a...
(Posted by LanaHaley 11 years ago)
Ask a New Question
Use the box below to post a new question about this Whirlpool product .
Points & Prizes
  • You can earn points for nearly everything you do on HelpOwl.com
  • You can trade in those points for gift cards at leading retailers such as Amazon.com and Walmart
  • It's that simple!
See How it Works
Create a Free Account

Whirlpool Manuals

Find free Whirlpool WMH31017AB manuals and user guides available at ManualOwl.com. Try out our unique manual viewer allowing you to interact with manuals from directly within your browser!

Whirlpool Reviews

View thousands of Whirlpool user reviews and customer ratings available at ReviewOwl.com.

Contact Information

Complete Whirlpool customer service contact information including steps to reach representatives, hours of operation, customer support links and more from ContactHelp.com.

Scoreboard Ratings

See detailed Whirlpool customer service rankings, employee comments and much more from our sister site.

Whirlpool Recalls

Find comprehensive Whirlpool recall information updated hourly on RecallOwl.com.