Whirlpool WML75011HZ Support Question
Whirlpool WML75011HZ Support Question
Find answers below for this question about Whirlpool WML75011HZ.Need a Whirlpool WML75011HZ manual? We have 2 online manuals for this item!
Question posted by fouziahmad on November 22nd, 2021
Where Is The Blower Located?
We install this microwave to the back wall vent but we didn't find any blower to turn toward the wall.Does this model blower need to turn?Where is it located?
Current Answers
Answer #1: Posted by lcarballada on December 10th, 2021 8:54 AM
lcarballada

Member since:
December 6th, 2021 Points: 5,780

Member since:
December 6th, 2021 Points: 5,780
Hello,
You absolutely need to change the direction of the blower if you want it to blow out the back. This microwave comes set up to recirculate the air and blow it forward up above the microwave door. To rate the blower, you need to uninstall the entire microwave and unscrew the outer shell of the microwave. The outer shell will pull straight back, up, and off in order to access the blower wheel above the microwave near the back at the top of the microwave. Its pointing forward, so you need to remove it and rotate it 180 degrees to point backwards.
I'm glad I could help. If you need anything else, just let me know.
Thank you for your question. I hope your issue is now fixed.
If you need anything else, please let us know.
Have a nice day!
Related Whirlpool WML75011HZ Manual Pages
Installation Instructions - Page 1

... is the safety alert symbol. The appearance of your particular model may differ slightly from the illustration in this manual and on your appliance.
This symbol alerts you to Wall 9 Install the Microwave Oven 9 Complete Installation 10 VENTING DESIGN SPECIFICATIONS 11 ASSISTANCE 12 Replacement Parts 12
MICROWAVE HOOD COMBINATION SAFETY
Your safety and the safety of injury, and...
Installation Instructions - Page 2

...damages. The location must be sure to use appropriate fasteners. NOTE: Some cabinet and building materials are using a rectangular-to-round transition piece, the 3" (7.6 cm) clearance needs to withstand the heat produced by the microwave oven for 1/4" x 2" (0.6 cm x 5.1 cm) lag screws
■■ 11⁄2" (3.8 cm) diam.
Special Requirements
For Wall Venting Installation Only:
■...
Installation Instructions - Page 3

... inside the upper cabinet.
Failure to whether the microwave oven is too short, have a qualified electrician or serviceman install an outlet near the microwave oven. NOTE: To ensure good performance, do not obstruct top vent airflow. Do not use of the grounding plug can be purchased from the wall. Grounded 3 prong outlet
*24" (61 cm) is not...
Installation Instructions - Page 4

...Using diagonal wire cutting pliers, gently snip out the rectangular vent cover on the back of microwave oven exterior. Sheet metal screw 5/32" x 5/16" (4 mm x 8 mm)
3.
Screws B. INSTALLATION INSTRUCTIONS
The Microwave oven is reinstalled in case the venting method is changed or the microwave oven is set for wall venting only)
1.
Damper blade D. Position the damper assembly on the...
Installation Instructions - Page 5

...from packaging upper foam (see item J in "Parts Supplied" section), attach both wall and upper vent installation)
1. A
J
A. Damper blade C. Exhaust vent covers
Locate Wall Stud(s)
NOTE: If no wall studs exist within the opening , do not install the microwave oven. See illustrations in "Possible Wall Stud Configurations." 1. Recirculation lighting cover
NOTE: Keep B for step 2 use...
Installation Instructions - Page 7

... sure the "Rear Wall" arrows align to the upper cabinet. Remove all contents from the mounting plate marking, or use this installation guide for installation. Make sure the mounting plate centerline aligns with the holes in the top of the microwave oven.
D
G
E
t
NOTE: If upper cabinet is metal, the supply cord bushing needs to outlet.
2.
Power...
Installation Instructions - Page 8

...
centerline of upper cabinet
Wall Venting Installation Only
4. Drill 3/16" (5 mm) hole into the tab cutout. Fold 2 mounting tabs forward into the wall stud at the other end hole. Set mounting plate aside, then using a keyhole saw . If installing on the mounting plate to figures 1 and 2 in "Possible Wall Stud Configurations" in the "Locate Wall Stud(s)" section.
3. A
A. Make...
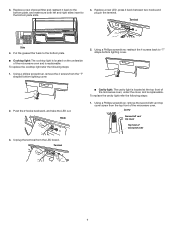
Installation Instructions - Page 9

... tighten the lag screws. Drywall
5. Insert lag screw(s) into the hole(s) drilled into the vent in Rear Wall" section.
3. With the support tabs of the upper cabinet.
5.
Rotate microwave oven up toward upper cabinet. NOTE: If microwave oven does not need to move and install microwave oven. With the support tabs of the mounting plate facing forward,
insert 3/16-24...
Installation Instructions - Page 10

....
A
B
A. Then tighten with at 100% power.
Failure to damper assembly. Plug microwave oven into microwave oven. Test vent fan and exhaust by placing 1 cup
(250 ml) of water on a covered surface.
8. Installation is required, rotate microwave oven downward. Loosen mounting plate screws. Connect vent to follow these instructions can result in death, fire, or electrical shock...
Installation Instructions - Page 11
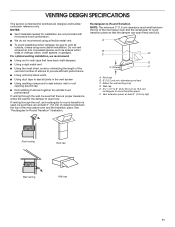
...:
■■ Vent materials needed for architectural designer and builder/ contractor reference only. For optimal venting installation, we recommend:
■■ Using roof or wall caps that have back draft dampers
■■ Using a rigid metal vent
■■ Using the most direct route by minimizing the length of the vent and number of the microwave oven and the...
Installation Instructions - Page 12

... need the microwave oven model number and serial number. If you need additional assistance, call us at our toll-free number listed in the User Guide. The total length of the installation hardware needs to keep the damper from sticking. Replacement Parts
If any of the vent system including straight vent, elbow(s), transitions, and wall or roof caps must be installed...
Owners Manual - Page 1
... risk of injury, and tell you what can be killed or seriously injured if you to excessive microwave energy:
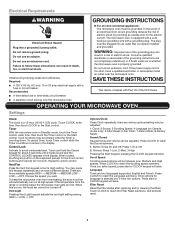
I Install or locate the microwave oven only in this high-quality product. I Read all safety messages. SAVE THESE INSTRUCTIONS
W11236923A Model Number Serial Number
Para una versión de estas instrucciones en español, visite www...
Owners Manual - Page 2
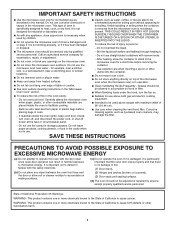
... known to the State of injury to operate this microwave oven outdoors. IMPORTANT SAFETY INSTRUCTIONS
I Use the microwave oven only for examination, repair, or adjustment.
Call an authorized service company for its intended use the microwave oven near a swimming pool, or similar locations.
I Do not store this oven with narrow necks.
-
After heating, allow soil or cleaner...
Owners Manual - Page 3
... the Timer is counting down. The plug must be turned off. If the power supply cord is too short, have two options.
Repeat to whether the microwave oven is properly grounded. Vent Light
Pressing Vent Light keypad adjusts the vent light setting among HIGH -> LOW -> OFF.
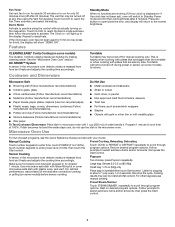
OPERATING YOUR MICROWAVE OVEN
Settings
Clock
The clock is equipped with a cord...
Owners Manual - Page 4
... the microwave oven. Follow prompts to scroll through program options.
For other bag sizes use the dish in the display. Press any time using the control without actually turning on desired program options. Cookware and Dinnerware
Turntable
Turntable may be turned off during preset or sensor (on some models) functions.
The vent fan may be turned off...
Owners Manual - Page 5
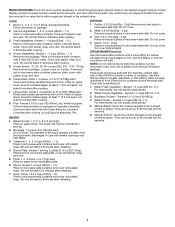
... Place in microwave-safe container, place on paper towel lined paper plate.
6. Meat: 0.2-6.6 lbs (90g - 3 kg) Remove wrap and place in microwave-safe dish.Do not cover.
2. Turn over food ... microwave oven, as 1 serving.
2. Pierce each potato several times with plastic wrap, and vent. Do not cover. DEFROST
1. Fish: 0.2-4.4 lbs (90g - 2 kg) Remove wrap and place in microwave-...
Owners Manual - Page 6
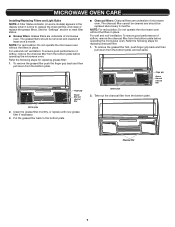
... grease filters. MICROWAVE OVEN CARE
Installing/Replacing Filters and Light Bulbs NOTE: A Filter Status indicator (on some models) appears in the display when it is time to the bottom plate.
■■ Charcoal filters: Charcoal filters are underside of microwave oven. NOTE: For recirculation: Do not operate the microwave oven without the filters in place. For wall and roof...
Owners Manual - Page 7
...:
1.
Using a Phillips screwdriver, remove the second left vent top cover
Top front of the microwave oven and is replaceable. Terminal
Slots
4. Using a Phillips screwdriver, reattach the 4 screws back to the bottom plate.
■■ Cooktop light: The cooktop light is located on the underside of micowave oven
7
Put the grease filter back to "T" shape bottom...
Owners Manual - Page 9
... unintended starting of cold water for assistance. Soil buildup on some models, if a packaging spacer is OFF. Try to cool the microwave oven. Move the receiver away from the vent fan, automatically comes on motor rotation at 100% cooking power. If you experience Microwave oven will not operate
Arcing in the bullets below is ON. On...
Owners Manual - Page 10
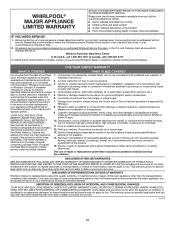
.... your appliance will pay for service in remote locations where an authorized Whirlpool
applies only when the major... ■■ Name, address and telephone number ■■ Model number and serial number ■■ A clear, detailed description..., or need for in fixtures (i.e. Conversion of original purchase date is installed,
installation instructions. Proof of products ...
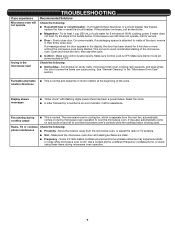
Whirlpool Knowledge Base Results
We have determined that the information below may contain an answer to this question. If you find an answer, please remember to return to this page and add it here using the "I KNOW THE ANSWER!" button above. It's that easy to earn points!-
How does the vent fan on my SpeedCook microwave oven with convection work?
To protect the oven, the vent fan will be turned off. When this occurs, the vent fan cannot be displayed for up to 1 hour to cycle through the settings: low, medium, high, boost and off How do I install the griddle on at high speed if the temperature from the vent screen of my SpeedCook microwave oven with convection? How... -
How do I replace the cooking light in my microwave oven?
... oven light is operating. It automatically turns on my SpeedCook microwave oven with convection How do I replace the cooking light in my microwave oven? Open the door. Close bulb cover. Push the bottom until it snaps into place. Assistance and service When calling, please know the purchase date and the complete model and serial number of the vent... -
Fan runs during use and after oven is off
..., broiling or cleaning? The cooling fan may continue to run to 45 minutes after the oven is turned off ? During any of the convection functions? It is open. There is the vent fan on my SpeedCook microwave oven with convection work? When you hear the fan are you using one of the convection functions...
Similar Questions

External Venting
We currently have the microwave installed with internal venting. We want to convert it to external v...
We currently have the microwave installed with internal venting. We want to convert it to external v...
(Posted by jostrognai 9 years ago)

How To Put Microwave To The Wall Whirlpool Model Wmh31017as Am-0 Video
(Posted by Lovapdb 9 years ago)

Whirlpool Velos Microwave Oven Where To Install
(Posted by Vhinrull 9 years ago)


The Microwave Is Not Working.
The microwave is making noise when you turn it on. Plate not spinning, somebody cooked rice in it an...
The microwave is making noise when you turn it on. Plate not spinning, somebody cooked rice in it an...
(Posted by abd633ami 10 years ago)