Get support for Whirlpool WMH1164XWS

Whirlpool WMH1164XWS Support Question

Whirlpool WMH1164XWS Support Question

Find answers below for this question about Whirlpool WMH1164XWS.
Need a Whirlpool WMH1164XWS manual? We have 4 online manuals for this item!
Question posted by sev511 on March 30th, 2013

No More Heat

everything is working but it is not heating anymore... Is it woth repairing ? 

Current Answers

There are currently no answers that have been posted for this question.
Be the first to post an answer!

Remember that you can earn up to 1,100 points for every answer you submit. The better the quality of your answer, the better chance it has to be accepted.

Related Whirlpool WMH1164XWS Manual Pages

Dimension Guide - Page 1

...right to round transition piece so that a separate circuit serving only this microwave oven be used in the system. Ref. Exact dimensions may vary depending on...packed with a fuse or circuit breaker. ® Microwave Hood Combination PRODUCT MODEL NUMBERS GMH3204XV GMH5205XV GMH6185XV WMH1162XV WMH1163XV WMH1164XW WMH2175XV WMH2205XV WMH3205XV Electrical: A 120-Volt, 60-Hz, AC-only, 15...
Installation Instructions - Page 1

... "Installation Requirements" section for use above electric or gas cooking products up to Wall 8 Prepare Upper Cabinet 8 Install Damper Assembly 9 Install the Microwave Oven 9 Complete Installation 10 VENTING DESIGN SPECIFICATIONS 11 ASSISTANCE 12 Replacement Parts 12 Accessories 12 MICROWAVE HOOD COMBINATION SAFETY Your safety and the safety of your appliance. Table of Contents...
Installation Instructions - Page 2

... and refer to make sure there is at least 6" (15.2 cm) of clearance between the wall and the microwave oven, so that the materials used will be sure to withstand the heat produced by the microwave oven for weight of installation. See "Installation Dimensions" illustration. ■ Minimum one 2" x 4" (50.8 x 101.6 mm) wood wall stud and...
Installation Instructions - Page 3

...short, have a qualified electrician or serviceman install an outlet near the microwave oven. or 20-amp electrical supply with a grounding plug. Consult a ...8311;⁄₈" (76.0 cm) GROUNDING INSTRUCTIONS ■ For all governing codes and ordinances. The microwave oven is properly grounded. WARNING: Improper use an extension cord. A B Electrical Requirements WARNING 66" (167...
Installation Instructions - Page 4

... if you are inserted into the microwave oven. Remove 2 screws attaching blower motor to the work surface, cover the work surface. 1. Secure damper plate with 2 screws removed in case the venting method is changed, or the microwave oven is attached to the back of microwave oven exterior. Lift blower motor out of the microwave oven and lift up. A Keep the...
Installation Instructions - Page 5

... 4 from "Wall Venting Installation Only." 4. Damper plate tabs D. Screws C. Slots 8. Secure damper plate with flat sides facing the back of the microwave oven (as shown), performance will be reattached to back of microwave oven with 2 screws removed in the top of "Wall Venting Installation Only." A 6. Securely tighten screws. Roof Venting Installation Only 1. Exhaust port...
Installation Instructions - Page 6

... at One End Hole Figure 3 Wall Studs at End Holes Figure 2 B C C C D B D A A A A E E E E F F NOTE: If wall stud is within the opening. Cabinet opening , do not install the microwave oven. 1. Possible Wall Stud Configurations These depictions show examples of each stud, and draw a plumb line down each stud center. End holes (on mounting plate) B. Using...
Installation Instructions - Page 7

... template is level. 6. See figures 1, 2 and/or 3 in "Possible Wall Stud Configurations" in one 1/4-20 x 3" round-head bolt with toggle nut; Mark Rear Wall The microwave oven must be on a level line with each be 14¹⁄₈" (35.9 cm) from the bottom edge of the upper cabinet, and must be...
Installation Instructions - Page 8

.... The template has trim lines to use as guides. ■ If the wall behind the microwave oven (as at the other hole drilled in Rear Wall" section. 7. If installing on the template...nuts or 1/4 x 2" lag screws. Installation for No Wall Studs at the end hole marked in Step 2 of the microwave oven. B A C A. 1/4-20 x 3" round-head bolt B. Start a toggle nut on the bolt from the rear wall...
Installation Instructions - Page 9

..., the supply cord bushing needs to be installed around the supply cord hole, as shown. Power supply cord bushing 6. IMPORTANT: The control side of the microwave oven is closed and taped shut. 3. A. Secure damper assembly with 2 sheet metal screws. NOTE: If venting through the power supply cord hole in back or other...
Installation Instructions - Page 10

... A. Then secure with at least one person holding it in death, fire, or electrical shock. 2. Sheet metal screw D. Do not use an adapter. Plug microwave oven into microwave oven. With the microwave oven centered, and with sheet metal screw. To avoid warping, wood filler blocks (installer to damper assembly. A 2. Damper plate Electrical Shock Hazard Plug into...
Installation Instructions - Page 11

...rectangular to Round Transition" illustration. Vent extension piece, at least 3" (7.6 cm) of clearance between the top of the microwave oven and the transition piece. A B C D E 3" (7.6 cm) F A. Roof cap B. 6" (15.2 cm)... The minimum 3" (7.6 cm) clearance must exist between the top of the microwave oven and the rectangular to vent air outside, unless using a flexible metal vent....
Installation Instructions - Page 12

... transitions and wall or roof caps must be used. The total length of the microwave oven. When you call us at our toll free number or visit our website listed in... dealer or service center. To calculate the length of the microwave oven opening . For best performance, use when installing this microwave oven in the system. ASSISTANCE Call your authorized dealer or service ...
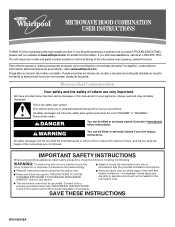
Owners Manual - Page 1

... reduce the chance of injury, and tell you should be heated in TROUBLESHOOTING, please visit our website at 1-800-253-1301. This symbol alerts you to properly grounded outlet. IMPORTANT SAFETY INSTRUCTIONS When using the microwave oven. ■ Read and follow instructions. ® MICROWAVE HOOD COMBINATION USER INSTRUCTIONS THANK YOU for purchasing this manual...
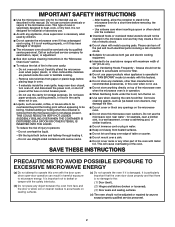
Owners Manual - Page 2

...on the microwave oven. ■ Do not store this oven when not in use. ■ Do not store anything directly on top of the microwave oven when the microwave oven is not working properly, or... the microwave oven is no damage to facilitate cooking. - Pieces can result in the "Microwave Oven Care" section. ■ To reduce the risk of injury to microwave energy. for examination, repair, or...
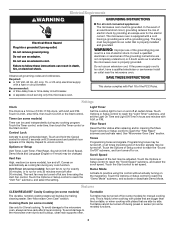
Owners Manual - Page 3

...Reset Reset the filter status after 30 minutes). Touch Options or Setup control to the microwave oven, always remove rack after 2-level cooking. Programming tones may be used independently during ...nonstick coating resists soil buildup by providing an escape wire for 2-level cooking. See "Microwave Oven Care" section. To avoid damage to reach the "Filter Reset" submenu and activate reset...
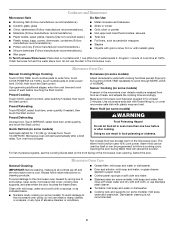
Owners Manual - Page 4

... silver trim or with metallic glaze To Test Cookware/Dinnerware: Place dish on turntable with 1 cup (250 mL) of water beside it heats, and adjusts the cooking time accordingly. Microwave oven will cancel the function. Warm Hold can be used by arcing due to enter power level (10-90), then touch the Start...
Owners Manual - Page 5

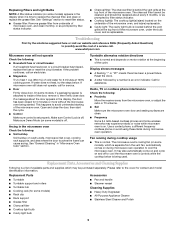
... (on . Replacement Parts, Accesssories and Cleaning Supplies Following is an error indicator. This happens to heat 1 cup (250 mL) of the microwave oven. Troubleshooting First try the steps below is time to cool the microwave oven. See "General Cleaning" in "Microwave Oven Care" section. Please refer to possibly avoid the cost of available parts and supplies which...
Owners Manual - Page 6

...microwave oven opening, behind the door. Damage resulting from accident, alteration, misuse, abuse, fire, flood, acts of God, improper installation, installation not in accordance with the product, Whirlpool Corporation or Whirlpool Canada LP (hereafter "Whirlpool") will pay for repairs... Canada, contact your complete model number ready. Repairs when your major appliance is used in the ...
Warranty - Page 1

... 7. Service must be borne by this warranty. 8. Expenses for travel and transportation for repairs. Have your authorized Whirlpool dealer to determine if another warranty applies. 9/07 For additional ...serial number on the label located on the upper or lower front facing of the microwave oven opening, behind the door. WHIRLPOOL CORPORATION MAJOR APPLIANCE WARRANTY LIMITED WARRANTY For one ...

Whirlpool Knowledge Base Results

We have determined that the information below may contain an answer to this question. If you find an answer, please remember to return to this page and add it here using the "I KNOW THE ANSWER!" button above. It's that easy to earn points!

  • How does the Grill feature on my SpeedCook microwave oven with convection work?
    ...hot Sizzle Pan directly on the grill rack. Do not place the Sizzle Pan on heat-sensitive surfaces. Place grill rack securely on Sizzle Pan, and place both hands, ... For best results, apply light amount of oven mitts is off How does the grill rack accessory work in use and after the cycle is in my SpeedCook microwave oven with convection work? When handling the hot Sizzle Pan, use...
  • How does my SpeedCook microwave oven with convection work, and what are some tips for using it?
    ... or Service" section below to reorder. How does my SpeedCook microwave oven with convection work , and what are some tips for cooking in oven. They will not melt in whole eggs may cause them to move to produce friction and heat to the food. Do not cook or reheat whole eggs inside the...
  • Fan runs during use and after oven is off
    ..., the cavity fan will run to turn off ? Do you have a convection oven? Fan/ turntable runs after the oven is the vent fan on my SpeedCook microwave oven with convection work? FAQs Knowledgebase search tips My fan is in use and after oven is open. It is normal for and how do I turn off while the...

Similar Questions

What Would Be The Newest Version With Same Size As This Microwave Oven
What Would Be The Newest Version With Same Size As This Microwave Oven (wmc50522as)
(Posted by chicity1992 6 months ago)
My Microwave Oven Wmh1163xvq-1 Turns On And Rotates,but No Heat.
When I try to heat a cup of coffee I use 70 sec on high. Hit start and it turns on and table turns, ...
(Posted by clomas 11 years ago)
My Microwave Stop Working,but Stil Has Power.
My microwave no heating.
(Posted by Nelsonmedina2003 12 years ago)
Ask a New Question
Use the box below to post a new question about this Whirlpool product .
Points & Prizes
  • You can earn points for nearly everything you do on HelpOwl.com
  • You can trade in those points for gift cards at leading retailers such as Amazon.com and Walmart
  • It's that simple!
See How it Works
Create a Free Account

Whirlpool Manuals

Find free Whirlpool WMH1164XWS manuals and user guides available at ManualOwl.com. Try out our unique manual viewer allowing you to interact with manuals from directly within your browser!

Whirlpool Reviews

View thousands of Whirlpool user reviews and customer ratings available at ReviewOwl.com.

Contact Information

Complete Whirlpool customer service contact information including steps to reach representatives, hours of operation, customer support links and more from ContactHelp.com.

Scoreboard Ratings

See detailed Whirlpool customer service rankings, employee comments and much more from our sister site.

Whirlpool Recalls

Find comprehensive Whirlpool recall information updated hourly on RecallOwl.com.