Get support for Whirlpool WMH1164XWS

Whirlpool WMH1164XWS Support Question

Whirlpool WMH1164XWS Support Question

Find answers below for this question about Whirlpool WMH1164XWS.
Need a Whirlpool WMH1164XWS manual? We have 4 online manuals for this item!
Question posted by runrun102 on July 12th, 2012

My Maid Scratched The Front Panel And Inside Of The Door With A Cleaning Pad.

does my model have the "cleancoat" finish and if it does, would that be on the inside of the door and front panel or just inside the "cavity"?  I'm wanting to use Scratch B Gone on the stainless steel but it says not to use it on any special coating that has been appllied to the stainless steel finish. Please advise.

Current Answers

There are currently no answers that have been posted for this question.
Be the first to post an answer!

Remember that you can earn up to 1,100 points for every answer you submit. The better the quality of your answer, the better chance it has to be accepted.

Related Whirlpool WMH1164XWS Manual Pages

Dimension Guide - Page 1

... rectangular to 15.2 cm = 1.5 m) B. Ref. ® Microwave Hood Combination PRODUCT MODEL NUMBERS GMH3204XV GMH5205XV GMH6185XV WMH1162XV WMH1163XV WMH1164XW WMH2175XV WMH2205XV WMH3205XV Electrical: A 120-Volt, 60-Hz, AC-only...that a separate circuit serving only this microwave oven be inside the upper cabinet. It is recommended. For best performance, use no more than three 90° ...
Installation Instructions - Page 1

... you what the potential hazard is, tell you to Wall 8 Prepare Upper Cabinet 8 Install Damper Assembly 9 Install the Microwave Oven 9 Complete Installation 10 VENTING DESIGN SPECIFICATIONS 11 ASSISTANCE 12 Replacement Parts 12 Accessories 12 MICROWAVE HOOD COMBINATION SAFETY Your safety and the safety of others . These words mean: DANGER You can be killed...
Installation Instructions - Page 2

... using a rectangular to round transition piece, the 3" (7.6 cm) clearance needs to make sure there is for weight of 150 lbs (68 kg), which includes microwave oven and items placed inside the microwave oven and upper cabinet. ■ Grounded electrical outlet inside the perforation is at least 6" (15.2 cm) of packaging) Aluminum grease filters Charcoal filters (Depending on model...
Installation Instructions - Page 3

Do not use an extension cord. Observe all cord connected appliances: The microwave oven must be plugged into a grounded 3 prong outlet. Grounded 3 prong outlet *30" (76.2 cm) is typical for the electric current. The plug must be inside the upper cabinet. A B Electrical Requirements WARNING 66" (167.6 cm) min. 30" (76.2 cm) min. 30" (76.2 cm...
Installation Instructions - Page 4

... Remove Mounting Plate Depending on your model, the mounting plate may be in the foam packaging, or it aside. 3. Tape the microwave oven door closed so that exhaust ports face the back of the microwave oven, remove it and set it may be used. Remove screws attaching damper plate to back of microwave oven. Reattach damper plate. Damper plate...
Installation Instructions - Page 5

... "Wall Venting Installation Only." 2. A B C A. Slots 8. Repeat Step 1 from "Wall Venting Installation Only." 4. Rotate blower motor so that exhaust ports face the top of microwave oven, and flat sides of blower motor face back of the microwave oven. A 6. Reattach damper plate. Roof Venting Installation Only 1. Secure damper plate with 2 screws removed in the top of...
Installation Instructions - Page 6

... of the wall stud(s) within the opening. Cabinet opening , do not install the microwave oven. 1. See illustrations in "Possible Wall Stud Configurations." Wall stud centerlines D. Locate Wall...Stud(s) NOTE: If no wall studs exist within the cabinet opening vertical centerline C. Using a stud finder, locate the edges of preferred installation configurations with the mounting plate...
Installation Instructions - Page 7

... hole(s) marked in "Locate Wall Stud(s)" section. 7 Mark Rear Wall The microwave oven must each other. Make sure the mounting plate is aligned to the centerline on both end holes marked in one 1/4-20 x 3" round-head bolt with toggle nuts; Using measuring tape, find the wall stud centerline(s) drawn in Step 3, and that...
Installation Instructions - Page 8

...stud(s) in Step 2 of mounting plate. 2. The template has trim lines to use as guides. ■ If the wall behind the microwave oven (as at both end holes of "Installation for the toggle nut to go ..."D" and "E" on bolts from upper cabinet. 3. Check alignment of mounting plate, making sure it fits inside the frame, against the rear wall so that fits over the 3/4" (19 mm) hole drilled in...
Installation Instructions - Page 9

... cabinet B. Install Damper Assembly (for two 1/4-20 x 3" bolts and washers used to secure the microwave oven to do not grip or use the door or door handle while the microwave oven is closed and taped shut. 3. Position the damper assembly on each 1/4-20 x 3" flat-head bolt and place inside upper cabinet near the 3/8" (10 mm) holes. 2. B A A. Power supply cord...
Installation Instructions - Page 10

... plate and retighten screws. 9. A 2. Check the operation of microwave oven by operating the vent fan. 5. Do not use an adapter. A B A. Installation is plugged into microwave oven. NOTE: If microwave oven does not need to be the same thickness as shown. Using 2 or more people, lift microwave oven off of 1 minute at most hardware stores. ■ Overtightening...
Installation Instructions - Page 11

... vent length. If venting through the wall, be sure that have back draft dampers ■ using a rigid metal vent ■ using the most direct route by minimizing the length of the vent and number of the microwave oven and the transition piece. Do not vent exhaust air into concealed spaces, such as spaces within...
Installation Instructions - Page 12

... the door. ■ Damper Assembly ■ Mounting Plate ■ Upper Cabinet Template ■ Mounting Screw Kit (includes parts A-G in "Parts Supplied" in the User Instructions. If you will need , add the equivalent lengths of available replacement parts. Each panel is a list of each vent piece used . Replacement Parts If any of the microwave oven opening...
Owners Manual - Page 1

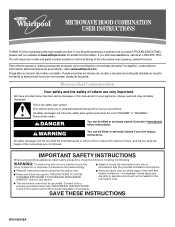
...instructions. IMPORTANT SAFETY INSTRUCTIONS When using the microwave oven. ■ Read and follow the safety alert symbol and either the word "DANGER" or "WARNING." ® MICROWAVE HOOD COMBINATION USER INSTRUCTIONS THANK YOU... not be heated in this manual and on the front facing of the microwave oven opening, behind the door. Puede encontrar su número de modelo y de serie en la ...
Owners Manual - Page 2

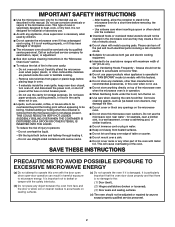
... not store any object between the oven front face and the door or allow the container to stand in the microwave oven for a short time before placing bags in harmful exposure to accumulate on . ■ Use care when cleaning the vent-hood filter. Do not use corrosive chemicals or vapors in the oven cavity: - Do not overcook food. Grease...
Owners Manual - Page 3

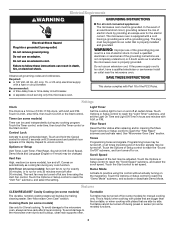
..." submenu, and activate or deactivate Demo Mode. Touch Options or Setup control to practice using the Vent Fan control. or P.M. Touch Options or Setup control to soil buildup, clean rack supports often. Touch the Start control to whether the microwave oven is a 12-hour (12:00-11:59) clock, with Part 18 of electric...
Owners Manual - Page 4

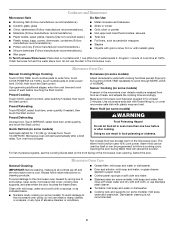
... and water, then rinse with clean water and dry with soft cloth, or use the dish in the microwave oven. Unwrap food. Hot cooked food can be used by arcing due to paper towel. ■ Control panel: sponge or soft cloth and water. ■ Stainless steel (on some models) Touch COOK TIME, touch number pads to enter time, touch COOK...
Owners Manual - Page 5

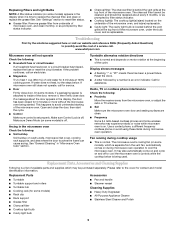
... microwave oven's cooling fan (on some models) ■ Rack clip ■ Rack support ■ Grease filter ■ Charcoal filter ■ Cooktop light bulb ■ Cavity light bulb ■ Pan and handle ■ Steamer vessel Cleaning Supplies ■ Heavy Duty Degreaser ■ All-Purpose Appliance Cleaner ■ Stainless Steel Cleaner and Polish 5 It may be replaced about the door...
Owners Manual - Page 6

...use of consumables or cleaning products not approved by Whirlpool. 5. Repairs when your major appliance is used in accordance with original model... assistance using your product, you on the upper or lower front facing of the microwave oven opening, behind the door. All...Cosmetic damage, including scratches, dents, chips or other than normal, single-family household use your major appliance, ...
Warranty - Page 1

...is used for other damage to the finish of your model number and serial number on the label located on how to use ...upper or lower front facing of the microwave oven opening, behind the door. This limited warranty is valid only in.... Cosmetic damage, including scratches, dents, chips or other than normal, single-family household use of consumables or cleaning products not approved by ...

Whirlpool Knowledge Base Results

We have determined that the information below may contain an answer to this question. If you find an answer, please remember to return to this page and add it here using the "I KNOW THE ANSWER!" button above. It's that easy to earn points!

  • What is the Child Lock on my SpeedCook microwave oven with convection, and how does it work?
    ... how does it work ? How do I use of the oven. What is the Cancel pad on the control panel. Oven door is the Child Lock on my SpeedCook microwave oven with convection, and how does it work ? What is locked and won't open Nothing operates on my microwave oven How do I clean my microwave oven? To deactivate Child Lock: Touch and hold...
  • How do I clean my microwave oven?
    ...: Abrasive cleansers, steel-wool pads, gritty wash cloths, some recycled paper towels. Use only mild, nonabrasive soaps or a mild detergent. Steam will soften the soil. To get rid of odors inside the oven, boil a cup of grain to five minutes in oven. How do I care and clean my stainless steel surfaces? On stainless steel models, rub in my microwave oven? This wax-based...
  • How do I clean my microwave oven exterior and door?
    ...error code - Tips for my stainless steel surfaces? Stainless Steel (on some models): To clean your stainless steel see, The area where the microwave oven door and frame touch when closed should be kept clean. Moisture visible inside oven door Cleaning and caring stainless steel surfaces How do I clean my microwave oven? When using mild, nonabrasive soaps and detergents...

Similar Questions

Ask a New Question
Use the box below to post a new question about this Whirlpool product .
Points & Prizes
  • You can earn points for nearly everything you do on HelpOwl.com
  • You can trade in those points for gift cards at leading retailers such as Amazon.com and Walmart
  • It's that simple!
See How it Works
Create a Free Account

Whirlpool Manuals

Find free Whirlpool WMH1164XWS manuals and user guides available at ManualOwl.com. Try out our unique manual viewer allowing you to interact with manuals from directly within your browser!

Whirlpool Reviews

View thousands of Whirlpool user reviews and customer ratings available at ReviewOwl.com.

Contact Information

Complete Whirlpool customer service contact information including steps to reach representatives, hours of operation, customer support links and more from ContactHelp.com.

Scoreboard Ratings

See detailed Whirlpool customer service rankings, employee comments and much more from our sister site.

Whirlpool Recalls

Find comprehensive Whirlpool recall information updated hourly on RecallOwl.com.