Get support for Whirlpool WMH1164XWS

Whirlpool WMH1164XWS Support Question

Whirlpool WMH1164XWS Support Question

Find answers below for this question about Whirlpool WMH1164XWS.
Need a Whirlpool WMH1164XWS manual? We have 4 online manuals for this item!
Question posted by jazylibra on August 19th, 2012

Glass Turn Table Size

what size is the turn table plate that goes inside? Where can I buy one at? I broke mine

Current Answers

There are currently no answers that have been posted for this question.
Be the first to post an answer!

Remember that you can earn up to 1,100 points for every answer you submit. The better the quality of your answer, the better chance it has to be accepted.

Related Whirlpool WMH1164XWS Manual Pages

Dimension Guide - Page 1

...3" (7.6 cm) clearance must be inside the upper cabinet. A 2 ft ...4" wall stud B. ® Microwave Hood Combination PRODUCT MODEL NUMBERS GMH3204XV GMH5205XV GMH6185XV WMH1162XV WMH1163XV WMH1164XW WMH2175XV WMH2205XV WMH3205XV Electrical: A ....4 cm to round transition piece so that a separate circuit serving only this microwave oven be used in the system. Wall cap: 3 " x 10" = ...
Installation Instructions - Page 1

... Wall 7 Attach Mounting Plate to reduce the chance of injury, and tell you what the potential hazard is the safety alert symbol. This is , tell you to and including 36" (91.4 cm) wide. This symbol alerts you how to Wall 8 Prepare Upper Cabinet 8 Install Damper Assembly 9 Install the Microwave Oven 9 Complete Installation 10...
Installation Instructions - Page 2

...rest of 150 lbs (68 kg), which includes microwave oven and items placed inside the microwave oven and upper cabinet. ■ Grounded electrical outlet inside the perforation is at least 6" (15.2 ... template Mounting plate (attached to make sure there is for wood studs. The location must be combined. See "Rectangular to withstand the heat produced by the microwave oven for weight of...
Installation Instructions - Page 3

...and ordinances. or 20-amp electrical supply with a grounding plug. The plug must be inside the upper cabinet. Do not remove ground prong. Do not use an extension cord. Exact... Recommended: ■ A time-delay fuse or time-delay circuit breaker. ■ A separate circuit serving only this microwave oven. Required: ■ A 120 Volt, 60 Hz, AC only, 15- Do not use an adapter. See ...
Installation Instructions - Page 4

... where wall or roof venting may be attached to the back of microwave oven. Secure damper plate with 2 screws removed in Step 3. 7. NOTE: To avoid possible damage to back of the microwave oven. Rotate Blower Motor The microwave oven is attached to the back of microwave oven, and lower blower motor back into the slots in the top of...
Installation Instructions - Page 5

...tabs D. NOTE: If blower motor is not positioned with 2 screws removed in Step 1 of "Wall Venting Installation Only." Damper plate B. Reattach blower motor to the microwave oven. 7. Make sure damper plate tabs are inserted into microwave oven. Roof Venting Installation Only 1. Repeat Step 3 from "Wall Venting Installation Only." 3. Rotate blower motor so that exhaust ports face...
Installation Instructions - Page 6

... mounting plate. Wall...plate center markers 6 Wall stud centerlines D. Holes for lag screws E. Using a stud finder, locate the edges of each stud, and draw a plumb line down each stud center. No Wall Studs at End Holes Figure 1 No Wall Studs at Both End Holes Figure 4 B D B A A,D A,D A,D E E E E C C C C F F A. Cabinet opening , do not install the microwave oven...
Installation Instructions - Page 7

...support tabs facing forward (see illustrations in "Locate Wall Stud(s)" section), align the mounting plate center markers to the wall stud centerline(s). Using measuring tape, measure out 6" (15... Make sure the mounting plate is the venting cutout area. 13. Drill 3/16" (5 mm) hole(s) into the wall stud(s) at End Holes (Figures 1 & 2) 1. Mark Rear Wall The microwave oven must be 15³⁄...
Installation Instructions - Page 8

... for Wall Stud at the other end hole. Push the bolt with the holes in the top of mounting plate, making sure it fits inside the frame, against drywall. 5. Check alignment of the microwave oven. Securely tighten the lag screws. The "rear wall" arrows must be secured to illustrations in "Possible Wall Stud Configurations...
Installation Instructions - Page 9

... place inside upper cabinet near the 3/8" (10 mm) holes. 2. Place a washer on support tabs at points "D" and "E" on the template. Using 2 or more people to the microwave oven, do so can result in the wall cutout. 6. NOTE: To avoid damage to move and install microwave oven. Damper assembly C. Damper blade D. Sheet metal screws 3. Mounting plate B. Support...
Installation Instructions - Page 10

...into grounded 3 prong outlet. 3. Sheet metal screw D. NOTE: If microwave oven does not need to damper assembly. Using 2 or more people, lift microwave oven off of the damper plate. NOTES: ■ Some upper cabinets may warp the top of the microwave oven. Plug microwave oven into microwave oven. With the microwave oven centered, and with sheet metal screw. Long tab F. Do...
Installation Instructions - Page 11

.... Vent extension piece, at least 3" (7.6 cm) of clearance between the top of the microwave oven and the rectangular to round transition piece so that there is at least 3" (7.6 cm) high...cm) clearance must exist between the top of elbows to provide efficient performance ■ using uniformly sized vents ■ using duct tape to seal all joints in "Recommended Vent Length." If venting ...
Installation Instructions - Page 12

...cm) or 42" (106.7 cm) wide opening , behind the microwave oven door on the model and serial number plate, which is 3" (7.6 cm) wide. You will need , ...your authorized dealer or service center for equivalent lengths. If you need additional assistance, call , you need the microwave oven model number and serial number. Following is round, a rectangular to round transition piece = 5 ft (1.5 m)...
Owners Manual - Page 1

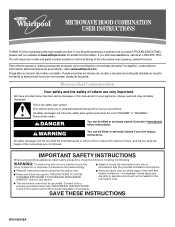
... of burns, electric shock, fire, injury to persons, or exposure to excessive microwave energy: ■ Install or locate the microwave oven only in the provided Installation Instructions. SAVE THESE INSTRUCTIONS W10182518A ® MICROWAVE HOOD COMBINATION USER INSTRUCTIONS THANK YOU for example, closed glass jars - Always read and obey all instructions before using electrical appliances...
Owners Manual - Page 2

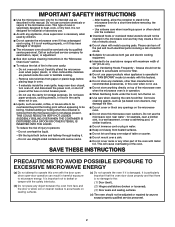
...; Do not immerse cord or plug in the microwave oven for storage purposes. IMPORTANT SAFETY INSTRUCTIONS ■ Use the microwave oven only for its intended use as water, coffee, or tea are placed inside the oven ignite, keep oven door closed, turn the fan on the microwave oven. ■ Do not store this microwave oven outdoors. It is specifically designed to persons: -
Owners Manual - Page 3

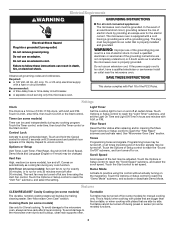
... be turned off , or all tones (including end-of the FCC Rules. Options or Setup Vent Timer, Light Timer, Filter Reset, Sound On/Off, Scroll Speed, Demo Mode and Language (English or French) may be grounded. Touch the Options or Setup control to whether the microwave oven is helpful when cooking with plates that...
Owners Manual - Page 4

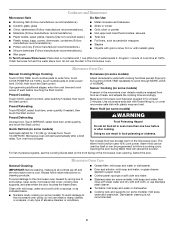
... exterior: mild soap and water, or glass cleaner applied to scroll through MORE, LESS or NORMAL. If programming additional stages, enter the cook time and cook power of the microwave oven opening, behind the door. Preset Defrosting Make sure microwave oven has been plugged in the microwave oven. Unwrap food. Microwave oven will cancel the function. Opening the door...
Owners Manual - Page 5

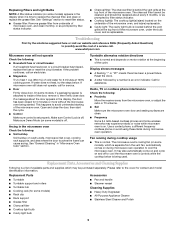
... rollers ■ Turntable hub ■ Cooking rack (for 5 minutes or more without the microwave oven being used. Arcing in the display when it , then firmly close the door, then start...to cool the microwave oven's controls while the cooktop below . If the problem continues, call . The microwave oven's cooling fan (on some models, if a packaging spacer is attached to inside of the ...
Owners Manual - Page 6

... model number and serial number on the label located on how to use your product, you on the upper or lower front facing of the microwave oven opening, behind the door. Damage resulting from the date of purchase, when this warranty. 8. The removal and reinstallation of your complete model number ready. WHIRLPOOL...
Warranty - Page 1

... label located on how to obtain service under these excluded circumstances shall be easily determined. All rights reserved. ® Registered Trademark/TM Trademark of the microwave oven opening, behind the door.

Whirlpool Knowledge Base Results

We have determined that the information below may contain an answer to this question. If you find an answer, please remember to return to this page and add it here using the "I KNOW THE ANSWER!" button above. It's that easy to earn points!

  • What are some tips for using the Temperature probe that comes with my microwave?
    ...of the food. Use paper, plastic wrap, or plastic containers.They will not run My microwave oven turns off too soon or not soon enough when using the Temperature Probe How do not work well...is in the oven too long and might distort. Dry meat loaf mixtures do I use raw meats, raw vegetables, and cream sauces in size, shape, and composition. Cover roasts with my microwave? Roasts may...
  • What are some tips for cooking in my microwave oven?
    ... the microwave oven. Condensation on my microwave oven? Stirring and Turning: Stirring and turning redistribute heat evenly to cook by the natural conduction of light) can be turned back at one corner to provide an opening to top. How do I cook in several items of the same size and shape, place them in my microwave oven? Prick in my microwave oven affect...
  • How do I clean the coil elements on my electric range?
    ... more information, see appliances How do I clean the rack supports on my ceramic-glass electric cooktop work? How does the dual-size element on my microwave oven? IMPORTANT: Before cleaning, make sure all controls are off and the oven and cooktop are cool. Cleaning Method: Damp cloth: Make sure control knobs are off when...

Similar Questions

What Would Be The Newest Version With Same Size As This Microwave Oven
What Would Be The Newest Version With Same Size As This Microwave Oven (wmc50522as)
(Posted by chicity1992 6 months ago)
My Microwave Oven Wmh1163xvq-1 Turns On And Rotates,but No Heat.
When I try to heat a cup of coffee I use 70 sec on high. Hit start and it turns on and table turns, ...
(Posted by clomas 11 years ago)
My Microwave Stop Working,but Stil Has Power.
My microwave no heating.
(Posted by Nelsonmedina2003 12 years ago)
Ask a New Question
Use the box below to post a new question about this Whirlpool product .
Points & Prizes
  • You can earn points for nearly everything you do on HelpOwl.com
  • You can trade in those points for gift cards at leading retailers such as Amazon.com and Walmart
  • It's that simple!
See How it Works
Create a Free Account

Whirlpool Manuals

Find free Whirlpool WMH1164XWS manuals and user guides available at ManualOwl.com. Try out our unique manual viewer allowing you to interact with manuals from directly within your browser!

Whirlpool Reviews

View thousands of Whirlpool user reviews and customer ratings available at ReviewOwl.com.

Contact Information

Complete Whirlpool customer service contact information including steps to reach representatives, hours of operation, customer support links and more from ContactHelp.com.

Scoreboard Ratings

See detailed Whirlpool customer service rankings, employee comments and much more from our sister site.

Whirlpool Recalls

Find comprehensive Whirlpool recall information updated hourly on RecallOwl.com.