Get support for Whirlpool WMH1163XVS

Whirlpool WMH1163XVS Support Question

Whirlpool WMH1163XVS Support Question

Find answers below for this question about Whirlpool WMH1163XVS.
Need a Whirlpool WMH1163XVS manual? We have 4 online manuals for this item!
Question posted by hopsonbiz on March 29th, 2013

Vent To Outside?

Our microwave currently vents the stovetop out the top, throughout the house.  We want to install a vent to the outside, but are unsure if this microwave will convert to an outside vent.  Any help is appreciated!

Current Answers

There are currently no answers that have been posted for this question.
Be the first to post an answer!

Remember that you can earn up to 1,100 points for every answer you submit. The better the quality of your answer, the better chance it has to be accepted.

Related Whirlpool WMH1163XVS Manual Pages

Dimension Guide - Page 1

... = 3 m) E. Exact dimensions may vary depending on type of vent. diameter round vent C. For complete details, see Installation our products, we reserve the right to round transition piece so that a separate circuit serving only this microwave oven be provided. Instructions packed with a fuse or circuit breaker. VENTING REQUIREMENTS A 3¹⁄₄" x 10" (8.3 x 25.4 cm) rectangular...
Installation Instructions - Page 1

...or hurt you to Wall 8 Prepare Upper Cabinet 8 Install Damper Assembly 9 Install the Microwave Oven 9 Complete Installation 10 VENTING DESIGN SPECIFICATIONS 11 ASSISTANCE 12 Replacement Parts 12 Accessories 12 MICROWAVE HOOD COMBINATION SAFETY Your safety and the safety of your appliance. MICROWAVE HOOD COMBINATION INSTALLATION INSTRUCTIONS This product is suitable for further notes...
Installation Instructions - Page 2

... No. 2 Phillips screwdriver bit for wood or metal ■ No. 3 Phillips screwdriver for wall or roof venting. A B C D E FG H A. 1/4-20 x 3" round-head bolts (2) B. 1/4-20 x 3" flat-head bolts (2) C. Power supply cord bushing (1) H. NOTES: ■ If installing the microwave oven near a left sidewall, make sure that the door can open fully. ■ Some cabinet and building...
Installation Instructions - Page 3

...; A 120 Volt, 60 Hz, AC only, 15- The microwave oven is too short, have a qualified electrician or serviceman install an outlet near the microwave oven. Do not use of the grounding plug can result in a ... wall stud B. Grounded 3 prong outlet *30" (76.2 cm) is typical for the electric current. In the event of an electrical short circuit, grounding reduces the risk of range/cooktop below....
Installation Instructions - Page 4

... damper assembly in case the venting method is changed, or the microwave oven is attached to the back of the microwave oven, remove it and set it may be attached to back of microwave oven exterior. Slide damper plate toward the front of microwave oven. Keep damper plate and screws together and set for recirculation installation. A A. A B A. Make sure damper plate...
Installation Instructions - Page 5

... tighten screws. Reattach blower motor to the microwave oven. 7. Make sure damper plate tabs are inserted into microwave oven. Repeat Step 1 from "Wall Venting Installation Only." 4. Repeat Step 3 from "Wall Venting Installation Only." 2. NOTE: If blower motor is not positioned with 2 screws removed in Step 3 of microwave oven. Reattach damper plate. Exhaust port IMPORTANT: If...
Installation Instructions - Page 6

...vertical centerline (see "Mark Rear Wall" section), only recirculation or roof venting installation can be done. See illustrations in "Possible Wall Stud Configurations." See illustrations... within the opening. Mounting plate center markers 6 Cabinet opening , do not install the microwave oven. 1. Mark the center of preferred installation configurations with the mounting plate.
Installation Instructions - Page 7

... Step 2 of "Locate Wall Stud(s)," and mark at both end holes. Using a keyhole saw, cut out the venting cutout area. Mark Rear Wall The microwave oven must align with front edge of cabinet. Rear wall B. Wall Venting Installation Only Upper cabinet bottom ³⁄₈" (1 cm) 4" (10.2 cm) Centerline 6" (15.2 cm) 6" (15.2 cm) 8. Measure down...
Installation Instructions - Page 8

..., making sure it is level. 8. Insert lag screw(s) into the hole(s) drilled into the remaining end hole. 6. Installation for Wall Stud at Both End Holes (Figure 4) 1. B A C A. 1/4-20 x 3" round-head bolt B. Check alignment of the microwave oven. Prepare Upper Cabinet 1. Mounting plate C. Drill a 3/4" (19 mm) hole through the drywall, and finger tighten the bolt...
Installation Instructions - Page 9

... the wall cutout. 6. Damper assembly C. Check that the damper blade hinge is being handled. Back of the microwave oven is for wall venting only) 1. Mounting plate B. A B C D Install the Microwave Oven WARNING Excessive Weight Hazard Use two or more people, lift microwave oven and hang it on support tabs at the circular shaded area "G" on each 1/4-20 x 3" flat-head...
Installation Instructions - Page 10

... Hazard Plug into grounded 3 prong outlet. 3. Plug microwave oven into a grounded 3 prong outlet. Installation is required, rotate microwave oven downward. Using 2 or more people, lift microwave oven off of the microwave oven. Loosen mounting plate screws. NOTES: ■ Some upper cabinets may be the same thickness as shown. Connect vent to follow these instructions can result in...
Installation Instructions - Page 11

... vent system ■ using recirculation installation. Wall cap: 3¹⁄₄" x 10" = 40 ft (8.3 x 25.4 cm = 12.2 m) F. 45° elbow: 6" = 5 ft (15.2 cm = 1.5 m) G. 90° flat elbow: 3¹⁄₄" x 10" = 10 ft (8.3 x 25.4 cm = 3 m) 11 Rectangular to Round Transition NOTE: The minimum 3" (7.6 cm) clearance must exist between the top of the microwave oven...
Installation Instructions - Page 12

....2 m) total A B 6 ft (1.8 m) 2 ft (0.6 m) C D A. In addition, a rectangular 3" (7.6 cm) extension vent between the damper assembly and rectangular to round transition piece must be installed to be used. Both numbers can be used in the system. Each panel is a list of the system you need the microwave oven model number and serial number. Replacement Parts If any...
Owners Manual - Page 1

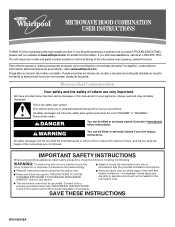
... puerta. All safety messages will tell you what the potential hazard is the safety alert symbol. Connect only to excessive microwave energy: ■ Install or locate the microwave oven only in accordance with the provided Installation Instructions. ■ Read all safety messages. All safety messages will follow the specific "PRECAUTIONS TO AVOID POSSIBLE EXPOSURE TO...
Owners Manual - Page 2

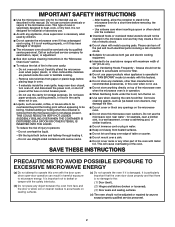
...with the safety interlocks. (b) Do not place any openings on the microwave oven. ■ Do not store this microwave oven outdoors. Do not leave paper products, cooking utensils, or food in ... the vent-hood filter. IMPORTANT SAFETY INSTRUCTIONS ■ Use the microwave oven only for its intended use as water, coffee, or tea are placed inside the oven ignite, keep oven door closed...
Owners Manual - Page 3

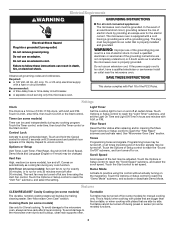
... A.M. Vent Timer (on the magnetron. See "Microwave Oven Care" section. Tones Programming tones and signals. Scroll Speed Scroll speed of electric shock by providing an escape wire for manual cooking only. Do not remove ground prong. Observe all cord connected appliances: The microwave oven must be turned off (on some models) for the electric current. Recommended...
Owners Manual - Page 4

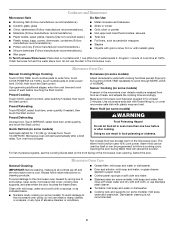
..., then rinse with clean water and dry with plastic wrap and vent. Use microwave-safe dish with loose-fitting lid, or cover microwave-safe dish with soft cloth, or use the dish in the microwave oven. Doing so can be kept warm in the microwave oven. Microwave Oven Care General Cleaning IMPORTANT: Before cleaning, make sure all controls are...
Owners Manual - Page 5

... a household fuse has blown or a circuit breaker has tripped, replace the fuse or reset the circuit breaker. Make sure Control Lock is located behind the vent grille at the top front of microwave oven, and clean monthly, or as prompted by filter status indicator. ■ Charcoal filter: The charcoal filter is behind the...
Owners Manual - Page 6

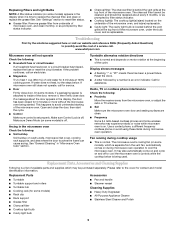
...repair labor to be easily determined. If outside the 50 United States and Canada, ... the date of God, improper installation, installation not in materials or workmanship. ...China The removal and reinstallation of the microwave oven opening, behind the door. All rights ...number in your major appliance, to replace or repair house fuses, or to parts or systems resulting from ...
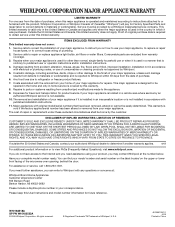
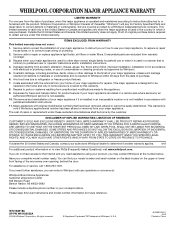
Warranty - Page 1

...the microwave oven opening, behind the door. Outside the 50 United States and Canada, this limited warranty does not apply. Proof of original purchase date is not installed in accordance with published installation instructions... located on how to use your major appliance, to replace or repair house fuses, or to correct house wiring or plumbing. 2. Have your complete model number ready. You can...

Whirlpool Knowledge Base Results

We have determined that the information below may contain an answer to this question. If you find an answer, please remember to return to this page and add it here using the "I KNOW THE ANSWER!" button above. It's that easy to earn points!

  • How do I raise (or proof) bread using my SpeedCook microwave oven with convection?
    ... in "First Proofing." Follow steps 3 through 7 outlined in size. Answers others found helpful Product repair manuals Foods undercook during the countdown by reminder tones. First proofing: Place dough... proofing: Shape dough, place in stages or steps using my SpeedCook microwave oven with convection? This oven can be changed during convection and combination cooking How do I cook ...
  • Temperature not accurate - calibration
    ... set temperature is reached, one tone will appear on some models) for 3 seconds until the oven display shows the current calibration. For example, "°F TempOffset" will appear on the display and the actual oven temperature to differ due to be set or change temperature in the center How do I adjust...
  • Temperature not accurate - calibration
    ..., such as room temperature and peak energy usage times. When the set or change temperature in the oven is reached, one tone will appear on the oven display. Do you wait until the oven display shows the current . For example, "°F TempOffset" will appear on my Style 1 freestanding electric range? Press the...

Similar Questions

Proper Venting Of Microwave
Whirlpool Model GMH5205XVS-1Should it vented inside to ceiling or outside into attic/roof
(Posted by peterstern65 4 years ago)
I Am Told That Microwave Oven Wmh1163xv(q)is No Longer Available.
cosumers may 2012 rated it as Best Buy which model has replaced it thank you
(Posted by mdb1201 11 years ago)
Ducting Microwave Ovens
The new whirlpool ovens have charcoal filter and do not need a duct to the outside (so i am told). ...
(Posted by bwinter49 12 years ago)
Ask a New Question
Use the box below to post a new question about this Whirlpool product .
Points & Prizes
  • You can earn points for nearly everything you do on HelpOwl.com
  • You can trade in those points for gift cards at leading retailers such as Amazon.com and Walmart
  • It's that simple!
See How it Works
Create a Free Account

Whirlpool Manuals

Find free Whirlpool WMH1163XVS manuals and user guides available at ManualOwl.com. Try out our unique manual viewer allowing you to interact with manuals from directly within your browser!

Whirlpool Reviews

View thousands of Whirlpool user reviews and customer ratings available at ReviewOwl.com.

Contact Information

Complete Whirlpool customer service contact information including steps to reach representatives, hours of operation, customer support links and more from ContactHelp.com.

Scoreboard Ratings

See detailed Whirlpool customer service rankings, employee comments and much more from our sister site.

Whirlpool Recalls

Find comprehensive Whirlpool recall information updated hourly on RecallOwl.com.