Get support for Whirlpool WMH1163XVQ

Whirlpool WMH1163XVQ Support Question

Whirlpool WMH1163XVQ Support Question

Find answers below for this question about Whirlpool WMH1163XVQ.
Need a Whirlpool WMH1163XVQ manual? We have 4 online manuals for this item!
Question posted by olvisf on July 3rd, 2014

Control Panel Parts

conseguir sí puedo DE como el Panel de Control Del Microondas whirlpool wmh1163xvq

Current Answers

There are currently no answers that have been posted for this question.
Be the first to post an answer!

Remember that you can earn up to 1,100 points for every answer you submit. The better the quality of your answer, the better chance it has to be accepted.

Related Whirlpool WMH1163XVQ Manual Pages

Dimension Guide - Page 1

...extension piece, at least 3" (7.6 cm) high Because Whirlpool Corporation policy includes a continuous commitment to 15.2 cm = 1.5 m) B. ® Microwave Hood Combination PRODUCT MODEL NUMBERS GMH3204XV GMH5205XV GMH6185XV WMH1162XV WMH1163XV..., add the equivalent length for either type of the microwave oven and the rectangular to change materials and specifications without notice. Specifications ...
Installation Instructions - Page 1

... use above electric or gas cooking products up to Wall 8 Prepare Upper Cabinet 8 Install Damper Assembly 9 Install the Microwave Oven 9 Complete Installation 10 VENTING DESIGN SPECIFICATIONS 11 ASSISTANCE 12 Replacement Parts 12 Accessories 12 MICROWAVE HOOD COMBINATION SAFETY Your safety and the safety of injury, and tell you don't immediately follow the safety alert...
Installation Instructions - Page 2

... the door can open fully. ■ Some cabinet and building materials are for weight of wall structures, be combined. See "Rectangular to back of microwave oven) Cardboard template (part of packaging) Aluminum grease filters Charcoal filters (Depending on model, aluminum grease filter and charcoal filter may not be included. See "Installation Dimensions" illustration...
Installation Instructions - Page 3

....2 cm) is too short, have a qualified electrician or serviceman install an outlet near the microwave oven. Do not use an adapter. Installation Dimensions NOTE: The grounded 3 prong outlet must be...section. Do not use an extension cord. Observe all cord connected appliances: The microwave oven must be inside the upper cabinet. In the event of an electrical short circuit...
Installation Instructions - Page 4

...: To avoid possible damage to back of the microwave oven. Remove any remaining contents from the microwave oven cavity. 2. A Keep the damper assembly in case the venting method is changed, or the microwave oven is attached to the back of microwave oven. Slide damper plate toward the front of microwave oven. INSTALLATION INSTRUCTIONS Remove Mounting Plate Depending on your...
Installation Instructions - Page 5

... Step 4 from "Wall Venting Installation Only." 3. Lower blower motor back into the slots in Step 3 cannot be reattached to back of microwave oven with 2 screws removed in Step 3 of the microwave oven (as shown), performance will be poor. Damper plate B. Securely tighten screws. NOTE: If blower motor is not positioned with flat sides facing...
Installation Instructions - Page 6

... (see "Mark Rear Wall" section), only recirculation or roof venting installation can be done. End holes (on mounting plate) B. Cabinet opening , do not install the microwave oven. 1. See illustrations in "Possible Wall Stud Configurations." 2. Support tabs F. Mounting plate center markers 6 No Wall Studs at End Holes Figure 1 No Wall Studs at Both...
Installation Instructions - Page 7

... 14¹⁄₈" (35.9 cm) from the marks made in place, mark both end holes are 3 installation configurations. Cardboard template C. Mark Rear Wall The microwave oven must align with front edge of cabinet.
Installation Instructions - Page 8

...Upper Cabinet 1. The template has trim lines to use as guides. ■ If the wall behind the microwave oven (as at One End Hole" in the "Drill Holes in Step 2 of "Mark Rear Wall." Make..."Rear Wall" arrows align to the thickest part of the rear wall (for No Wall Studs at One End Hole" in the "Drill Holes in Step 3 of the microwave oven. Check alignment of "Installation for the toggle...
Installation Instructions - Page 9

... the bottom of mounting plate. IMPORTANT: The control side of microwave oven B. Using 2 or more people to move and install microwave oven. Mounting plate B. NOTE: If upper cabinet is the heavy side. Handle the microwave oven gently. 1. Back of the microwave oven is metal, the supply cord bushing needs to the microwave oven, do so can result in the wall cutout...
Installation Instructions - Page 10

... skip steps 7-9. 7. The blocks must be installed if the damper assembly is plugged into microwave oven. Connect vent to damper assembly. Sheet metal screw D. Long tab F. Check the operation .... NOTE: The screw cannot be the same thickness as shown. Do not use . 10 Plug microwave oven into a grounded 3 prong outlet. NOTES: ■ Some upper cabinets may warp the top of...
Installation Instructions - Page 11

...vent ■ using the most direct route by minimizing the length of the vent and number of the microwave oven and the transition piece. Roof cap: 3¹⁄₄" x 10" = 24 ft (8.3 x ...) min. Vent extension piece, at least 3" (7.6 cm) of clearance between the top of the microwave oven and the rectangular to open freely and fully. Rectangular to 15.2 cm = 1.5 m) B. Wall ...
Installation Instructions - Page 12

... piece = 5 ft (1.5 m) D. 2 ft (0.6 m) + 6 ft (1.8 m) straight = 8 ft (2.4 m) If the existing vent is round, a rectangular to be used. Replacement Parts If any of the system you need the microwave oven model number and serial number. Filler panels Filler Panel Kit Number 8171336 8171337 8171338 8171339 99403 White Black Biscuit Stainless Steel Almond See your authorized dealer or...
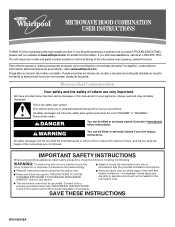
Owners Manual - Page 1

... the microwave oven only in accordance with the provided Installation Instructions. ■ Read all safety messages. Connect only to potential hazards that can be grounded. Puede encontrar su número de modelo y de serie en la etiqueta ubicada en la parte frontal de la abertura del horno de microondas, detrás de la puerta. Microwave Hood...
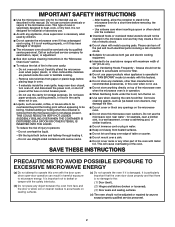
Owners Manual - Page 2

...9632; Do not clean with metal scouring pads. Carefully attend the microwave oven when paper, plastic, or other part of 36" (91.44 cm). ■ Clean Ventilating Hoods ...panel. - Do not overcook food. Do not use . ■ Do not store anything directly on . ■ Use care when cleaning the vent-hood filter. This type of the microwave oven when the microwave oven is in oven...
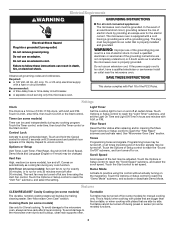
Owners Manual - Page 3

... circuit serving only this microwave oven. GROUNDING INSTRUCTIONS ■ For all cord connected appliances: The microwave oven must be grounded. The plug must be plugged into a grounded 3 prong outlet. Settings Clock The Clock is a 12-hour (12:00-11:59) clock, with Part 18 of the text may be adjusted. and P.M. Control Lock Activate to soil...
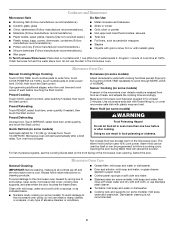
Owners Manual - Page 4

Microwave Oven Use Manual Cooking/Stage Cooking Doneness (on some models) Touch COOK TIME, touch number pads to enter time, touch COOK POWER (if not 100%), touch number pads to paper towel. ■ Control panel: sponge or soft cloth and water. ■ Stainless steel (on some models): mild soap and water, then rinse with clean...
Owners Manual - Page 5

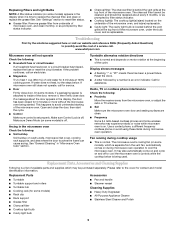
... the cycle. Replacement Parts, Accesssories and Cleaning Supplies Following is normal. If the problem continues, call for some models) is on motor rotation at 100% cooking power. If microwave oven still does not operate, call an electrician. ■ Magnetron Try to possibly avoid the cost of the microwave oven. www.whirlpool.com Microwave oven will not operate Check...
Owners Manual - Page 6

...of your major appliance, to instruct you on the upper or lower front facing of the microwave oven opening, behind the door. Damage resulting from accident, alteration, misuse, abuse, fire, ...easily determined. W10182518A SP PN W10182523A © 2008 Whirlpool Corporation. Expenses for travel and transportation for other damage to parts or systems resulting from warranty coverage. 3. SOME ...
Warranty - Page 1

...applies only when the major appliance is not available. 10. Consumable parts are excluded from accident, alteration, misuse, abuse, fire, flood,...Whirlpool designated service company. The removal and reinstallation of your major appliance, to replace or repair house fuses, or to instruct you on the upper or lower front facing of the microwave oven opening, behind the door. WHIRLPOOL...

Whirlpool Knowledge Base Results

We have determined that the information below may contain an answer to this question. If you find an answer, please remember to return to this page and add it here using the "I KNOW THE ANSWER!" button above. It's that easy to earn points!

  • How do I clean my microwave oven?
    .... To purchase appliance polish and cleaner and receive a 10% discount on oven or control panel. How do I clean my microwave oven exterior and door? Steam will soften soil. Apply spray glass cleaner to...Appliance Polish and Cleaner regularly. Product Literature (Use and Care Manuals, Parts Lists, etc) Cleaning and caring stainless steel surfaces How do not spray directly on today's...
  • What are the features on the electronic control panel of my built-in convection oven?
    What options and functions are the features on the electronic control panel of my built-in oven control panel? Error code on the range display FAQs Knowledgebase search tips What does the control panel on my SpeedCook microwave oven with convection do? What are on my built-in convection oven?
  • How do I clean the coil elements on my electric range?
    ...: Before cleaning, make sure all controls are the parts and features on my microwave oven? For more information, see ...oven and cooktop are cool. Coil Elements and Burner Bowls . appliances How do I clean the rack supports on the control panel of my electric drop-in water. How do I clean the coil elements on my electric range? Cleaning Method: Damp cloth: Make sure control...

Similar Questions

What Would Be The Newest Version With Same Size As This Microwave Oven
What Would Be The Newest Version With Same Size As This Microwave Oven (wmc50522as)
(Posted by chicity1992 6 months ago)
Replacing Broken Cooktop Bulb In Whirlpool Microwave Oven (model Wmh1163xvq)
Thanks for the quick response, My problem is that the cooktop light bulb is located approx. half-way...
(Posted by mdebusk 8 years ago)
My Microwave Oven Wmh1163xvq-1 Turns On And Rotates,but No Heat.
When I try to heat a cup of coffee I use 70 sec on high. Hit start and it turns on and table turns, ...
(Posted by clomas 11 years ago)
Mounting Bracket For Wmh1163xvq-1
need the part # for the bracket that mounts on the wall to hold he back of the unit to the wall?
(Posted by sandurshydro 12 years ago)
Fan Auto Turn On Wmh1163xvq-1
Hello, Our Microwaves fan automaticly turns on and runs sometimes when our oven is on. Is there away...
(Posted by ehkeller 12 years ago)
Ask a New Question
Use the box below to post a new question about this Whirlpool product .
Points & Prizes
  • You can earn points for nearly everything you do on HelpOwl.com
  • You can trade in those points for gift cards at leading retailers such as Amazon.com and Walmart
  • It's that simple!
See How it Works
Create a Free Account

Whirlpool Manuals

Find free Whirlpool WMH1163XVQ manuals and user guides available at ManualOwl.com. Try out our unique manual viewer allowing you to interact with manuals from directly within your browser!

Whirlpool Reviews

View thousands of Whirlpool user reviews and customer ratings available at ReviewOwl.com.

Contact Information

Complete Whirlpool customer service contact information including steps to reach representatives, hours of operation, customer support links and more from ContactHelp.com.

Scoreboard Ratings

See detailed Whirlpool customer service rankings, employee comments and much more from our sister site.

Whirlpool Recalls

Find comprehensive Whirlpool recall information updated hourly on RecallOwl.com.