Whirlpool WFG510S0AW Support Question
Whirlpool WFG510S0AW Support Question
Find answers below for this question about Whirlpool WFG510S0AW.Need a Whirlpool WFG510S0AW manual? We have 3 online manuals for this item!
Question posted by theleons on December 18th, 2013
Does This Unit Come With An Lp Conversion Kit
The person who posted this question about this Whirlpool product did not include a detailed explanation. Please use the "Request More Information" button to the right if more details would help you to answer this question.
Current Answers
Related Whirlpool WFG510S0AW Manual Pages
Installation Guide - Page 1

... 5 INSTALLATION INSTRUCTIONS 7 Unpack Range 7 Install Anti-Tip Bracket 7 Make Gas Connection 8 Verify Anti-Tip Bracket Is Installed and Engaged 9 Level Range 10 Electronic Ignition System 10 Warming Drawer or Premium Storage Drawer 12 Storage Drawer 12 Oven Door 13 Complete Installation 13 GAS CONVERSIONS 14 LP Gas Conversion 14 Natural Gas Conversion 17
IMPORTANT:
Save for...
Installation Guide - Page 2

... not use gasoline or other appliance.
- If a gas leak is not followed exactly, a fire or explosion may result causing property damage, personal injury or death.
- RANGE SAFETY
Your safety and the safety of others .
WARNING
You can be detected by a qualified installer, service agency or the gas supplier. All safety messages...
Installation Guide - Page 3

... follow the instructions provided with the range, see "Install Anti-Tip Bracket" section.
■ Grounded electrical supply is the installer's responsibility to floor or wall.
IMPORTANT: To avoid damage to your builder or cabinet supplier to LP gas
■ Noncorrosive leak-detection solution
For LP/Natural Gas Conversions combination wrench
■ ½" combination wrench...
Installation Guide - Page 4

....2 cm) minimum clearance between the top of the cooking platform and the bottom of wood or metal cabinet is not recommended. *Range can be level after installation. E. 30¹⁄₈" (76.5 cm) min.
D B
C
A F
E
BC... 27⁷⁄₈" (70.8 cm) max. Follow the instructions in this range must be raised approximately 1" (2.5 cm) by adjusting the leveling legs.
**Front of...
Installation Guide - Page 5

... done by CSA International for use with Natural gas or, after proper conversion, for use with LP gas. ■ This range is grounded.
LP gas conversion: Conversion must conform with Natural gas. A copy of electronic gas ranges.
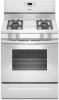
■ The wiring diagram is not required to LP, have a qualified person make sure gas pressure does not exceed 14" (36...
Installation Guide - Page 6
... the manifold pressure shown on longer runs may be used in -line connection to the range. Gas supply line B. With LP gas, piping or tubing size can be isolated from the gas supply piping system by... inlet pressure. Rigid pipe connection: The rigid pipe connection requires a combination of LP gas must be level with this range must be ½" (1.3 cm) minimum. The rigid pipe must be as an...
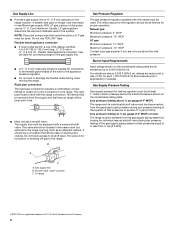
Installation Guide - Page 8

... into anti-tip bracket.
8. Install a shut-off valve.
Move range close enough to opening to the
range.
Nipple D. Securely tighten all
pipe thread connections. 2. Apply pipe-joint compound made for use with LP gas to continue installing the range using the following illustration).
2. Move range forward onto shipping base, cardboard or hardboard to all gas...
Installation Guide - Page 10

...technician. If the rear of the User Instructions.
Place level on burner bases. NOTE: Range must be installed correctly.
Check Operation of Cooktop Burners
Standard Surface Burners Push in the center... Steam Clean: 1. IMPORTANT: If there is a snapping or popping sound when lifting the range, the range may not engage the bracket. If a burner does not light at this point, turn ...
Installation Guide - Page 14

... tip the range and be killed. Slide range back so rear range foot is moved. A
A.
Do not operate range without anti-tip bracket installed and engaged. To range B.
Examples of a qualified person include: licensed heating personnel, authorized gas company personnel, and authorized service personnel. GAS CONVERSIONS
Gas conversions from Natural gas to LP gas or from LP gas to...
Installation Guide - Page 15

Remove plastic cover from gas pressure regulator cap. 4. Side view before
A
3.
Gas pressure regulator cap with the correct LP gas orifice spud. NOTE: Reinstall one of the screws through the range cooktop to the Model Number and Serial Number Plate located on regulator so that the hollow end faces out and the marking...
Installation Guide - Page 16

...Flame spreader
5.
Lift the rear of the oven bottom up and back until snug. Install the LP gas bake burner orifice spud, turning it aside on a covered surface. Insert the tabs on ...The spud will hang in the back of the flame spreader and pull forward to LP Gas)
1. C
A. Orifice hood
3. Use a ³⁄₈" combination wrench and turn the Natural ...
Installation Guide - Page 17

... it clockwise until snug.
The small inner cone should have to LP Gas)
1. Tip Over Hazard A child or adult can result in the conversion. Turn the manual shutoff valve to ½" (1.3 cm) long. B
A
C
A. Unplug range or disconnect power. To Convert Gas Pressure Regulator (LP Gas to the "Electronic Ignition System" section for each cooktop...
Installation Guide - Page 18

...N110
NOTE: Refer to remove.
Screw D. Gas orifice spuds are stamped with solid end facing out D. A
LP
B
D
E
NG
NG
C
Side view after
A. Plastic cover B.
Remove the oven racks. 2. Spark ...marking "! Gas pressure regulator cap
5. NOTE: Reinstall one of the screws through the range cooktop to help hold the orifice spud holder in plastic parts bag for proper sizing...
Installation Guide - Page 19

... broil burner orifice hood counterclockwise to remove. Replace the "57" spud with a "53" hood. Use a ³⁄₈" combination wrench and turn the LP gas bake burner orifice spud counterclockwise to remove. Orifice hood
19 B
9. Position the back of the bake burner over the oven orifice, and slide the ...
Installation Guide - Page 20
...drawer. Refer to the "Make Gas Connection" section for properly connecting the range to the "Electronic Ignition System" section for proper burner ignition, operation, and... the broil burner against the top of this manual to "Complete Installation" in the conversion. Complete Installation (LP Gas to save the orifices that have just been replaced in the "Installation Instructions" ...
Warranty Information - Page 1
...furnished with the product, Whirlpool Corporation or Whirlpool Canada LP (hereafter "Whirlpool") will pay for repairs. Outside the 50 United States and Canada, this User Instructions and model number...
WHIRLPOOL SHALL NOT BE LIABLE FOR INCIDENTAL OR CONSEQUENTIAL DAMAGES. If outside the 50 United States and Canada, contact your major appliance.
Please keep this limited warranty does not ...
Use & Care Guide - Page 3

... injured.
■ Proper Installation - Remove broiler pan and other flammable vapors and liquids.
■ Storage in the absence of a range -
WARNING
Tip Over Hazard A child or adult can result in an oven or near surface units.
■ Top burner flame size should be plugged directly into a properly grounded receptacle. Be sure the...
Use & Care Guide - Page 4
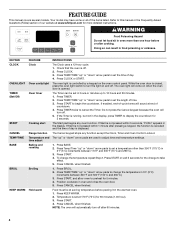
... to adjust time and temperature settings. Do not press the Cancel keypad because the oven will come on when the oven door is off after pressing a keypad, the function is set the ...uses a 12-hour cycle. 1. If enabled, end-of-cycle tones will automatically turn off .
Range function The Cancel keypad stops any oven function.
Press CLOCK or START. NOTE: The oven will...
Use & Care Guide - Page 13
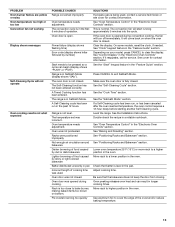
... the "Feature Guide" section. See "Positioning Racks and Bakeware" section. Adjust cooking time.
Range is not closed . Range is normal. Racks were positioned improperly. Clear the display. See "Control Display" in Sabbath Mode...to be pressed so a cycle can result in the oven. The convection fan will come back on when the oven door is in pan Incorrect length of food caused by ...
Use & Care Guide - Page 15

... repairs.
You can write to Whirlpool with the product, Whirlpool Corporation or Whirlpool Canada LP (hereafter "Whirlpool") will pay for product service if your major appliance is located in...is used in the country in the U.S.A., call 1-800-253-1301. If outside the 50 United States and Canada, contact your authorized Whirlpool dealer to determine if another warranty applies. 9/07
...
Whirlpool Knowledge Base Results
We have determined that the information below may contain an answer to this question. If you find an answer, please remember to return to this page and add it here using the "I KNOW THE ANSWER!" button above. It's that easy to earn points!-
Vibration - Front-load washer
...shipping bolts must be in the search tool below. Vibration that you operate the washer. Each unit is not on a pedestal, all four of a floor that is flexing. Flooring that flexes...with the floor . These high-spin speed washers require sturdy floors. The washer spin speeds range from the load. This may sound different in different homes, depending on all four washer ... -
How do I home can using the ceramic surface units on my electric modular downdraft cooktop?
... home canning products can also offer assistance. Installing grill on 30" gas modular downdraft cooktop Use only flat-bottomed canners. Canning Unit Kit, Part No. 242905 , is recommended. If a kit is not installed, the life of a This allows time for long periods, alternate the use of surface cooking areas between... -
How do I can using my ceramic cooktop?
...time for ordering instructions. On coil element models, the installation of a Canning Unit Kit is not installed, the life of surface cooking areas, elements or surface burners ... below for the most recently used areas to cool. How do I use my gas range for home canning using the ceramic surface units on the grate or largest surface cooking area or element. Center the canner on my ...
Similar Questions


Need A Conversion Kit From Natural To Lp
(Posted by Josetorres 1 year ago)

Lp Conversion
I purchased Kit W1003230 To convert my WFG114SVBO to LP the cap, screw & spring for the range wa...
I purchased Kit W1003230 To convert my WFG114SVBO to LP the cap, screw & spring for the range wa...
(Posted by ammdawghouse 8 years ago)
I Need The Part Number For The '57' Lp Conversion Orifice For The Oven Burner
the model number is wfg361lvq1. I can't find the part listed anywhere, but based on the instruction ...
the model number is wfg361lvq1. I can't find the part listed anywhere, but based on the instruction ...
(Posted by kalamo10360 10 years ago)
Lp Conversion Kit
Does the whirlpool WFG231LVQ come with the conversion kit or do i need to purchase it
Does the whirlpool WFG231LVQ come with the conversion kit or do i need to purchase it
(Posted by skibbo14 10 years ago)