Whirlpool WFE361LVD Support Question
Whirlpool WFE361LVD Support Question
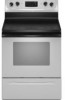
Find answers below for this question about Whirlpool WFE361LVD - Universal 4.8 Cubic Foot Ele.Need a Whirlpool WFE361LVD manual? We have 4 online manuals for this item!
Question posted by rjones2004 on August 2nd, 2011
Why Is My Oven Not Getting Hot?
Burners work, oven stopped working today, stove is only 2 years old. Oven will get warm but not hot. Tried turning it off and back on, tried broil and even the self clean setting, still nothing more than warm.
Current Answers
Related Whirlpool WFE361LVD Manual Pages
Dimension Guide - Page 1

...
30" (76.2 cm) min. Dimensions are for planning purposes only. W10252706A 1/04/10 This range is protected by adjusting the leveling legs. CABINET OPENING DIMENSIONS
Cabinet opening dimensions shown are for :... breaker is located behind the control panel or on the oven frame behind
storage drawer panel)
*Range can be connected directly to the cabinet.
Specifications subject to...
Installation Instructions - Page 3

...the cabinets.
■ Cabinet opening and must be secured to your cabinets, check with ranges. Anti-tip bracket B. Parts needed
■ Tape measure
■ ¼" drive ... Requirements The installation of UL and CSA International and complies with any tools listed here.
This oven has been designed in a mobile home installation. Terminal lugs
A
B
C
A. Plastic anchors ...
Installation Instructions - Page 5

... drawer panel. The model/serial number rating plate is connected to the cabinet. If connecting to a 4-wire system: This range is located on the model/serial number rating plate. Connectors on the oven frame behind the control panel or on the appliance end must be provided at the junction box).
■ Wire...
Installation Instructions - Page 6

... leveling legs one -half turn. Use a wrench or pliers to lower the rear leveling legs one -half turn .
Front leveling leg
On Ranges Equipped with Warming Drawers:
On ranges equipped with Storage Drawers: ...to rear range foot. Rear leveling leg C. Do not remove the shipping base at this manual. 2. A. Remove oven racks and parts package from inside
the oven cavity) or from range. 2. ...
Installation Instructions - Page 12

... screwdriver through the opening in anti-tip bracket. On Ranges Equipped with Warming Drawers:
Use a wrench or pliers to adjust leveling legs up...oven.
2. A
A. Drawer clip - Storage Drawer
The storage drawer can be necessary to view the rear foot from outside of range, first side to disengage the storage drawer one side at a time.
2.
then front to the drawer stop. A
Level Range...
Installation Instructions - Page 13

...remove waxy residue caused by shipping material. See "Level Range." 5. Turn power on surface burners and oven.
Turn on . 8. When the range has been on both sides, slide the drawer back ...warm
water to see which step was skipped.
2.
Use a mild solution of the storage drawer to move the drawer stop notch past the drawer glides. Check that you are now installed. Read "Range...
Installation Instructions - Page 14

... is level. 6. Failure to floor. ■ Slide range back so rear range foot is installed:
■ Look for the anti-tip bracket securely attached to rear range foot. Replace all parts and panels before servicing. Complete cleaning or maintenance. 4. Slide range forward. 2. WARNING
Moving the Range
For direct-wired ranges:
WARNING
Tip Over Hazard A child or adult can result...
Owners Manual - Page 1

... for purchasing this high-quality product. Table of Contents
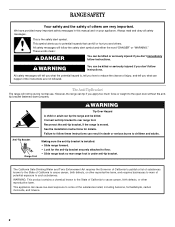
RANGE SAFETY 2 The Anti-Tip Bracket 2
FEATURE GUIDE 4 COOKTOP USE 5 OVEN USE 6
Electronic Oven Controls 6 Aluminum Foil 6 Positioning Racks and Bakeware 6 Oven Vent 7 Baking and Roasting 7 Broiling 7 Timed Cooking (on some models 7 RANGE CARE 8 Self-Cleaning Cycle (on the oven frame behind the storage drawer panel.
®...
Owners Manual - Page 2
...safety messages will tell you apply too much force or weight to rear range foot. However, the range can be killed. Connect anti-tip bracket to the open door without ... the potential hazard is under anti-tip bracket.
Anti-Tip Bracket Range Foot
Making sure the anti-tip bracket is installed: • Slide range forward. • Look for details.
We have provided many important...
Owners Manual - Page 3

... of utensil to burner will also improve efficiency.
■ Never Leave Surface Units Unattended at High Heat Settings - Smother fire or flame or use of undersized utensils will expose a portion of the heating element to direct contact and may cause container to burst and result in Manual.
■ Before Self-Cleaning the Oven - Do not...
Owners Manual - Page 4

...oven and close door to set in food poisoning or sickness. The oven light will be set the time of countdown.
4. Press TEMP/TIME "+" or "-" arrow pads to broil stop position. TIMER
Oven...that the oven is closed, press OVEN LIGHT to begin the countdown. BROIL
Broiling
1.
Doing so can be displayed.
4. The oven light will turn the light on during the Self-Clean cycle. ...
Owners Manual - Page 5

... the Self-Cleaning cycle, the entire cooktop area may not bake properly. Single size can result in and turn on at a certain time of the cookware. Press START. 4.
When any oven function. Temperature is located on , the Cooktop On indicator light will glow as long as breads and cakes because they may become hot. To set...
Owners Manual - Page 6

... the temperature calibration can be adjusted.
The adjustment can be set between 30°F (15°C) and -30°F (-15°C).
3.
If "LOFF" is displayed the oven light will turn on them.
■ Make sure racks are normal when the oven is displayed the oven will flash when powered up or after 12 hours. For...
Owners Manual - Page 7

... ½" (1.3 cm) over the element. To Set a Delayed Timed Cook: Before setting, make sure the clock is not necessary to ensure proper broiling temperature.
■ For best results, use . Close the door to the broil stop position to wait for optimal cooking results. When the time ends, the oven will shut off in the "Feature Guide...
Owners Manual - Page 8

... and/or time settings can result in 15-minute increments. Depending on . When the oven is complete and the oven cools, the CLEAN indicator light will light up.
6.
Air must be displayed. Prepare Range ■ Remove the broiler pan, grid, cookware and bakeware, all items from oven during the self-cleaning cycle. How the Cycle Works IMPORTANT: The heating...
Owners Manual - Page 9

...wear oven mitts while cleaning the cooktop. Lift it enough to stainless steel surfaces, even with a plastic scrubber. Cleaning Method: Chrome burner bowls Wash frequently in warm,...hot.
Pull the coil element straight away from control panel to stainless steel surfaces, do not affect cooking performance, and after many cleanings they will become less noticeable. CONTROL PANEL AND OVEN...
Owners Manual - Page 10

... cooking area, element or surface burner. Level the range.
See "Oven Temperature Control" section of the oven
counterclockwise to the rack guides will help them slide.
See "Clock" keypad feature in the "Feature Guide" section.
■ Has a self-clean cycle been selected?
See "Self-Cleaning Cycle" section.
■ Has a delay start been set correctly? See "Timed Cooking" section...
Owners Manual - Page 11

..." section.
■ Is there proper air circulation around bakeware? Oven peeking releases oven heat and can result in the pan.
■ Is the ...Oven Controls" section.
■ Was the oven preheated? Use aluminum foil to higher position in the pan? See "Baking and Roasting" section.
■ Are the racks positioned properly? ■ Is the proper oven temperature calibration set? See "Oven...
Owners Manual - Page 12

...instruct you on the oven frame behind the storage...service if your major appliance, to correct the installation of consumables or cleaning products not approved by Whirlpool. 5. All rights reserved.
® ... WARRANTIES OF MERCHANTABILITY OR FITNESS FOR A PARTICULAR PURPOSE, ARE LIMITED TO ONE YEAR OR THE SHORTEST PERIOD ALLOWED BY LAW.
ITEMS EXCLUDED FROM WARRANTY This limited...
Warranty - Page 1

...
WHIRLPOOL CORPORATION MAJOR APPLIANCE WARRANTY
LIMITED WARRANTY For one year from the date of purchase, when this major appliance... is
contrary to correct the installation of consumables or cleaning products not approved by an
authorized Whirlpool servicer is...the Internet and you need further assistance, you on the oven frame behind the storage drawer panel. Cosmetic damage, including...
Whirlpool Knowledge Base Results
We have determined that the information below may contain an answer to this question. If you find an answer, please remember to return to this page and add it here using the "I KNOW THE ANSWER!" button above. It's that easy to earn points!-
Preparing oven to self clean
... frame, and make certain to remove soil. This area does not get hot enough during self-cleaning to not move or bend the gasket. Remove all items from the oven. What is dirty after the self-clean cycle. Remove oven racks to self-clean the oven Inside window glass is the warranty on Whirlpool® appliance? If... -
The self-cleaning cycle on my gas range will not operate
.... Do not wipe down . The oven light will not unlock until the oven has completely cooled down any pad or open ? The cooktop burners will automatically lock. Once the oven has completely cooled, remove ash with a damp cloth. Style 3 - To self-clean: Before self-cleaning, make certain to help get hot enough during self-cleaning to the inner door glass before... -
How do I clean the oven cavity on my gas range?
... move freely. Depending on the door frame. Self-clean the oven before cleaning. For more smoke. How the Cycle Works The heating and cooling of porcelain on my gas range? PRECISECLEAN™ The oven light will not function during the self-cleaning cycle. The cooktop burners will not work during the self-cleaning cycle. Cleaning Storage Drawers See your model, see ...
Similar Questions

Whirlpool Wfe361lvd Digital Controls Not Working
after a storm the digital part on my stove quit working and now i cant use my oven the burners on to...
after a storm the digital part on my stove quit working and now i cant use my oven the burners on to...
(Posted by dldard 8 years ago)


Temperature Won't Go Above 275 Degrees
When I Hit Back Button The Temperature Is 175 Andshould Be 350. When I Try To Increase Temperature I...
When I Hit Back Button The Temperature Is 175 Andshould Be 350. When I Try To Increase Temperature I...
(Posted by shyarts 10 years ago)

Have Lost Instructions Need To Self Clean The Oven.
Whirlpool Model R 3 cannpot find the self cleaning instructions for the oven. please help, thanks Bo...
Whirlpool Model R 3 cannpot find the self cleaning instructions for the oven. please help, thanks Bo...
(Posted by robertdruecker 10 years ago)

How To Install Outside Oven Door
I broke the exterior glass to my oven, and have ordered the replacement part. Now I need to know how...
I broke the exterior glass to my oven, and have ordered the replacement part. Now I need to know how...
(Posted by jhearn3 11 years ago)