Get support for Whirlpool RF114PXST

Whirlpool RF114PXST Support Question

Whirlpool RF114PXST Support Question

Find answers below for this question about Whirlpool RF114PXST.
Need a Whirlpool RF114PXST manual? We have 4 online manuals for this item!
Question posted by Jprince97090 on October 21st, 2015

8 Minute Timer..how To Turn Off

i want to disable the 8 minute timer that comes on at bake. The manual says press timer off but i do not have that option.

Current Answers

Answer #1: Posted by TechSupport101 on October 21st, 2015 8:00 AM
TechSupport101

Member since:
May 24th, 2013

Points: 12,171,305
100
points
Hi. If the manual is not found very comprensive, I suggest you avail a personalized assistance from here http://www.whirlpool.com/contact-us/ preferably over a Live Chat.

Answer #2: Posted by Odin on October 21st, 2015 8:06 AM
Odin

Member since:
April 10th, 2010

Points: 41,236,700
100
points
There are several related models that use the same manual. On your model you may not be able to disable that function. To resolve the issue for sure, you'll have to phone Whirlpool. See the contact information here: https://www.contacthelp.com/Whirlpool/customer-service


Hope this is useful. Please don't forget to click the Accept This Answer button if you do accept it. My aim is to provide reliable helpful answers, not just a lot of them. See https://www.helpowl.com/profile/Odin.

Related Whirlpool RF114PXST Manual Pages

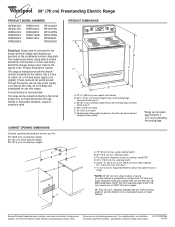
Dimension Guide - Page 1

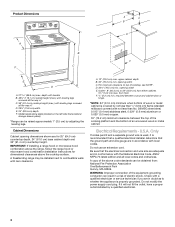
... cord rated at 250 volts, 40 or 50 amps and investigated for use with ranges. For minimum clearance to top of cooktop, see Installation Instructions packed with the neutral...⁷⁄₈" (75.9 cm) width E. 25" (63.5 cm) depth F. For complete details, see NOTE*. This range is recommended. A C B D E F A. 13" (33.0 cm) max. Dimensions are for planning purposes only. A...
Installation Instructions - Page 1

... TEMPLATE 15 IMPORTANT: Save for local electrical inspector's use. Only 4 INSTALLATION INSTRUCTIONS 6 Unpack Range 6 Install Anti-Tip Bracket 6 Electrical Connection - INSTALLATION INSTRUCTIONS 30" (76 CM) FREESTANDING ELECTRIC RANGES Table of Contents RANGE SAFETY 2 INSTALLATION REQUIREMENTS 3 Tools and Parts 3 Location Requirements 3 Electrical Requirements - U.S.A. W10252706B...
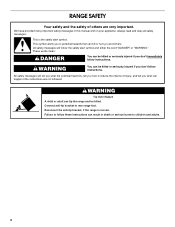
Installation Instructions - Page 2

...Over Hazard A child or adult can be killed. WARNING You can tip the range and be killed or seriously injured if you don't follow the safety alert symbol... "DANGER" or "WARNING." Reconnect the anti-tip bracket, if the range is moved. RANGE SAFETY Your safety and the safety of injury, and tell you what ...range foot. Connect anti-tip bracket to potential hazards that can result in this...
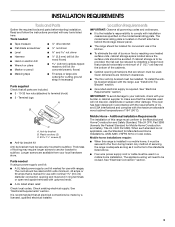
Installation Instructions - Page 3

.... ■ A UL listed strain relief. Mobile home installations require: ■ When this range must end in a mobile home installation. Anti-tip bracket B. See "Electrical Requirements" section... are minimum clearances. ■ The floor anti-tip bracket must be made by installing a range hood that projects horizontally a minimum of 5" (12.7 cm) beyond the bottom of the ...
Installation Instructions - Page 4

... the electrical connection and wire size are in a risk of the above the range, follow the range hood or microwave hood combination installation instructions for 25" (64.0 cm) countertop depth...depth and 36" (91.4 cm) countertop height. Do not modify the power supply cord plug. A freestanding range may be obtained from either cabinet, 5¹⁄₂" (14.0 cm) max. D. 30¹⁄&#...
Installation Instructions - Page 5

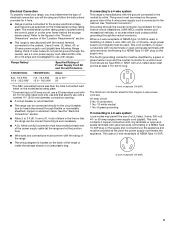
... terminals or open -end spade terminals with kit. or 50-amp power supply cord (pigtail) (see following Range Rating chart). See the "Electrical Connection" section. ■ Allow 2 to 3 ft (61.0 cm to... The ground must determine the type of the "Location Requirements" section. ■ This range is prohibited for use with the ground connected to the cabinet. and recreational vehicles, or...
Installation Instructions - Page 6

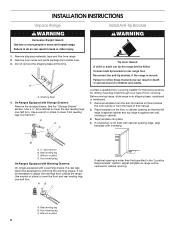
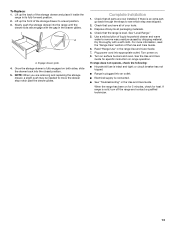
... legs cannot be killed. Wrench or pliers D. Rear leveling leg B. Failure to rear range foot. Use wrench or pliers to lower front leveling legs one-half turn . Front leveling leg C. Do not remove the shipping base at this manual. 2. Failure to follow these instructions can result in cabinet opening edge, align template with...
Installation Instructions - Page 7

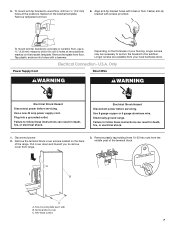
...floor, use a 4.8 mm) masonry drill bit to remove cover from floor. Remove template from range. 3. Plug into holes with screws provided. Pull cover down and toward you to drill 2... power. 2. Remove template from the middle post of the range. 5. Electrically ground range. Electrical Connection - To mount anti-tip bracket to follow these instructions can result in ...
Installation Instructions - Page 8

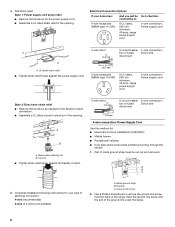
Electrical Connection Options If your type of the ground-link under the screw. 8 Style 1: Power supply cord strain...or fused Direct wire disconnect 5" (12.7 cm) 3-wire receptacle (NEMA type 10-50R) A UL listed, 250-volt minimum, 40-amp, range power supply cord 3-wire connection: Power supply cord Style 2: Direct wire strain relief ■ Remove the knockout as needed for : ■ ...
Installation Instructions - Page 9

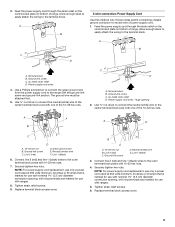
... local codes permit connecting chassis ground conductor to the outer terminal block posts with ranges. 5. Allow enough slack to easily attach the wiring to the terminal block. ... screws. 9. Ground-link screw D. Connect line 2 (red) and line 1 (black) wires to the range with ranges. 8. Feed the power supply cord through the strain relief on the cord/conduit plate on bottom of power ...
Installation Instructions - Page 10

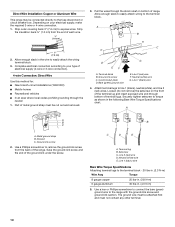
... wiring terminal block. 3. Line 2 (red) wire F. Save the ground-link screw and the end of range. C D E A. Line 2 (red) wire D. Allow enough slack in the wire to the terminal ...make the required 3-wire or 4-wire connection. 1. Pull the wires through bottom of the range. Complete electrical connection according to torque as shown in . (4.0 N-m) 5. Ground-link screw...
Installation Instructions - Page 11

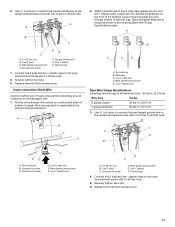
... block access cover. 11 G A B F DE C A. 10-32 hex nut B. Connect line 2 (red) and line 1 (black) wires to the outer terminal block posts with one of range. Replace terminal block access cover. 3-wire connection: Direct Wire Use this method only if local codes permit connecting ground conductor to line 2 (red), bare (green...
Installation Instructions - Page 13

... Care Guide. 6. For more information, read the "Range Care" section of liquid household cleaner and warm water to a level position. 3. Read "Range Use" in its fully forward position. 2. Turn on range operation. See the Use and Care Guide for heat. When the range has been on for 5 minutes, check for specific instruction on surface burners and...
Owners Manual - Page 3

... used in or around any part of the range unless specifically recommended in temperature. ■ Utensil Handles Should Be Turned Inward and Not Extend Over Adjacent Surface Units ... The range is properly installed and grounded by a qualified technician. ■ Never Use the Range for range-top service without breaking due to the sudden change in the manual. Proper relationship of a range -...
Owners Manual - Page 4

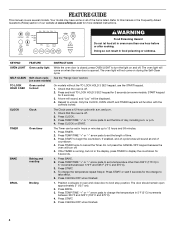
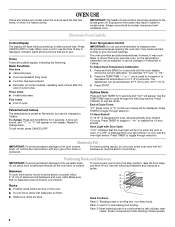
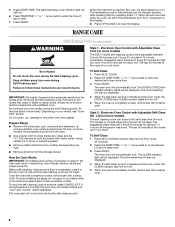
... to set the time of time. 3. Press BAKE. 2. Press START. 4. Press START or wait 5 seconds for 3 seconds). 3. Press BROIL. 3. Check that the oven is opened. Press TEMP/TIME "+" or "-" arrow pads to turn off . 2. Press TIMER twice to unlock. Press TEMP/TIME "+" or "-" arrow pads to 12 hours and 59 minutes. 1. The oven light will come on some models, START keypad for...
Owners Manual - Page 5

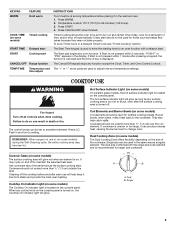
... models) On ceramic glass models, the hot surface indicator light is on the console panel. Press START. 4. Press CANCEL/OFF when finished. To set length of day, cook for 60 minutes (1.00 hours). 3. The Start Time keypad is turned on, the Cooktop On indicator light will glow red when an element is located on...
Owners Manual - Page 6

...the following options. however... pull it out to disable the 12-hour shutoff....turn on the oven door or bottom. Indicator lights show functions that no bakeware piece is open. Press CANCEL/OFF to another . Press and hold TIMER for 2-rack baking and broiling. End of some models), repeating each minute after a power loss. Press TIMER to toggle through selection. Press TIMER...
Owners Manual - Page 8

... are 2 hours 30 minutes for light soil, and 4 hours 30 minutes for heavy soil. The CLEAN indicator light will automatically turn on some models) WARNING Burn Hazard Do not touch the oven during the Self-Cleaning cycle. Press START. When the start time is completely cooled, remove ash with a damp cloth. RANGE CARE Self-Cleaning...
Owners Manual - Page 9

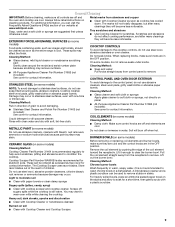
... acids, such as vinegar and tomato, should be cleaned as soon as the entire range is also recommended for contact information. Cleaning Method: ■ Glass cleaner, mild liquid...or nonabrasive scrubbing pad: Gently clean around the model and serial number plate because scrubbing may want to remove. Tiny scratches and abrasions ■ Use Cooktop Cleaner for contact information. Cleaning...
Owners Manual - Page 10

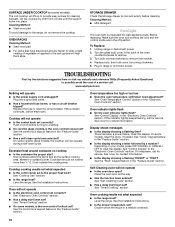
...the oven control lockout set correctly? Unplug range or disconnect power. 2. Turn the glass bulb cover in the "Feature Guide" section. Turn bulb counterclockwise to the range, do not remove the cooktop. Plug... Guide" section. ■ Has a self-clean cycle been selected? Depending on your model, press OFF/CANCEL or CANCEL/ OFF to the rack guides will not operate ■ Is the control...

Whirlpool Knowledge Base Results

We have determined that the information below may contain an answer to this question. If you find an answer, please remember to return to this page and add it here using the "I KNOW THE ANSWER!" button above. It's that easy to earn points!

  • My microwave oven display shows time countdown, but is not operating
    ... Timer" appears in use it? The microwave oven light will come on, the fan will run and, if on model). The display on model), and counts down the set , functions can be off , "Off Timer"... to two minutes (depending on model), the display will return to use ? If tones are turned off . Touch Timer Set/Off  Demo Mode The Demo Mode is showing messages Touch and hold Timer Off or ...
  • How do I bake and roast using my gas range?
    ...range? The preheat conditioning time will not change if the temperature is counting down " arrow pad to set between 170°F and 500°F (77°C and 260°C). If baking and roasting while the minute timer...'t operate My gas oven cooking results are affected by pressing Bake. What is the AccuBake® Press Off/Cancel or Cancel (depending on my SpeedCook microwave ...
  • My gas oven cooking results are not what I expected
    ... calibration: Press and hold Bake for 5 seconds until the oven display shows the current calibration, for  5 seconds by the displayed amount. If baking and roasting while the minute timer is reset... timed preheat conditioning. Preheat temperatures are not what I bake and roast using my gas range? The oven temperature on my gas range is either too high or too low My gas oven...

Similar Questions

'failure Detected'
The oven will reach preheated temp then show and error of "Failure Detected" and shut off. It appear...
(Posted by mnjd9899 7 years ago)
Can Whirlpool 30' Gas Range Wfg110avq0 Be Converted To Lp?
Can Whirlpool 30" Gas Range WFG110AVQ0 be converted to LP?
(Posted by thompsoncory88 7 years ago)
Rf114pxst Range
I have a Whirlpool RF114PXST. The surface burner indicator light is always on. Even with all of the ...
(Posted by bcarlson63398 10 years ago)
I Have A Whirlpool Gas Range That Won't Stay Lit While I Am Baking. Can You
tell me what to check on this oven or how to fix the problem.?
(Posted by delanehoward 11 years ago)
Oven Will Not Allways Light.
Sir; I have a Whirlpool range Model # SF357PEKW.  The oven will not always light.  When START is p...
(Posted by tfarmer 12 years ago)
Ask a New Question
Use the box below to post a new question about this Whirlpool product .
Points & Prizes
  • You can earn points for nearly everything you do on HelpOwl.com
  • You can trade in those points for gift cards at leading retailers such as Amazon.com and Walmart
  • It's that simple!
See How it Works
Create a Free Account

Whirlpool Manuals

Find free Whirlpool RF114PXST manuals and user guides available at ManualOwl.com. Try out our unique manual viewer allowing you to interact with manuals from directly within your browser!

Whirlpool Reviews

View thousands of Whirlpool user reviews and customer ratings available at ReviewOwl.com.

Contact Information

Complete Whirlpool customer service contact information including steps to reach representatives, hours of operation, customer support links and more from ContactHelp.com.

Scoreboard Ratings

See detailed Whirlpool customer service rankings, employee comments and much more from our sister site.

Whirlpool Recalls

Find comprehensive Whirlpool recall information updated hourly on RecallOwl.com.