Get support for Whirlpool GH7208XRY

Whirlpool GH7208XRY Support Question

Whirlpool GH7208XRY Support Question

Find answers below for this question about Whirlpool GH7208XRY.
Need a Whirlpool GH7208XRY manual? We have 4 online manuals for this item!
Question posted by hilger2000 on April 21st, 2012

Slow Start For Magnetron Cooling Fan

The magnetron cooling fan on my Whirlpool gh5184xpb-4 microwave often sounds like it starts out very weak for the first 5 seconds of a cooking cycle, then speeds up to normal.  A) will this turn into a problem?  B) How can I fix it?  Do I need a new fan motor, can I clean the fan motor, or is it a different issue?  Thanks for your help?

Current Answers

There are currently no answers that have been posted for this question.
Be the first to post an answer!

Remember that you can earn up to 1,100 points for every answer you submit. The better the quality of your answer, the better chance it has to be accepted.

Related Whirlpool GH7208XRY Manual Pages

Owners Manual - Page 1

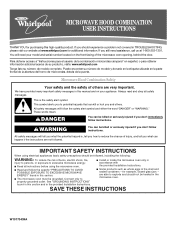
...microwave oven must be heated in the shell and sealed containers - for additional information. Para obtener acceso a "Instrucciones para el usuario de la combinación microondas campana" en español, o para obtener información adicional acerca de su producto, visite: www.whirlpool...are able to explode and should experience a problem not covered in this high-quality product. ...
Owners Manual - Page 2

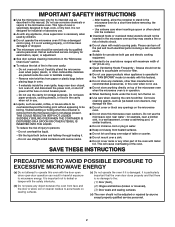
... filter. ■ Do not cover or block any object between the oven front face and the door or allow the container to microwave energy. Corrosive cleaning agents, such as water, coffee, or tea are placed inside the oven ignite, keep oven door closed, turn the fan on hood or filter. ■ Do not use straight-sided...
Owners Manual - Page 3

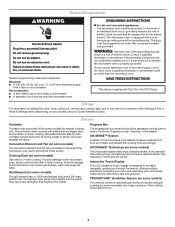
... preset or sensor (on some models) functions. Convection Element and Fan (on some moodels), and it heats, and adjusts the cooking time accordingly. Do not use of sensor functions. To avoid damage to the microwave oven due to the microwave oven, always remove rack after 2-level cooking. Progress Bar The progress bar is a visual picture of the...
Owners Manual - Page 4

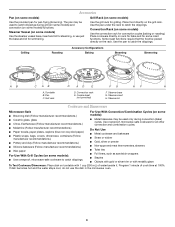
...use the dish in the microwave oven. 4 Pan C. Do ...cook time at 100%. Convection rack E. The pan may be used to catch drippings. Place cookware directly on rack for bake and for convection cycles (baking or roasting). Place food directly on some models): ■ Use ovenproof, microwave...cool, do not use just the base and lid for all other convection and combination cycles...
Owners Manual - Page 5

...Remove grease filters from most automatic cook functions by touching "Doneness" ...for commercially packaged popcorn. Stage Cooking Popcorn is not recommended. ...cooking cycle. For optimal performance, wait at least 2 minutes. Add or subtract time from underside of the microwave oven, and are off and the microwave oven is located under the vent screen on the top of the microwave oven...
Owners Manual - Page 6

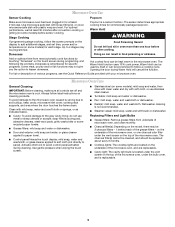
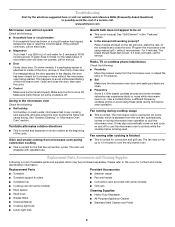
... firmly close the door, then start the cycle. ■ Control Make sure control is off . The microwave oven's cooling fan (on ■ This is normal for 2 minutes at the beginning of cold water for convection and grill use . Replacement Parts, Accesssories and Cleaning Supplies Following is a list of the microwave oven. www.whirlpool.com Microwave oven will dissipate with some models...
Owners Manual - Page 8

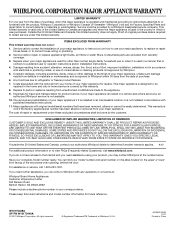
..., including scratches, dents, chips or other than normal, single-family household use your correspondence. This warranty...Whirlpool. 5. IMPLIED WARRANTIES, INCLUDING WARRANTIES OF MERCHANTABILITY OR FITNESS FOR A PARTICULAR PURPOSE, ARE LIMITED TO ONE YEAR OR THE SHORTEST PERIOD ALLOWED BY LAW. Damage resulting from accident, alteration, misuse, abuse, fire, flood, acts of the microwave oven...
Dimension Guide - Page 1

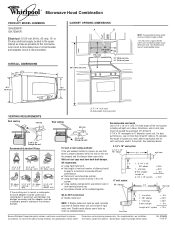
...= 25 ft. = 40 ft. = 8 ft. = 73 ft. 6 ft. ® Microwave Hood Combination PRODUCT MODEL NUMBERS GH6208XR GH7208XR Electrical: A 120-volt, 60-Hz, AC-only, 15... of vent should be uniform. ✔ using duct tape to the microwave oven hood. wall cap 8 feet straight = 5 ft. = 20 ft. = 40 ft. = 8 ft. Because Whirlpool Corporation policy includes a continuous commitment to 6" = 5 ft. 3-1/4" ...
Installation Instructions - Page 1

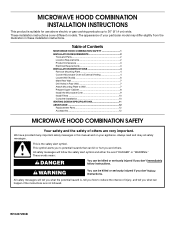
...Requirements 2 Product Dimensions 3 Electrical Requirements 3 INSTALLATION INSTRUCTIONS 4 Remove Mounting Plate 4 Convert Microwave Oven to External Venting 4 Locate Wall Stud(s 6 Mark Rear Wall 7 Drill Holes in ...manual and on your appliance. MICROWAVE HOOD COMBINATION INSTALLATION INSTRUCTIONS This product is suitable for use above electric or gas cooking products up to reduce the chance...
Installation Instructions - Page 2

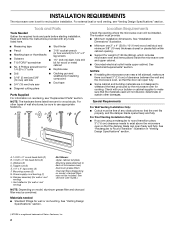
...cooking. Materials needed ■ Standard fittings for 1/4" x 2" lag screws ■ Scissors ■ 1½" (3.8 cm) diam. Read and follow the instructions provided with your builder or cabinet supplier to make sure there is at least 3" (7.6 cm) of clearance between the wall and the microwave oven...Gather the required tools and parts before starting installation. hole drill ■ T10 TORX...
Installation Instructions - Page 3

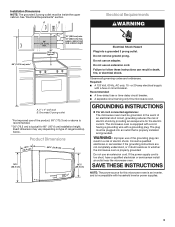
.... 13" (33.0 cm) max. Recommended: ■ A time-delay fuse or time-delay circuit breaker. ■ A separate circuit serving only this microwave oven is an inverter, and is properly installed and grounded. The microwave oven is typical for 66" (167.6 cm) installation height. SAVE THESE INSTRUCTIONS NOTE: The power source for the electric current. upper...
Installation Instructions - Page 4

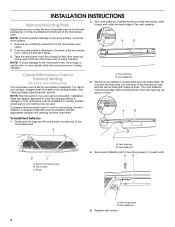
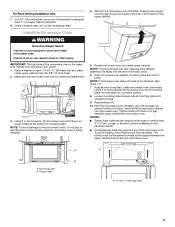
... deflector 5. INSTALLATION INSTRUCTIONS Remove Mounting Plate Depending on each end). To prepare the microwave oven for recirculation installation. When the vent deflector is as far back as it can easily...vent opening must be made to External Venting (for wall or roof venting only) The microwave oven is being handled. See "Venting Design Specifications" section. A A. NOTE: To avoid...
Installation Instructions - Page 5

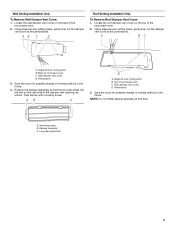
...Only To Remove Roof Damper Vent Cover: 1. Wall damper vent cover D. Top of the microwave oven. 2. Using diagonal wire cutting pliers, gently snip out the damper vent cover at this...cutting pliers B. Damper assembly C. Locate the roof damper vent cover on the top of microwave oven C. A. Perforations 3. Then secure with mounting screw. Save the cover for possible change...
Installation Instructions - Page 6

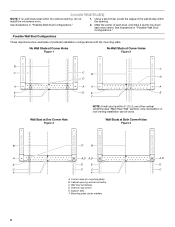
....2 cm) of the wall stud(s) within the cabinet opening . Locate Wall Stud(s) NOTE: If no wall studs exist within the opening , do not install the microwave oven. 1. Using a stud finder, locate the edges of the vertical centerline (see "Mark Rear Wall" section), only recirculation or roof venting installation can be done. See...
Installation Instructions - Page 7

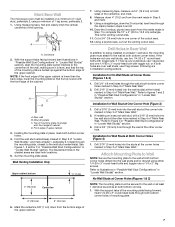
... wall stud, the mounting plate must attach to the wall at both bottom corner holes. If installing on a second wall stud, drill a 3/16" (5 mm) hole into the wall stud(s) at the hole(s) marked in ...studs at the corner holes marked in Step 4 of the upper cabinet. 7. Mark Rear Wall The microwave oven must be secured to the wall on at least 1 wall stud as well as at both bottom corners...
Installation Instructions - Page 8

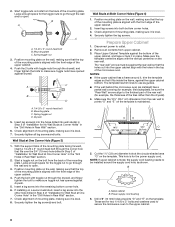
...holes. 3. Mounting plate C. Securely tighten all contents from the back of the microwave oven. Start a toggle nut on the template. Securely tighten the lag screw(s) and bolt. ... upper cabinet bottom. Cut the 1¹⁄₂" (3.8 cm) diameter hole at points "D" and "E" on a second wall stud, insert a lag screw into the other hole drilled in Step 2 of the mounting plate. A C...
Installation Instructions - Page 9

... shut. 3. Longer or shorter bolts are available at one person holding it on support tabs at least one corner of microwave oven still tilted, thread power supply cord through upper cabinet into microwave oven. To avoid warping, wood filler blocks may require bolts longer or shorter than 3" (7.6 cm). Mounting plate B. Place a washer on a covered...
Installation Instructions - Page 10

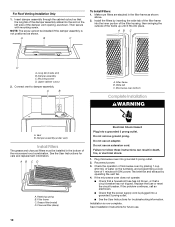
.... If the problem continues, call an electrician. ■ Check that the power supply cord is plugged into a grounded 3 prong outlet. A B C To Install Filters: 1. Wide tab C. Filter frame C. Test vent fan and exhaust by placing 1 cup (250 mL) of water on the left side of 1 minute at 100% power. If the microwave oven does not...
Installation Instructions - Page 11

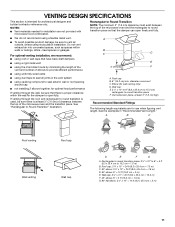
... We do not recommend using the most direct route by minimizing the length of the vent and number of the microwave oven and the transition piece. If venting through the wall, be sure to open freely and fully. Rectangular to Round...length. Vent extension piece, at least 3" (7.6 cm) of clearance between the top of the microwave oven and the rectangular to round transition piece F.
Installation Instructions - Page 12

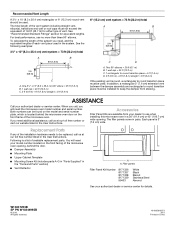
.... See "Recommended Standard Fittings" section for either type of vent. ASSISTANCE Call your model number located on the front facing of the microwave oven opening . One 3¹⁄₄" x 10" (8.3 x 25.4 cm) 90° elbow = 25 ft (7.6 m) B. ... 9/10 Printed in pairs. When you will need the microwave oven model number and serial number. The total length of the...

Whirlpool Knowledge Base Results

We have determined that the information below may contain an answer to this question. If you find an answer, please remember to return to this page and add it here using the "I KNOW THE ANSWER!" button above. It's that easy to earn points!

  • How do I use the Warm Hold feature on my microwave oven?
    ... will start immediately after the cooking cycle ends and the end-of food. Hot cooked food can be used by reminder tones. How do I use (for single cycle): Place hot cooked food on my SpeedCook microwave oven with convection and how do I cook foods manually using my microwave oven? Warm Hold can be programmed to follow a cooking cycle. When the cycle ends, "End" will sound...
  • What is the Convection Bake menu on my SpeedCook microwave oven with convection, and how do I use it?
    ... a shortcut to Manual Bake (see "Time/Temp/Power Cooking" section in use, the cooling fan turns on and stays on my SpeedCook microwave oven with convection, and how do I use it ? Bake may be very hot. Ovenproof, microwave-safe bakeware may use it with my SpeedCook microwave oven with or without microwaves to bake your food. While the convection system...
  • What is the vent fan on my microwave for and how do I operate it?
    ... than usual My microwave oven will automatically turn Vent Fan On/Off: Touch Vent Fan pad once for high, twice for medium, three times for low or four times for off My microwave oven makes humming noises My fan is also the cooling fan and will start at low speed when any sensor cooking function begins. To protect the microwave oven, if the...

Similar Questions

The Oven's Microwave Suddenly Heats Only Moderately. As If It Were At 50% Power.
The repair suggestions I have seen so far are based on the situation where the microwave does not he...
(Posted by privatesurfer2002 8 years ago)
Door Lock Will Not Disengage
Somehow the child locking mechanism was engaged and the lock will not disengage; nor will the light ...
(Posted by sjward90 10 years ago)
Oven Loses Power After Use.
The oven loses "all" power after use. if I wait a couple hours it comes back on. sometimes I don't e...
(Posted by ccsd595 10 years ago)
Ask a New Question
Use the box below to post a new question about this Whirlpool product .
Points & Prizes
  • You can earn points for nearly everything you do on HelpOwl.com
  • You can trade in those points for gift cards at leading retailers such as Amazon.com and Walmart
  • It's that simple!
See How it Works
Create a Free Account

Whirlpool Manuals

Find free Whirlpool GH7208XRY manuals and user guides available at ManualOwl.com. Try out our unique manual viewer allowing you to interact with manuals from directly within your browser!

Whirlpool Reviews

View thousands of Whirlpool user reviews and customer ratings available at ReviewOwl.com.

Contact Information

Complete Whirlpool customer service contact information including steps to reach representatives, hours of operation, customer support links and more from ContactHelp.com.

Scoreboard Ratings

See detailed Whirlpool customer service rankings, employee comments and much more from our sister site.

Whirlpool Recalls

Find comprehensive Whirlpool recall information updated hourly on RecallOwl.com.