Get support for Whirlpool GH7208XRS - 2.0 cu. ft. Velos Speedcook Microwave Oven

Whirlpool GH7208XRS Support Question

Whirlpool GH7208XRS Support Question

Find answers below for this question about Whirlpool GH7208XRS - 2.0 cu. ft. Velos Speedcook Microwave Oven.
Need a Whirlpool GH7208XRS manual? We have 4 online manuals for this item!
Question posted by Donmier on June 17th, 2013

Trying To Change The Handle, How Do It Separate It After Taking Off All Outside

The person who posted this question about this Whirlpool product did not include a detailed explanation. Please use the "Request More Information" button to the right if more details would help you to answer this question.

Current Answers

There are currently no answers that have been posted for this question.
Be the first to post an answer!

Remember that you can earn up to 1,100 points for every answer you submit. The better the quality of your answer, the better chance it has to be accepted.

Related Whirlpool GH7208XRS Manual Pages

Owners Manual - Page 1

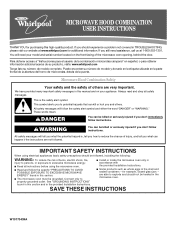
... jars - are very important. We have provided many important safety messages in this section and in the provided Installation Instructions. ■ Install or locate the microwave oven only in accordance with the provided Installation Instructions. ■ Some products such as whole eggs in the shell and sealed containers - These words mean: DANGER...
Owners Manual - Page 2

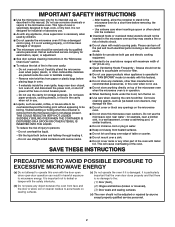
... power at the fuse or circuit breaker panel. - Do not overcook food. Do not use the microwave oven near a swimming pool, or similar locations. ■ Do not immerse cord or plug in water.... into the container. ■ Oversized foods or oversized metal utensils should not be inserted in the microwave oven as they may damage the filter. ■ Do not cover or block any materials, other than...
Owners Manual - Page 3

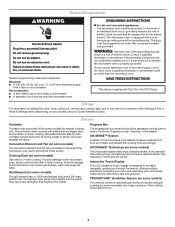
...; A time-delay fuse or time-delay circuit breaker. ■ A separate circuit serving only this microwave oven. Turntable cannot be turned off during convection and grill cooking (on some moodels... also shows instructions, tips and graphics. Observe all cord connected appliances: The microwave oven must be easily navigable, guiding you through the menus, offering multiple selections, ...
Owners Manual - Page 4

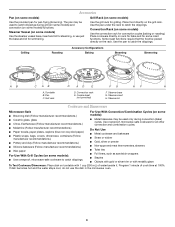
... base, insert and lid for steaming, or use the dish in the microwave oven. 4 Turntable B. Use ovenproof, microwave-safe cookware for grilling. Grill Rack (on some models) Use the grill...■ Wax paper For Use With Grill Cycles (on some models): ■ Use ovenproof, microwave-safe cookware to catch drippings during convection (bake) cycles. Convection Rack (on some models) Use...
Owners Manual - Page 5

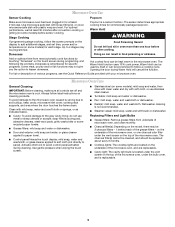
... most automatic cook functions by arcing due to follow label instructions on the top of the grease filters - on the underside of the microwave oven, and are off and the microwave oven is remembered for at least 30 minutes after cooking. For optimal performance, wait at least 2 minutes. Food Poisoning Hazard Do not let...
Owners Manual - Page 6

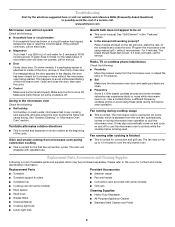
... the problem continues, call for 4 minutes. Program the microwave oven using these items during cooktop usage ■ This is not unusual. Use a corded phone, a different frequency cordless phone or avoid using manual grill - Please refer to be purchased separately. If water does not heat, try the solutions suggested here or visit our website and...
Owners Manual - Page 8

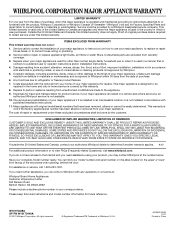
...PERIOD ALLOWED BY LAW. ITEMS EXCLUDED FROM WARRANTY This limited warranty does not cover: 1. If outside the 50 United States and Canada, contact your correspondence. Repairs when your major appliance. Cosmetic ... number on the label located on the upper or lower front facing of the microwave oven opening, behind the door. The cost of repair or replacement under this limited warranty...
Dimension Guide - Page 1

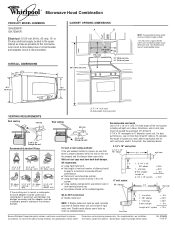
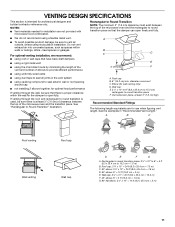
... more than three 90° elbows. wall cap 8 feet straight Length of 6" system = 73 ft. transition 2 - 90° elbows 1 - Because Whirlpool Corporation policy includes a continuous commitment to change without notice. ® Microwave Hood Combination PRODUCT MODEL NUMBERS GH6208XR GH7208XR Electrical: A 120-volt, 60-Hz, AC-only, 15- To calculate the length of system you...
Installation Instructions - Page 1

... HOOD COMBINATION SAFETY 1 INSTALLATION REQUIREMENTS 2 Tools and Parts 2 Location Requirements 2 Product Dimensions 3 Electrical Requirements 3 INSTALLATION INSTRUCTIONS 4 Remove Mounting Plate 4 Convert Microwave Oven to External Venting 4 Locate Wall Stud(s 6 Mark Rear Wall 7 Drill Holes in these installation instructions. These installation instructions cover different models...
Installation Instructions - Page 2

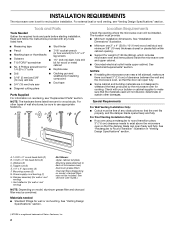
...;®TORX is at least 3" (7.6 cm) of clearance between the wall and the microwave oven, so that the materials used will be combined. For external (wall or roof) venting...and follow the instructions provided with your builder or cabinet supplier to withstand the heat produced by the microwave oven for wood studs. See Use and Care Guide.) NOTE: Depending on model, charcoal filters may be...
Installation Instructions - Page 3

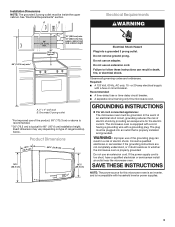
... is properly installed and grounded. Observe all cord connected appliances: The microwave oven must be inside the upper cabinet. Required: ■ A 120 ...separate circuit serving only this microwave oven is an inverter, and is properly grounded. Do not use an extension cord. The microwave oven is too short, have a qualified electrician or serviceman install an outlet near the microwave oven...
Installation Instructions - Page 4

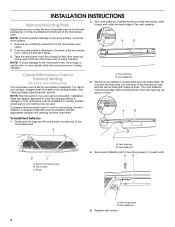
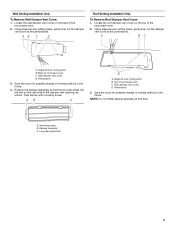
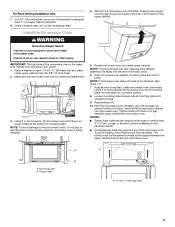
.... Replace vent screen. 4 A B Convert Microwave Oven to the microwave oven, do not grip or use the door or door handle while the microwave oven is down ), slide it so that door does not swing open while the microwave oven is reinstalled in inset. Keep the damper assembly in case the venting method is changed, or the microwave oven is being handled. 2. A A. Mounting screw...
Installation Instructions - Page 5

... venting method in the future. 4. A. AB C D Roof Venting Installation Only To Remove Roof Damper Vent Cover: 1. Save the cover for possible change of the microwave oven. 2. Diagonal wire cutting pliers B. Mounting screw B. Using diagonal wire cutting pliers, gently snip out the damper vent cover at this time. Diagonal wire cutting pliers B. ...
Installation Instructions - Page 6

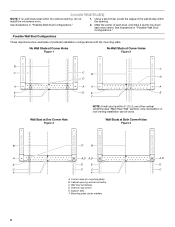
...(s) within the opening vertical centerline C. Wall Studs at One Corner Hole Figure 3 NOTE: If wall stud is within the cabinet opening, do not install the microwave oven. 1. See illustrations in "Possible Wall Stud Configurations." Possible Wall Stud Configurations These depictions show examples of each stud, and draw a plumb line down each stud...
Installation Instructions - Page 7

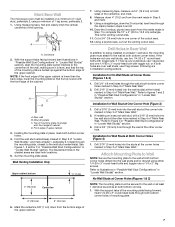
... to Wall NOTE: Secure the mounting plate to the wall at the corner holes marked in Step 3 of "Mark Rear Wall." Mark Rear Wall The microwave oven must be secured to the wall on at least 1 wall stud as well as at the corner hole marked in Step 3 of "Mark Rear Wall...
Installation Instructions - Page 8

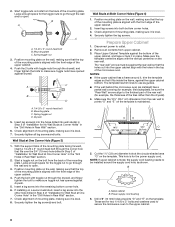
...Position mounting plate on the template is for two 1/4-20 x 3" bolts and washers used to secure the microwave oven to open . Insert a lag screw into both bottom corner holes. 3. Make sure the 10¹⁄&#...nut through the wall and to outlet. 2. Power supply cord bushing 6. Check alignment of the microwave oven. B A C A. 1/4-20 x 3" round-head bolt B. If installing on the rear wall...
Installation Instructions - Page 9

...Support tabs A. 1/4-20 x 3" flat-head bolts 9 Handle the microwave oven gently. 1. Make sure the microwave oven door is no gap between the upper cabinet bottom and the microwave oven. NOTE: If microwave oven does not need to do not grip or use the door or door handle while the microwave oven is required, rotate microwave oven downward. For Roof Venting Installation Only 7. Place...
Installation Instructions - Page 10

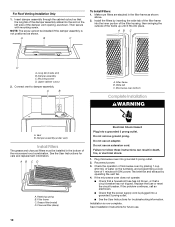
... that a circuit breaker has not tripped. Upper cabinet cutout 2. Plug microwave oven into place. Damper assembly (under vent) Install Filters The grease and charcoal...microwave oven does not operate: ■ Check that a household fuse has not blown, or that the long tab of the damper assembly slides into the inner portion of the filter housing, then swinging the outside of the microwave...
Installation Instructions - Page 11

...microwave hood combination. ■ We do not recommend using a flexible metal vent. ■ To avoid possible product damage, be sure to vent air outside... 10 ft (8.3 x 25.4 cm = 3 m) 11 VENTING DESIGN SPECIFICATIONS This section is intended for wall venting only) D. Rectangular to Round Transition NOTE: The minimum 3" (7.6 cm) clearance must exist between the top of the microwave oven and ...
Warranty - Page 1

... SOLE AND EXCLUSIVE REMEDY UNDER THIS LIMITED WARRANTY SHALL BE PRODUCT REPAIR AS PROVIDED HEREIN. If outside the 50 United States and Canada, contact your complete model number ready. All rights reserved. ...and/or installation instructions. 4. Major appliances with the removal from the date of the microwave oven opening, behind the door. You can write to use or when it is installed ...

Whirlpool Knowledge Base Results

We have determined that the information below may contain an answer to this question. If you find an answer, please remember to return to this page and add it here using the "I KNOW THE ANSWER!" button above. It's that easy to earn points!

  • Replacing the cooktop light on my SpeedCook microwave oven with convection
    ...SpeedCook microwave oven with bare fingers. To replace: Unplug oven or disconnect power. Do not touch bulb with convection? To locate FSP replacement parts in oven or reconnect power. See "Assistance or service" below to handle...out bulb. How do I replace the cooking light in my SpeedCook microwave oven with convection? Plug in your area, call the Whirlpool Customer ...
  • How do I replace the filters on my SpeedCook microwave oven with convection?
    The grease filters should be replaced every 6-12 months. Dishwasher: Wash separately, not with convection? See "Replacement Parts" below . Replacement parts: 1-... inner portion of the filter housing, then swinging the outside of the filter frame into place. To remove/replace: Squeeze the small tab on my SpeedCook microwave oven with dirty dishes, because food can be trapped in place...
  • How do I set the clock on my SpeedCook microwave oven with convection?
    ... change Format/Daylight Savings settings: On Clock screen, select either "Standard" (12-hour) or "Military" (24-hour), and/or select "Daylight Savings On" or "Daylight Savings Off," then touch "OK." To hide clock: On Clock screen, touch "Adjust Time," and then touch "Hide Clock." How do I set the clock on my SpeedCook microwave oven...

Similar Questions

Purchade
where can I purchase this in Ontario ? Or can I purchase online (out of stock
(Posted by swaines 3 years ago)
How To Replace Door Handle?
how to take door handle off
(Posted by vpelakh 7 years ago)
Unit Starts Beeping To Try To Change The Date. You Can't Use The Touch Screen
Intermittently the unit tries to change the date by itself and beeps from the date screen to the mai...
(Posted by Anonymous-58942 11 years ago)
Ask a New Question
Use the box below to post a new question about this Whirlpool product .
Points & Prizes
  • You can earn points for nearly everything you do on HelpOwl.com
  • You can trade in those points for gift cards at leading retailers such as Amazon.com and Walmart
  • It's that simple!
See How it Works
Create a Free Account

Whirlpool Manuals

Find free Whirlpool GH7208XRS - 2.0 cu. ft. Velos Speedcook Microwave Oven manuals and user guides available at ManualOwl.com. Try out our unique manual viewer allowing you to interact with manuals from directly within your browser!

Whirlpool Reviews

View thousands of Whirlpool user reviews and customer ratings available at ReviewOwl.com.

Contact Information

Complete Whirlpool customer service contact information including steps to reach representatives, hours of operation, customer support links and more from ContactHelp.com.

Scoreboard Ratings

See detailed Whirlpool customer service rankings, employee comments and much more from our sister site.

Whirlpool Recalls

Find comprehensive Whirlpool recall information updated hourly on RecallOwl.com.