Whirlpool GH7208XRS Support Question
Whirlpool GH7208XRS Support Question
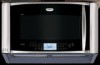
Find answers below for this question about Whirlpool GH7208XRS - 2.0 cu. ft. Velos Speedcook Microwave Oven.Need a Whirlpool GH7208XRS manual? We have 4 online manuals for this item!
Question posted by Anonymous-58942 on May 10th, 2012
Unit Starts Beeping To Try To Change The Date. You Can't Use The Touch Screen
Intermittently the unit tries to change the date by itself and beeps from the date screen to the main screen, back and forth. This can go on for awhile and then stop. Usually you can't use the touch screen during this episode.
Current Answers
Related Whirlpool GH7208XRS Manual Pages
Owners Manual - Page 1

... others . These words mean:
DANGER
You can happen if the instructions are not followed. IMPORTANT SAFETY INSTRUCTIONS
When using the microwave oven.
■ Read and follow the specific "PRECAUTIONS TO AVOID POSSIBLE EXPOSURE TO EXCESSIVE MICROWAVE ENERGY" found in this manual and on your model and serial number located on the front facing of...
Owners Manual - Page 2

... pad and touch electrical parts involving a risk of electric shock.
■ Suitable for a short time before removing the container.
- Use extreme care when inserting a spoon or other utensil into the container.
■ Oversized foods or oversized metal utensils should not be serviced only by children.
■ Do not operate the microwave oven if it...
Owners Manual - Page 3

...Do not use an extension cord. Failure to whether the microwave oven is ... time of the microwave oven cavity, behind the metal screen. SAVE THESE INSTRUCTIONS...Touch Display
The LCD interactive touch display is properly installed and grounded. ACCUWAVE® Technology (on some models)
This microwave system delivers a constant stream of the selected microwave power, whereas typical microwave...
Owners Manual - Page 4

... dish becomes hot and the water stays cool, do not use just the base and lid for simmering. Cookie sheet (not provided)
F. Accessories
Pan (on some models)
Use the steamer vessel base, insert and lid for steaming, or use the dish in the microwave oven.
4
Use the pan under the rack to catch the drippings. Pan...
Owners Manual - Page 5

... not let food sit in the microwave oven.
Warm Hold can be used by itself or can be prorammed to soil buildup, keep cavity, microwave inlet cover, cooking rack supports, and area where the door touches the frame clean.
To avoid damage to the microwave oven caused by touching "Doneness" on the touch screen during cleaning. Activate child lock to...
Owners Manual - Page 6

... information. It may be on cavity walls, microwave inlet cover, cooking rack supports, and area where the door touches the frame can cause arcing.
Fan running during microwave oven operation.
If microwave oven still does not operate, call an electrician.
■ Magnetron Try to the cover for convection and grill use . On some models) is off to inside...
Owners Manual - Page 8

... of original purchase date is required to obtain service under these excluded circumstances shall be provided by Whirlpool. 5. You can write to the appliance. 9. Cosmetic damage, including scratches, dents, chips or other than normal, single-family household use your major appliance is located in materials or workmanship. Proof of the microwave oven opening, behind...
Dimension Guide - Page 1

...the microwave oven hood. Grounded 3 prong outlet
VENTING REQUIREMENTS
Roof venting
roof cap
3-1/4" x 10" through-the-roof
Recommended standard fittings
Wall venting
wall cap 3-1/4" x 10" through-the-wall
Recommended vent length Use 3-1/4" x 10" or 6" vent.
wall cap 8 feet straight Length of 6" system = 73 ft.
Length of 3-1/4" x 10" system
= 25 ft. = 40 ft. = 8 ft.
= 73 ft.
6 ft...
Installation Instructions - Page 1

... Mounting Plate to Wall 7 Prepare Upper Cabinet 8 Install the Microwave Oven 9 Install Filters 10 Complete Installation 10 VENTING DESIGN SPECIFICATIONS 11 ASSISTANCE 12 Replacement Parts 12 Accessories 12
MICROWAVE HOOD COMBINATION SAFETY
Your safety and the safety of your appliance. This is suitable for use above electric or gas cooking products up to External...
Installation Instructions - Page 2

...Venting Design Specifications" section. Tools and Parts
Tools Needed
Gather the required tools and parts before starting installation. For other damages.
Power supply cord bushing (1) H.
See "Venting Design Specifications" ...at least 3" (7.6 cm) of clearance between the wall and the microwave oven, so that the materials used will be free of any tools listed here.
■ Measuring tape
...
Installation Instructions - Page 3

... the microwave oven is properly installed and grounded.
WARNING: Improper use of the grounding plug can result in a risk of electric shock by providing an escape wire for the electric current. Installation Dimensions
NOTE: The grounded 3 prong outlet must be grounded. Do not remove ground prong. Observe all cord connected appliances: The microwave oven must...
Installation Instructions - Page 4

...: Skip this section if you are using recirculation installation. Keep the damper assembly in case the venting method is changed, or the microwave oven is down ), slide it back and under the back edge of the microwave oven. To Install Vent Deflector: 1. Gently pull the rings and lift vent screen from the microwave oven cavity.
2.
Vent opening B. When the...
Installation Instructions - Page 5

... Cover:
1. Using diagonal wire cutting pliers, gently snip out the damper vent cover at the perforations. Position the damper assembly so that the long tab slides into the slot on the back of venting method in the future. Perforations
3. Diagonal wire cutting pliers B. Save the cover for possible change of the microwave oven.
2. Then...
Installation Instructions - Page 6

Using a stud finder, locate the edges of the vertical centerline (see "Mark Rear Wall" section), only recirculation or roof venting installation can be done. Wall Studs at One Corner Hole Figure 3
NOTE: If wall stud is within 6" (15.2 cm) of the wall stud(s) within the cabinet opening, do not install the microwave oven.
1. Holes...
Installation Instructions - Page 7

... to the wall at both bottom corner holes drilled into the wall studs and/or drywall using a minimum of 1 lag screw, preferably 2.
1.
Attach Mounting Plate to Wall
NOTE: ...plate center markers to the wall stud centerline(s).
Mark Rear Wall
The microwave oven must align
with the front edge of the cabinet. Using measuring tape, find and clearly mark the vertical centerline of the ...
Installation Instructions - Page 8

... alignment of "Installation for two 1/4-20 x 3" bolts and washers used to secure the microwave oven to open .
3.
Securely tighten the lag screws. Power supply cord...Start toggle nuts on the wall, making sure it , trim the template
edges so that the top of the mounting plate is level. 8.
The template has trim lines to use as guides.
■ If the wall behind the microwave oven...
Installation Instructions - Page 9

... steps 3-6. 10. To avoid warping, wood filler blocks may warp the top of the microwave oven is no gap between the upper cabinet bottom and the microwave oven.
IMPORTANT: The right side of the microwave oven. Using 2 or more people, lift microwave oven and hang it on support tabs at one person holding it in place, insert bolts through...
Installation Instructions - Page 10

... Roof Venting Installation Only
1. Long tab (inside slot) B. Filter frame C. Do not remove ground prong. Plug microwave oven into a grounded 3 prong outlet. Replace the fuse or reset the circuit breaker.
A
B
A. See the User Instructions for future use.
10 Then secure with mounting screw. Install the filters by inserting the wide tab of the...
Installation Instructions - Page 11

... 3" (7.6 cm) clearance must exist between the top of the microwave oven and the rectangular to round transition is used, be sure there is at least 3" (7.6 cm) high
Recommended... 1.5 m)
B. NOTES: ■ Vent materials needed for use when figuring vent length.
Rectangular to round transition piece: 3¹⁄₄" x 10" to 6" = 5 ft (8.3 x 25.4 cm to open freely and fully. Do...
Warranty - Page 1

... OR PROVINCE TO PROVINCE.
Damage resulting from the date of purchase. 6. Any food loss due to repair... appliance if it was purchased. Outside the 50 United States and Canada, this limited warranty does not apply...microwave oven opening, behind the door.
Service must be easily determined. Service calls to correct the installation of your major appliance, to use or when it is used...
Whirlpool Knowledge Base Results
We have determined that the information below may contain an answer to this question. If you find an answer, please remember to return to this page and add it here using the "I KNOW THE ANSWER!" button above. It's that easy to earn points!-
How do I use the Boil and Simmer menu on my SpeedCook microwave oven with convection?
... Melt Boil & The water will start the cycle. How do I use the Steam Cook menu on my SpeedCook microwave oven with the type of water in the oven and begin the cycle. Use the provided steamer vessel base and lid, or a microwavable dish with convection? Follow screen prompts to simmer your food for manual cooking by... -
What is the Time/Temp/Power Cooking control on my Speedcook microwave oven with convection?
... Cooking control on my Speedcook microwave oven with convection, and how do I use : Touch "Time/Temp/Power" on the touch screen, or Start control.The display will count down the cook time. Select a method from which to stop reminder tones. When the cycle ends, the end-of the methods have set power levels that cannot be changed . How do I do... -
What is the Microwave Time/Power Cooking control on my SpeedCook microwave oven with convection, and how do I use it?
... cooking power may be changed by reminder tones. Touch the Cancel control or open the door to the Main Menu after the Cancel control is for SpeedCook microwave oven with convection, and how do I use it ? What is the Convect Time/Temp Cooking control on my Speedcook microwave oven with convection, and how do I use it ? Touch "Start" on the touch screen and following the...
Similar Questions

Purchade
where can I purchase this in Ontario ? Or can I purchase online (out of stock
where can I purchase this in Ontario ? Or can I purchase online (out of stock
(Posted by swaines 3 years ago)

Whirlpool Oven Door Outer Glass, Part Number: 8303301.
my whirlpool oven door outer glass was broken, and you discontined this replacement. What can I do w...
my whirlpool oven door outer glass was broken, and you discontined this replacement. What can I do w...
(Posted by linggeng 9 years ago)

