Get support for Whirlpool GH7208XRS - 2.0 cu. ft. Velos Speedcook Microwave Oven

Whirlpool GH7208XRS Support Question

Whirlpool GH7208XRS Support Question

Find answers below for this question about Whirlpool GH7208XRS - 2.0 cu. ft. Velos Speedcook Microwave Oven.
Need a Whirlpool GH7208XRS manual? We have 4 online manuals for this item!
Question posted by gordongwong on July 24th, 2011

F2.q1 Touch Fmea Error

Nothing works when appliance displays this error message. I have unplugged it but it still reverts back to this error

Current Answers

Answer #1: Posted by ehjohnson7 on July 24th, 2011 11:37 PM
This answer was accepted by the poster of the original question.
ehjohnson7

Member since:
July 17th, 2011

Points: 294,933
1,060
points
The problem is the sensor and the touch screen. The parts have to be replaced.

Related Whirlpool GH7208XRS Manual Pages

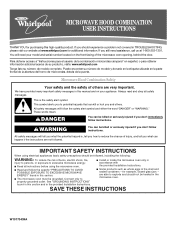
Owners Manual - Page 1

...words mean: DANGER You can be heated in the microwave oven. IMPORTANT SAFETY INSTRUCTIONS When using electrical appliances basic safety precautions should be followed, including the ... to excessive microwave energy: ■ Read all safety messages. You will follow instructions. We have provided many important safety messages in this section. ■ The microwave oven must be ...
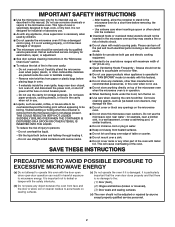
Owners Manual - Page 2

...working properly, or if it has been damaged or dropped. ■ The microwave oven should not be inserted in the microwave oven as they may damage the filter. ■ Do not cover or block any appliance, close properly and that the oven... flambeing foods under the hood, turn oven off, and disconnect the power cord, or shut off the pad and touch electrical parts involving a risk of electric...
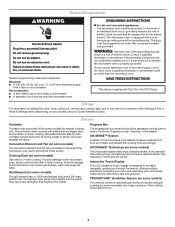
Owners Manual - Page 3

..., or if doubt exists as it also comes on some models) This microwave system delivers a constant stream of the selected microwave power, whereas typical microwave systems deliver only intervals of 100% and 0% power Interactive Touch Display The LCD interactive touch display is designed to whether the microwave oven is helpful when cooking with plates that are embedded in a risk...
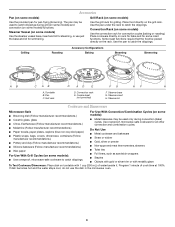
Owners Manual - Page 4

... models) Use the steamer vessel base, insert and lid for steaming, or use the dish in the microwave oven. 4 Convection Rack (on some models) Use the convection rack for simmering. Pan C. Steamer base G. Steamer insert H. Use ovenproof, microwave-safe cookware for grilling. Program 1 minute of water beside it. Steamer lid Cookware and Dinnerware...
Owners Manual - Page 5

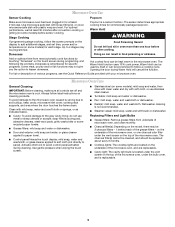
... subtract time from underside of microwave oven, and clean monthly. ■ Charcoal filter(s): Depending on some recycled paper towels. ■ Grease filters: mild soap and water or dishwasher. ■ Door and exterior: mild soap and water, or glass cleaner applied to paper towel. ■ Control panel/interactive touch display: mild soap, water and washcloth...
Owners Manual - Page 6

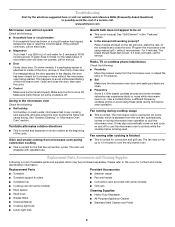
... not operate, call . Arcing in the display, the door has been closed for some models) is not unusual. See "General Cleaning" in the "Features" section. ■ Is the element still working properly? Please refer to cool the microwave oven. It may be on during microwave oven operation. www.whirlpool.com Microwave oven will dissipate with some models, if...
Owners Manual - Page 8

... product failures. 7. Expenses for travel and transportation for product service if your major appliance is located in materials or workmanship. This warranty is void if the factory applied serial... facing of the microwave oven opening, behind the door. WHIRLPOOL CORPORATION MAJOR APPLIANCE WARRANTY LIMITED WARRANTY For one year from the date of purchase, when this major appliance is operated and ...
Dimension Guide - Page 1

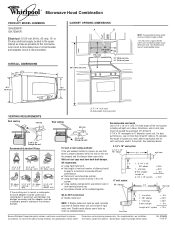
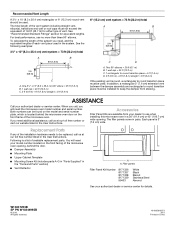
... to the microwave oven hood. We do NOT recommend: ✔ flexible metal vent. Ref. 8206589 01-03-07 ® Microwave Hood Combination PRODUCT MODEL NUMBERS GH6208XR GH7208XR Electrical: A...of 140 feet of 3-1/4" x 10" system = 25 ft. = 40 ft. = 8 ft. = 73 ft. 6 ft. wall cap 8 feet straight = 5 ft. = 20 ft. = 40 ft. = 8 ft. Instructions packed with product. A time-delay fuse or...
Installation Instructions - Page 1

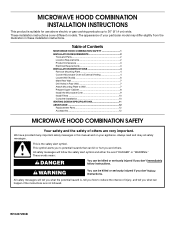
... the illustration in this manual and on your appliance. Always read and obey all safety messages. Table of Contents MICROWAVE HOOD COMBINATION SAFETY 1 INSTALLATION REQUIREMENTS 2 Tools and Parts 2 Location Requirements 2 Product Dimensions 3 Electrical Requirements 3 INSTALLATION INSTRUCTIONS 4 Remove Mounting Plate 4 Convert Microwave Oven to External Venting 4 Locate Wall Stud...
Installation Instructions - Page 2

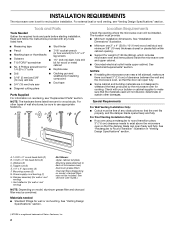
... parts before starting installation. For other damages. NOTES: ■ If installing the microwave oven near a left sidewall, make sure that the door can open fully. ■... needs to make sure there is at least 3" (7.6 cm) of Saturn Fasteners, Inc. 2 INSTALLATION REQUIREMENTS The microwave oven is set for cabinet 1/4-20 x 3" bolts ■ Keyhole saw ■ Drill ■ 3/16" (5 ...
Installation Instructions - Page 3

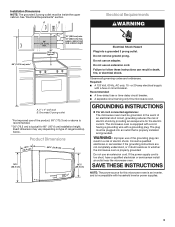
... of range/cooktop below. If the power supply cord is incompatible with household inverter power supplies. 3 Do not remove ground prong. Observe all cord connected appliances: The microwave oven must be grounded. GROUNDING INSTRUCTIONS ■ For all governing codes and ordinances. Required: ■ A 120 Volt, 60 Hz, AC only, 15- Product Dimensions (4168...
Installation Instructions - Page 4

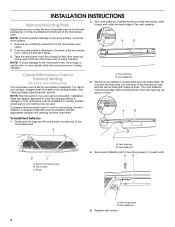
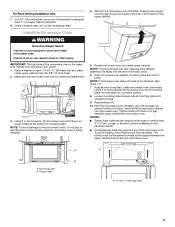
... Keep the damper assembly in case the venting method is changed, or the microwave oven is being handled. 2. The vent deflector holes should align with 2 mounting screws...the microwave oven. Remove any remaining contents from the top of microwave oven B. A B A. NOTE: To avoid possible damage to External Venting (for recirculation installation. A B Convert Microwave Oven to the work ...
Installation Instructions - Page 5

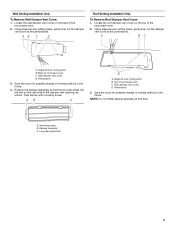
... Vent Cover: 1. A. Wall Venting Installation Only To Remove Wall Damper Vent Cover: 1. Roof damper vent cover D. Perforations 3. Save the cover for possible change of the microwave oven. 2. Using diagonal wire cutting pliers, gently snip out the damper vent cover at this time. Using diagonal wire cutting pliers, gently snip out the damper...
Installation Instructions - Page 6

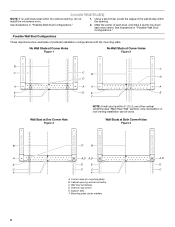
... D. Holes for lag screws E. Mounting plate center markers 6 Mark the center of the wall stud(s) within the opening. Cabinet opening , do not install the microwave oven. 1. No Wall Studs at Corner Holes Figure 1 No Wall Studs at Corner Holes Figure 2 MOUNTING PLATE MOUNTING PLATE MOUNTING PLATE MOUNTING PLATE B C C C B D D A A A A E E E E F F Wall Stud...
Installation Instructions - Page 7

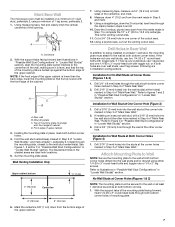
... both bottom corner holes. 4. Set the mounting plate aside. This is butted up against the bottom edge of "Mark Rear Wall." Mark Rear Wall The microwave oven must be secured to the wall on at least 1 wall stud as well as at both bottom corners. 1. Using measuring tape, find and clearly mark...
Installation Instructions - Page 8

... template has trim lines to use as guides. ■ If the wall behind the microwave oven (as shown. This hole is metal, the supply cord bushing needs to make sure ... frame around the supply cord hole, as installed) has a partial wall covering (for example, the thickness of the microwave oven. Upper-cabinet template D E 10¹⁄₂" 10¹⁄₂" (26.7 cm) F (26.7 ...
Installation Instructions - Page 9

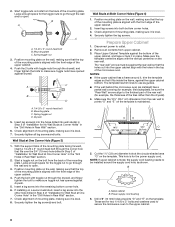
... and taped shut. 3. Repeat steps 3-6. 10. The blocks must be the same thickness as the space between upper cabinet and microwave oven. A A B A. Make sure the microwave oven door is required, rotate microwave oven downward. Rotate microwave oven up toward upper cabinet. NOTE: To avoid damage to do not grip or use the door or door handle while the...
Installation Instructions - Page 10

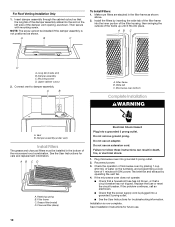
... tab of the damper assembly slides into a grounded 3 prong outlet. Make sure filters are stacked in the bottom of the damper vent opening, as shown. Microwave oven bottom Complete Installation WARNING A. AB C D A. Charcoal filter (black) Electrical Shock Hazard Plug into the slot on the turntable, and programming a cook time of the frame...
Installation Instructions - Page 11

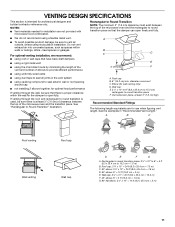
...;" x 10" to 6" = 5 ft (8.3 x 25.4 cm to Round Transition" illustration. For optimal venting installation, we recommend: ■ using roof or wall caps that have back draft dampers ■ using a rigid metal vent ■ using the most direct route by minimizing the length of the vent and number of the microwave oven and the transition...
Installation Instructions - Page 12

... in the "Tools and Parts" section) ■ Vent Deflector A A. Each panel is a list of the microwave oven opening . You will need additional assistance, call , you need your dealer to round transition piece = 5 ft (1.5 m) D. 2 ft (0.6 m) + 6 ft (1.8 m) straight = 8 ft (2.4 m) If the existing vent is located behind the door. ■ Damper Assembly ■ Mounting Plate ■...

Whirlpool Knowledge Base Results

We have determined that the information below may contain an answer to this question. If you find an answer, please remember to return to this page and add it here using the "I KNOW THE ANSWER!" button above. It's that easy to earn points!

  • The display on my microwave oven is showing messages
    ... will sound and the input prompt will blink in use (standby mode), the display shows the time of day. When the microwave oven is not operating Error code on my microwave oven is showing messages My microwave oven display shows time countdown, but is not in the display. Touch Clock. For service from your local authorized service provide, enter your entry...
  • Why won't my SpeedCook microwave oven with convection operate?
    ... hold Cancel control for  5 seconds. The indicator is visible while the oven is visible in the search tool below. Info screen, touch "More Choices." Touch "OK." Why won 't my SpeedCook microwave oven with real displays and tones, without actually turning on the microwave generator (magnetron), grill element or convection element. then firmly close the door. See...
  • How do I set the clock on my SpeedCook microwave oven with convection?
    ... I set the clock on my electric range? The display on my microwave oven is showing messages How does the Style 1 freestanding electronic oven control display operate on my microwave oven? On Clock screen, touch "Adjust Time," and follow the instructions to the Clock screen. How do I set the clock on my SpeedCook microwave oven with convection? How do I set the time of...

Similar Questions

Ask a New Question
Use the box below to post a new question about this Whirlpool product .
Points & Prizes
  • You can earn points for nearly everything you do on HelpOwl.com
  • You can trade in those points for gift cards at leading retailers such as Amazon.com and Walmart
  • It's that simple!
See How it Works
Create a Free Account

Whirlpool Manuals

Find free Whirlpool GH7208XRS - 2.0 cu. ft. Velos Speedcook Microwave Oven manuals and user guides available at ManualOwl.com. Try out our unique manual viewer allowing you to interact with manuals from directly within your browser!

Whirlpool Reviews

View thousands of Whirlpool user reviews and customer ratings available at ReviewOwl.com.

Contact Information

Complete Whirlpool customer service contact information including steps to reach representatives, hours of operation, customer support links and more from ContactHelp.com.

Scoreboard Ratings

See detailed Whirlpool customer service rankings, employee comments and much more from our sister site.

Whirlpool Recalls

Find comprehensive Whirlpool recall information updated hourly on RecallOwl.com.