Viking DMOS201SS Support Question
Viking DMOS201SS Support Question
Find answers below for this question about Viking DMOS201SS.Need a Viking DMOS201SS manual? We have 2 online manuals for this item!
Question posted by Mgorder on May 10th, 2013
Display Light Is Low
How do I get the display light brighter, can barely see it
Current Answers
Related Viking DMOS201SS Manual Pages
Installation Instructions - Page 2
... 8 Performance Checklist 8
IMPORTANT-Please Read and Follow! Remove the turntable from the product.
UÊ Before beginning, please read these instructions with Viking microwave ovens specifying builtin trim kit DMTK302 on the rating label on the left side wall of injury.
UÊ Please observe all local and national codes and ...
Installation Instructions - Page 3
... on the Rating label means the product is widely recognized. NA NA
(6.9 kg)
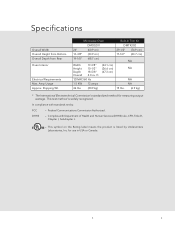
* The International Electrotechnical Commission's standardized method for use in USA or Canada.
3
E
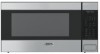
Microwave Oven
DMOS201
24"
(60.9 cm)
13-3/8" (33.9 cm)
19-1/8" (48.7 cm)
Width Height Depth Overall
17-3/8" 10-1/2" 18-5/8" 2.0 cu.
for measuring output wattage.
Complies with standards...
Installation Instructions - Page 4
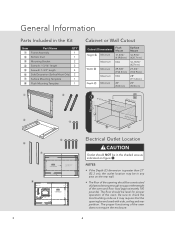
....2 mm) FLOOR LINE OF CUTOUT OPENING
CENTER LINE
BUILT-IN TRIM KIT FLUSH MOUNTING TEMPLATE FOR DESIGNER SERIES MICROWAVE OVEN
4-3/16" (106.4 mm)
3-15/16" (100 mm)
NOTES:
UÊ If the Depth (C) ...between holes 9.1" (231.2 mm)
BUILT-IN TRIM KIT SURFACE MOUNTING TEMPLATE
FOR DESIGNER SERIES MICROWAVE OVEN
Center Line
1. Align the Floor Line with side, ceiling and rear partition. Be sure...
Installation Instructions - Page 5

... Side Spacer Template - L with a 1/16" drill bit. Flush Mount Configuration Microwave Oven and Frame Assembly
glaFssLaUre SfluHsh wMithOthUe cNabTineCt ONFIGURATION- BOTTOM SPACER-1 REQUIRED. 1/4" plywood... is level with the cabinet.
SIDE SPACER-2 REQUIRED.
b. FIGURATION -Microwave Oven and Frame Assembly protrude from the front of the cabinet.
Tape it into place...
Use and Care Manual - Page 1
Viking Use & Care Manual
Designer Microwave Oven
Use and Care Manual - Page 2
... hope that you will provide you with the information you need to the elite world of Viking products, contact your Microwave Oven's care and operation.
Your Viking Microwave Oven is our ultimate goal. Congratulations
Congratulations and welcome to become familiar with your dealer or visit us online at 1-888-VIKING1. We hope you will...
Use and Care Manual - Page 3
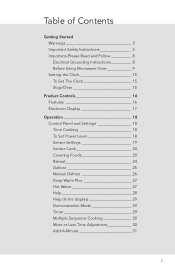
... Warnings 3 Important Safety Instructions 5 Important-Please Read and Follow __________ 8 Electrical Grounding Instructions __________ 8 Before Using Microwave Oven 9 Setting the Clock 15 To Set The Clock 15 Stop/Clear 15
Product Controls 16 Features 16 Electronic Display 17
Operation 18 Control Panel and Settings 18 Time Cooking 18 To Set Power Level 18...
Use and Care Manual - Page 8
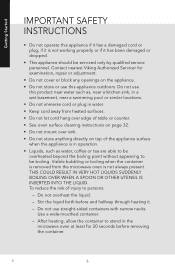
... without appearing to be serviced only by qualified service personnel. UÊ See oven surface cleaning instructions on the appliance. UÊ Do not mount over edge of table or... a wet basement, near a kitchen sink, in the microwave oven at least for examination, repair or adjustment. UÊ Keep cord away from the microwave oven is not working properly or if it has been damaged ...
Use and Care Manual - Page 10
...or serviceperson.
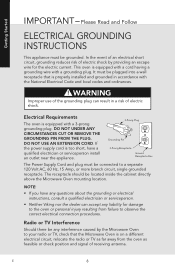
It must be located inside the cabinet directly above the Microwave Oven mounting location. DO NOT USE AN EXTENSION CORD.
Radio or TV Interference
Should there be ..., check that is properly installed and grounded in a risk of electric shock by the Microwave Oven to observe the correct electrical connection procedures. Getting Started
IMPORTANT - In the event of an ...
Use and Care Manual - Page 11
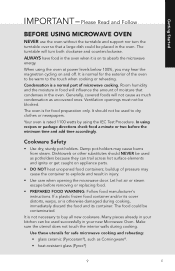
... off. If a plastic frozen food container and/or its container. UÊ heat-resistant glass (Pyrex®)
9
E It should NEVER be used successfully in your new Microwave Oven. UÊ DO NOT heat unopened food containers; UÊ PREPARED FOOD WARNING: Follow food manufacturer's instructions. It is otherwise damaged during cooking.
The turntable will not...
Use and Care Manual - Page 12
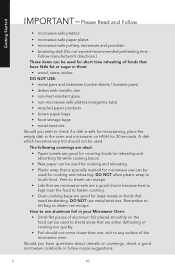
... should not come closer than one inch to use metal twist ties. E
10 UÊ Wax paper can be used for short time reheating of the microwave oven. Should you wish to check if a dish is kept near the food to shield areas that have little fat or sugar in them:
UÊ wood...
Use and Care Manual - Page 13
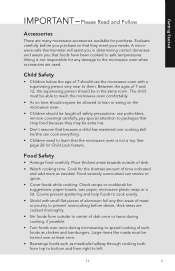
... 7 and 12, the supervising person should be taught all safety precautions: use the microwave oven with small flat least once.
UÊ Shield with a supervising person very ...before you in the same room. UÊ Stir foods from right to the microwave oven when accessories are many microwave accessories available for any thin areas of 7 should anyone be turned over once ...
Use and Care Manual - Page 14
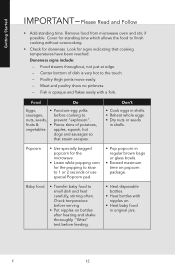
...food
UÊ Transfer baby food to
nuts, seeds, prevent "explosion".
UÊ Check for the microwave. Doneness signs include:
-
UÊ Heat bottles with a fork. Please Read and Follow
UÊ... before cooking to small dish and heat carefully, stirring often. Remove food from microwave oven and stir, if possible.
UÊ Exceed maximum time on bottles after heating and...
Use and Care Manual - Page 16
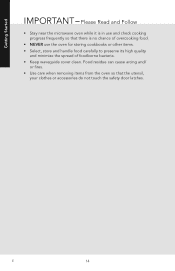
..., store and handle food carefully to preserve its high quality
and minimize the spread of overcooking food. Please Read and Follow
UÊ Stay near the microwave oven while it is no chance of foodborne bacteria. E
14 UÊ NEVER use and check cooking progress frequently so that the utensil,
your clothes or accessories...
Use and Care Manual - Page 17
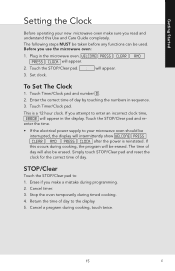
... for the correct time of day by touching the numbers in the microwave oven. 8&-$0.& 13&44 $-&"3 "/% 13&44 $-0$, will appear.
3. STOP/Clear
Touch the STOP/Clear pad to the display. 5. This is reinstated. Getting Started
Setting the Clock
Before operating your new microwave oven make a mistake during cooking, the program will be used.
Plug in...
Use and Care Manual - Page 20
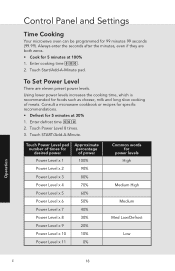
... eleven preset power levels. UÊ Cook for 5 minutes at 100%
1.
Consult a microwave cookbook or recipes for
power levels High
Medium High Medium
Med Low/Defrost Low
Operation
E
18 Touch START/Add-A-Minute. Enter cooking time .
2. Control Panel and Settings
Time Cooking
Your microwave oven can be programmed for foods such as cheese, milk and long...
Use and Care Manual - Page 32
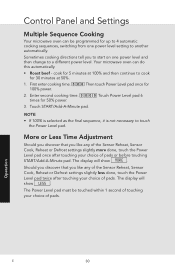
...Level pad 6 times for 100% power.
2.
UÊ Roast beef - Touch START/Add-A-Minute pad. Your microwave oven can be touched within 1 second of touching your choice of pads or before touching START/Add-A-Minute pad. Control... the Power Level pad once after touching your choice of pads. The display will show -&44 .
Operation
E
30 First enter cooking time. Then touch Power Level pad once for...
Use and Care Manual - Page 34
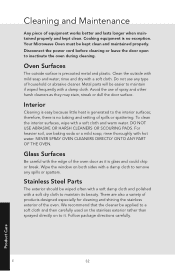
...soft cloth and warm water. Stainless Steel Parts
The exterior should be easier to inactivate the oven during cleaning. Clean the outside surface is no baking and setting of equipment works better ... be kept clean and maintained properly. rinse and dry with mild soap and water; Your Microwave Oven must be applied to a soft cloth and then carefully used on the stainless exterior rather ...
Use and Care Manual - Page 36
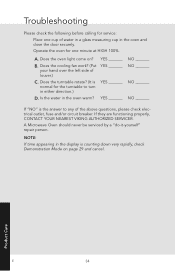
...Microwave Oven should never be serviced by a "do-it-yourself" repair person. B. Product Care
E
34 Operate the oven for service:
Place one minute at HIGH 100%. Is the water in either direction.)
D.
If they are functioning properly, CONTACT YOUR NEAREST VIKING AUTHORIZED SERVICER.
A.
NOTE:
If time appearing in the display...circuit breaker.
Does the oven light come on page 29 and ...
Use and Care Manual - Page 38
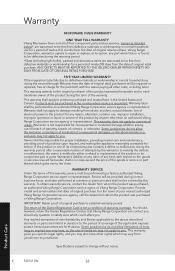
...fifth year from the date of warranty coverage.
Warranty
MICROWAVE OVEN WARRANTY
ONE YEAR FULL WARRANTY Viking Microwave Oven and all other costs, including labor. Products must be provided...materials or workmanship in normal household use during the warranty period. *Glass (including light bulbs), painted and decorative items are limited in the United States and Canada....
Similar Questions

How To Unlock Settings On My Viking Professional Microwave/convection Oven, Mode
How to unlock my Viking professional, microwave/convection oven. Model # VMOR205SS?Pushing 'start' o...
How to unlock my Viking professional, microwave/convection oven. Model # VMOR205SS?Pushing 'start' o...
(Posted by lcohernour 1 year ago)

Dim Display
The time/timer display has dimmed to the point that it is unreadable. This is the second time during...
The time/timer display has dimmed to the point that it is unreadable. This is the second time during...
(Posted by frankied 3 years ago)

Microwave (model# Dmos200) Stopped Heating
My 11 year old viking microwave suddenly stopped heating yesterday, it lights, turntable still works...
My 11 year old viking microwave suddenly stopped heating yesterday, it lights, turntable still works...
(Posted by leslieannp 3 years ago)

How Do I Increase The Brightness Of The Display?
How do I increase the brightness of the display?
How do I increase the brightness of the display?
(Posted by patriciaburgin 11 years ago)

Viking - Designer Series - Dmor206ss Not Working
3yr old convection microwave oven lights, fan work but turntable stopped running and can not open th...
3yr old convection microwave oven lights, fan work but turntable stopped running and can not open th...
(Posted by willjohnmill 12 years ago)