Sony LBT-LCD77Di Support Question
Sony LBT-LCD77Di Support Question
Find answers below for this question about Sony LBT-LCD77Di - Compact Hi-fi Stereo System.Need a Sony LBT-LCD77Di manual? We have 1 online manual for this item!
Question posted by blloyd66 on October 13th, 2012
Can You Connect A Cassette Player/turntable To This? (audio Input).
The person who posted this question about this Sony product did not include a detailed explanation. Please use the "Request More Information" button to the right if more details would help you to answer this question.
Current Answers
Related Sony LBT-LCD77Di Manual Pages
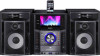
Operating Instructions - Page 13
... a disc. Press to switch the TV's input source to "COMPONENT 3" while using "THEATRE SYNC."
LCD...audio and video contents stored in the disc tray, and flashes when the disc tray is recognized.
DISC 1 DISC 3* button (page 38, 74)
Press to delete a pre-programmed track. DISC SKIP/EX-CHANGE button (page 36, 38, 74)
Press to the "DVD" function from the connected...
Operating Instructions - Page 14

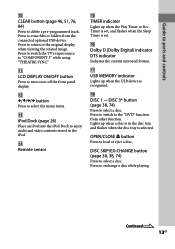
...REC TO USB button (page 74, 78)
Press to transfer music from a disc or record the sound from an analog audio source to select a track, chapter or video file.
Turn to select the preset station.
MASTER VOLUME
Turn to... numbers during recording.
OPERATION DIAL (page 37, 65)
Turn to the connected USB device. ECHO LEVEL
Turn to adjust the echo level.
Disc tray
14GB
Operating Instructions - Page 15
...)
Press to iPod Display mode or Main Display mode.
Continued 15GB Lights up in red when transferring or recording to the connected optional USB device or when erasing audio files or folders.
EQ BAND/MEMORY button (page 88)
Press to select the frequency band when adjusting the equalizer.
MIC...
Operating Instructions - Page 19

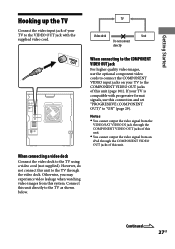
... button (page 35, 46, 51, 63, 76, 82)
Press to erase files or folders from the connected optional USB device.
Press to return to select a track, chapter or video file. Guide to parts and controls... to delete a pre-programmed track. Press to switch the TV's input source to "COMPONENT 3" while using "THEATRE SYNC."
-/--1) button
Press to enter a single-digit or doubledigit number.
...
Operating Instructions - Page 27
...
Unit
Do not connect directly
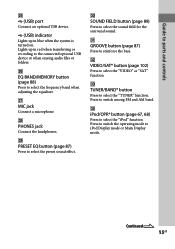
When connecting a video deck
Connect the video deck to the TV using a video cord (not supplied). Getting Started
Hooking up the TV
Connect the video input jack of your TV to the VIDEO OUT jack with progressive format signals, use the optional component video cords to connect the COMPONENT VIDEO input jacks on your...
Operating Instructions - Page 33
..., the guide message does not appear. Make sure that the headphones or microphones are not connected. If you cannot perform "SPEAKER SETUP."
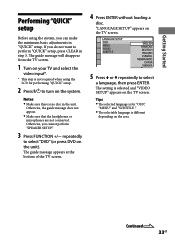
3 Press FUNCTION +/ repeatedly
to select "DVD" (or... guide message will disappear from the TV screen.
1 Turn on your TV and select the
video input*.
* This step is different depending on the area.
Continued 33GB Otherwise, you do ...
Operating Instructions - Page 35
...
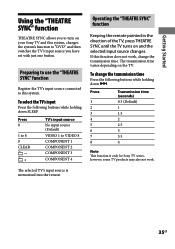
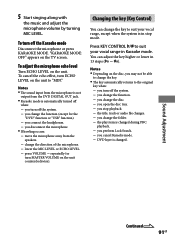
Preparing to use the "THEATRE SYNC" function
Register the TV's input source connected to this function does not work .
35GB Operating the "THEATRE ... TV. Press 0
1 to 8 9 CLEAR
+
TV's input source No input source (Default)
VIDEO 1 to VIDEO 8 COMPONENT 1 COMPONENT 2 COMPONENT 3
COMPONENT 4
The selected TV's input source is only for Sony TV series, however, some TV products may ...
Operating Instructions - Page 60

... setting displays a wide picture with a wide mode function.
4:3 LETTER BOX: Select this when you connect a wide-screen TV or a TV with bands on the upper and lower portions of the subtitle. If you select a language in "MENU," "AUDIO," or "SUBTITLE" that do not fit.
60GB This setting displays the wide picture on...
Operating Instructions - Page 66
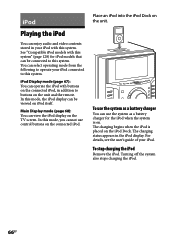
...the iPod
You can operate the iPod with buttons on the connected iPod, in addition to this system. iPod Display mode (page 67): You can enjoy audio and video contents stored in the iPod display. In this ... when the iPod is on the TV screen.
Main Display mode (page 68): You can be connected to this mode, you cannot use the system as a battery charger for iPod models that can select...
Operating Instructions - Page 67
... or chapter of audiobook/ podcast
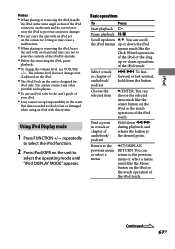
Hold down the button. Basic operations
To
Press
Start playback . Scroll up -or-down /.
You cannot connect any other portable audio players. To use VOLUME +/. Return to
select the operating mode until "iPod DISPLAY MODE" appears. Doing so may cause a malfunction. When...
Operating Instructions - Page 72
... on the USB device.
Compatibility with the USB device to be connected for a list of USB devices that has audio files, video files or JPEG image files.
72GB Note on the maximum number...58320; It may take a long time to be guaranteed.
If audio files on a USB device that can be connected to this system
See "Compatible devices with incompatible software, those files may produce ...
Operating Instructions - Page 73
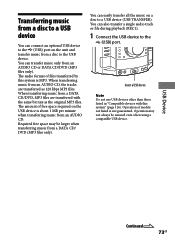
...even when using a compatible USB device. Transferring music from a disc to a USB device
You can connect an optional USB device to the (USB) port on a disc to a USB device (USB TRANSFER... transferring music from an AUDIO CD, the tracks are transferred with this system is not guaranteed. You can also transfer a single audio track or file during playback (REC1).
1 Connect the USB device to the...
Operating Instructions - Page 76
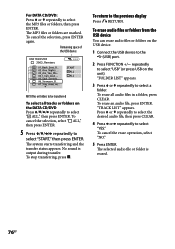
"FOLDER LIST" appears.
3 Press or repeatedly to select
"YES."
To erase audio files or folders from the USB device
You can erase audio files or folders on the USB device.
1 Connect the USB device to the
(USB) port.
2 Press FUNCTION +/ repeatedly
to select "USB" (or press USB on the DATA CD...
Operating Instructions - Page 78
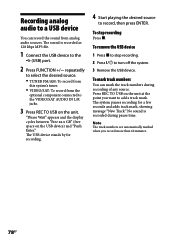
...AM: To record from this system's tuner.
VIDEO/SAT: To record from the optional component connected to a USB device
You can mark the track numbers during pause time. The sound is recorded ...for recording.
4 Start playing the desired source
to record, then press ENTER. Recording analog audio to the VIDEO/SAT AUDIO IN L/R jacks.
3 Press REC TO USB on the unit.
To remove the USB device...
Operating Instructions - Page 91
... function (except for the
"DVD" function or "USB" function). you connect the headphones. you disconnect the microphone. If howling occurs: ... ECHO LEVEL on the TV screen. Notes The sound input from the microphone is not
output from the
speakers. ... the title, track or audio file changes. you turn ECHO LEVEL on the unit counterclockwise). "...
Operating Instructions - Page 100

...OUT jack
Connect the audio input jack of music being played back.
100GB Note The date information format varies depending on the connected subwoofer or the type of an optional subwoofer. Hooking up optional components
To enhance your system, you can connect optional components.
Rear ... pressing DISPLAY during playback.
Refer to the operating instructions provided with each component.
Operating Instructions - Page 101

... when the system function is set "PROGRESSIVE (COMPONENT OUT)" to Karaoke mode, or if you press AUDIO, SOUND FIELD or the buttons related to "ON" (page 29).
If your TV accept progressive format signals, you must use this unit.
VIDEO OUT jack
Connect the video input jack of the TV or projector.
...
Operating Instructions - Page 105
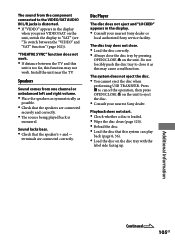
Install the unit near the TV. Disc Player
The disc does not eject and "LOCKED" appears in the display
when you press VIDEO/SAT on...disc that this system can play
back (page 8, 36). Load the disc on the unit. Speakers
Sound comes from the component connected to the VIDEO/SAT AUDIO IN L/R jacks is too far, this may not work . If distance between the "VIDEO" and "SAT" function"...
Operating Instructions - Page 113

... video cord.
Set "PROGRESSIVE (COMPONENT OUT)" to "OFF" if you use a partitioned USB device, only audio files on the TV so that the system is connected securely.
The video cord is ... FAT12, FAT16 and FAT32, but there is no picture.
The "VIDEO/SAT" function is no input signal.
Check that you can view the pictures from the system.
Make sure you set...
Operating Instructions - Page 124

...Video color system format North American model: NTSC Other models: NTSC and PAL
Tuner section
FM stereo, FM/AM superheterodyne tuner FM tuner section
Tuning range North American model: 87.5 MHz ... (SS-GZR777D) for
MHC-GZR333i
Front speaker (SS-LCD77DI) for LBT-
Disc player section
System: Compact disc and digital audio and video system
Laser Diode Properties Emission Duration: Continuous ...
Similar Questions

Can You Hook Up A Cassette Player This This Receiver..also Can You Hook Up A Tur
also a turntable to this receiver
also a turntable to this receiver
(Posted by jharden742 8 years ago)

How To Connect Ipod Into Sony Lcd77di
(Posted by LukiANDIE 9 years ago)

The Cassette Player Wont Play Tape, Can A Repair Be Done ?
(Posted by tonyatmoz 10 years ago)

Cassette Player
need belts for cassette player. there are four belts.
need belts for cassette player. there are four belts.
(Posted by ersdaillev 12 years ago)
I Have A Compact Hi-fi Stereo Sony Lbt-a37cdm.
The System Control Cord connects to a male connector in the back of the stereo. I have lost that mal...
The System Control Cord connects to a male connector in the back of the stereo. I have lost that mal...
(Posted by jan135 12 years ago)