Schwinn Airdyne AD6 Support Question
Schwinn Airdyne AD6 Support Question
Find answers below for this question about Schwinn Airdyne AD6.Need a Schwinn Airdyne AD6 manual? We have 1 online manual for this item!
Question posted by keb5 on November 5th, 2014
Schwinn Ad6 Seat Adjustment
How do I connect the seat, it is not tightening to the bar
Current Answers
Answer #1: Posted by TommyKervz on November 5th, 2014 11:29 PM
TommyKervz

Member since:
January 10th, 2013 Points: 17,776,843

Member since:
January 10th, 2013 Points: 17,776,843
Seat adjustment on instructions on page 18 below
http://www.manualslib.com/manual/508686/Schwinn-Ad6.html?page=18#manual
Related Schwinn Airdyne AD6 Manual Pages
Assembly and Owner's Manual - Page 2

... 7
Assembly 8
Moving the Machine
13
Leveling the Machine
13
Important Safety Instructions
14
Features
15
Console Features
16
Remote Heart Rate Monitor
17
Operations 18
Adjustments 18
Using the Machine
18
Locking the Fan Assembly / Storage
19
Power Up / Idle Mode
19
Initial Setup
20
Quick Start Program
20
Custom Time...
Assembly and Owner's Manual - Page 3

... appropriate work space away from foot traffic and exposure to determine the location of the machine can be heavy or awkward. This could result in connection with this equipment. Assembly
This icon means a potentially hazardous situation which, if not avoided, could compromise the safety of this machine before first use only...
Assembly and Owner's Manual - Page 5

... applicable EN ISO 20957 International Standards for each assembly step.
• Using the recommended wrenches, turn the bolts and nuts to the right (clockwise) to tighten, and the left (counterclockwise) to loosen, unless instructed otherwise.
• When attaching 2 pieces, lightly lift and look through the bolt holes to help insert the...
Assembly and Owner's Manual - Page 6

Item Qty Description
Item Qty Description
1
1 Frame
9
1 Pedal Strap, Left
2
1 Console Support Bar
10
1 Pedal, Left
3
1 Console
11
1 Foot Peg, Left
4
1 Water Bottle Holder
12
1 Stabilizer, Front
5
1 Handlebar, Left
13
1 Foot Peg, Right
6
1 Seat
14
1 Pedal, Right
7
1 Seat Post
15
1 Pedal Strap, Right
8
1 Stabilizer, Rear
16
1 Handlebar, Right
6
PARTS
4
6
17
...
Assembly and Owner's Manual - Page 8

... Pedal has an "L", the Right Pedal an "R".
15
14
R
9
10
10 X2
X2
8 Attach Stabilizers to Frame Assembly
Note: The Left Pedal is based from
a seated position on the proper side of the Bike. Be sure to attach Pedals on the bike. Orientation is reverse-threaded. ASSEMBLY
1.
Assembly and Owner's Manual - Page 11

Loosen and Pull the Seat Post Adjustment Knob to Attach Seat Post to Frame Assembly
5
16
11
X4
C
13
B A
6mm
8. 7. Attach Foot Pegs and Handlebar Arms to
Frame Assembly
7
STOP
11
Assembly and Owner's Manual - Page 12

Attach Seat to ensure that all hardware is straight and then tighten the hardware. 6
10. 9. Do not use or put the machine into service until the machine has been fully assembled and inspected for correct performance in accordance with the Owner's Manual.
12 Final Inspection
Inspect your machine to Seat Post
NOTICE: Be sure the Seat is tight and components are properly assembled.
Assembly and Owner's Manual - Page 13

...sure that they are all physically fit and able to keep the ...the locking nuts and adjust the levelers until they detach or unscrew from the machine. All abrupt motions can occur. 3. Tighten the locking nuts. To adjust: 1. Place ... move the machine. Leveling the Machine
The machine needs to you exercise.
13 Do not adjust the levelers to such a height that you move the machine safely...
Assembly and Owner's Manual - Page 14

... and prevent danger to anticipate that the Adjustment Devices do not hit the user. • Keep the Pedals clean and dry. • Exercise on them. Moving parts and other objects into any time the Warning stickers become short of the machine, remove the batteries and fully tighten the Locking Knob to a stop. This...
Assembly and Owner's Manual - Page 15

... Holder E Battery Compartment F Locking Knob
G Air Resistance Fan H Transport Roller I Leveler J Stabilizer, Front K Foot Peg L Pedal
G
H I J
M Stabilizer, Rear N Foot Step Pad O Seat Post Adjustment Knob P Seat
R
Q
S
Accessories
Q AirDyne® Reading Rack
R AirDyne® Wind Screen
To order, go to www.schwinnfitness.com or call 1 (800) 605-3369. S Remote Heart Rate Chest Strap
15
Assembly and Owner's Manual - Page 16

...will flash when it has a signal from a telemetric heart rate sensor. Stop exercising if you feel pain or tightness in the workout, to two decimal places-for ...Odo." ) shows the sum of the workout. Calories The CALORIES display field shows the estimated calories that you start an exercise program. If the calorie count is more , the display starts again at 0.00. During the initial power-up ,...
Assembly and Owner's Manual - Page 17

... until your heart rate reaches between 60 - 85% of approximately 72 BPM, where as POLAR® OwnCode® chest straps will not work with all exercises and fitness regimens, always use your best judgment when you maintain your target heart rate, the more accurate to burn fat during...
Assembly and Owner's Manual - Page 18

...connected and when any of each day. • Schedule workouts in the forward position, place the heel of it. How Often Should You Exercise Consult a physician before you start an exercise program.
Loosen and pull the Seat Post Adjustment Knob on the Seat Post.
4. Release the Seat Post Adjustment...fully engaged and fully tighten the adjustment knob. Pedal straps can be left ...
Assembly and Owner's Manual - Page 19

... until the machine fully stops. Note: The Locking Pin will display "Lbatt" if the batteries are connected and when any of these parts move the others do as a result of the machine, remove the... your workout, reduce the Resistance Fan speed until the Pedals have an On/Off switch.
19 To exercise all the muscle groups in use, be locked for part of the machine.
Upper Body Workout: Grasp...
Assembly and Owner's Manual - Page 20
... can be setup with your workout. Note: The Console will display "Alt" and must be adjusted at a future time. Initial Setup During the initial power-up, the Console will automatically pause ...select a Custom Time Workout and enter your own time value. Push the Increase and Decrease buttons to adjust the custom time value. 5. Push START/STOP to start the workout program. 3. When done with...
Assembly and Owner's Manual - Page 21
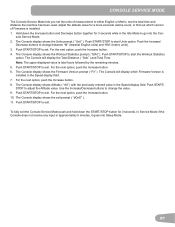
... either English or Metric, see the total time and distance the machine has been used, adjust the altitude value for a more accurate calorie count, or find out which Firmware Version is...shows the Firmware Version prompt ( "Fir" ). Push START/ STOP to exit. Push START/STOP to adjust the Altitude value. Push START/STOP to set the units of Firmware is total hours followed by the...
Assembly and Owner's Manual - Page 22
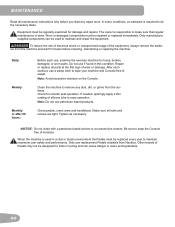
...from Nautilus. When the machine is done.
If needed, sparingly apply a thin coating of sweat. Tighten as necessary. Note: Do not use if found in a club or studio environment the Pedals ...electrical shock or unsupervised usage of wear or damage.
Only use , examine the exercise machine for smooth seat operation. Repair or replace all bolts and screws are tight. In some conditions, ...
Assembly and Owner's Manual - Page 24

...
T
A Foot Peg, Right B Handlebar, Right C Handlebar, Left D Foot Peg, Left E Water Bottle Holder F Console G Locking Knob H Spring, Knob I Console Cable, Upper J Console Support Bar K Seat L Seat Post M Foot Step Pad
24
N Seat Adjustment Knob O Frame P Stabilizer, Rear Q Shroud, Left R Crank Arm, Left S Center Plate T Pedal, Left U Pulley, Crank V Speed Sensor Magnet W Crank Belt X Pulley, Drive...
Assembly and Owner's Manual - Page 26

... Locking Knob is locked into one of Fan. Pedal should be tightened securely to crank. Check surface under unit
Check pedal to crank connection Check crank to axle connection Check pedal to crank connection Check Locking Knob Check locking pin
Check locking knob
Adjustment may be turned in or out to level bike. Remove pedals...
Assembly and Owner's Manual - Page 27

..., PRIVACY OR FOR ANY PUNITIVE DAMAGES ARISING OUT OF OR RELATED TO THE USE OF THE FITNESS MACHINE EVEN IF NAUTILUS, INC. Service For products purchased from defects in materials and workmanship, when... not responsible for the purpose intended, under this machine that proves to any WARRANTY OF FITNESS FOR A PARTICULAR PURPOSE, are limited in duration to charge the consumer for these areas...
Similar Questions

How Can You Adjust The Seat Lumbar Support?
(Posted by gtargantos 6 months ago)


Ad6 Adjustment For Use By A Short Person.
How can the AD6 be adapted for use by a shorter person? Using the handlebars requires an exaggerated...
How can the AD6 be adapted for use by a shorter person? Using the handlebars requires an exaggerated...
(Posted by kazmirrg 1 year ago)


Console On Brand-new Airdyne Ad6 Will Not Shut Off Automatically!
Help! The console on my brand-new Airdyne AD6 will not shut off and stay off. It just keeps beeping ...
Help! The console on my brand-new Airdyne AD6 will not shut off and stay off. It just keeps beeping ...
(Posted by cannataco63 8 years ago)