Get support for Sanyo DP55441

Sanyo DP55441 Support Question

Sanyo DP55441 Support Question

Find answers below for this question about Sanyo DP55441.
Need a Sanyo DP55441 manual? We have 1 online manual for this item!
Question posted by Anonymous-59887 on May 20th, 2012

Why Does My Sanyo Dp55441 Want To Turn Off Every Couple Of Hours?

I get a message saying your TV will turn off in one minute. As long as I exitusing the remote the TV stays on but if I am not in the room when the message comes on the TV turns off and I have to turn it back on when I get back in the room.  

Current Answers

Answer #1: Posted by addisk on May 20th, 2012 3:57 PM
This answer was accepted by the poster of the original question.
addisk

Member since:
May 8th, 2012

Points: 694,616
1,060
points
look on the menu there have  options for that like when there have no action the tv shut off by itself it's like an screensaver


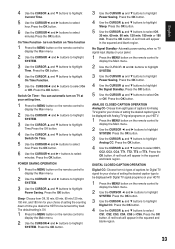
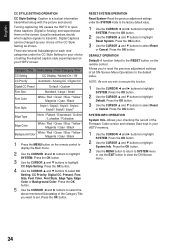
POWER SAVING OPERATION
1 Press the MENU button on the remote control to
display the Main menu.
2 Use the CURSOR ◄ and ► buttons to highlight
SYSTEM.
3 Use the CURSOR ▲ and ▼ buttons to highlight
Power Saving. Press the OK button.
Sleep- Choose from Off, 30 min, 60 min, 90 min,120 min,
150 min, and 180 min for your choice of setting the counting
down of time you desire the HDTV to be turned off by itself.
The default setting is Off.
1 Press the MENU button on the remote control to
display the Main menu.
2 Use the CURSOR◄ and ► buttons to highlight
SYSTEM. Press the OK button.
3 Use the CURSOR ▲ and ▼ buttons to highlight
Power Saving. Press the OK button.
4 Use the CURSOR ▲ and ▼ buttons to highlight
Sleep. Press the OK button.
5 Use the CURSOR ▲ and ▼ buttons to select Off,
30 min, 60 min, 90 min, 120 min, 150 min or 180
min. Press the OK button. A red hook will appear
in the squared and blank region.
No Signal Standby- Automatic power saving, when no TV
s

Related Sanyo DP55441 Manual Pages

Owners Manual - Page 3

...has been exposed to grounding electrodes, and requirements for long periods of the obsolete outlet. 10. Minimum clearance ... by the manufacturer. 12. Refer all instructions to the television equipment, be connected to the grounding system of the building...LCD TV cabinet for your product. Install the LCD TV in particular, specifies that provides guidelines for choosing SANYO. Heat ...
Owners Manual - Page 4

... that this television meet rigid U.L. It is designed and manufactured to provide reasonable protection against risk of the following measures: - HANDLING PRECAUTIONS • Handle by turning the equipment... limits required for ENERGY STAR qualification. Consult the dealer or an experienced radio/TV technician for a Class B digital device, pursuant to Part 15 of Dolby Laboratories...
Owners Manual - Page 5

...THE LCD SCREEN 3 HANDLING PRECAUTIONS 3 INSTALLING AND UNINSTALLING STAND 5 INSTALLATION 6 POSITIONING THE LCD HDTV 6 WALL MOUNTING (OPTIONAL 6 GETTING STARTED 7 PReCAUTIONS 7 GETTING STARTED-CONTROLS AND JACKS 8 REMOTE CONTROL OPERATION 9 GETTING STARTED-CONNECTIONS.....10 POWER CONNECTION 11 INITIAL SETUP 11 INITIAL CHANNEL SCAN 11 GETTING STARTED-POWER CONNECTION/CHANNEL SEARCH..11...
Owners Manual - Page 6

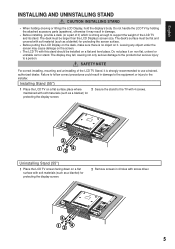
...to the installer. Installing Stand (55") 1 Place the LCD TV on a flat surface place where 2 Secure the stand to the TV with soft materials (such as a blanket) for protecting the screen...SAFETY NOTE For correct installing, mounting and uninstalling of the LCD TV and its stand. The desk's surface must be installed on a flat surface with 4 screws. maintained with soft materials (such as a...
Owners Manual - Page 7

...: 55" TV M8 Diameter, Length - 13mm (min.); 16mm (max.) Wall • (60mm) 6 Allow adequate space for proper ventilation. 52.3 4 36.5 33.5 3 29.3 14.9 NOTE: All dimensions are in a confined area. Wall mounting kit shall be able to a wall mounting kit. English INSTALLATION POSITIONING THE LCD HDTV Always use a firm-flat surface when...
Owners Manual - Page 8

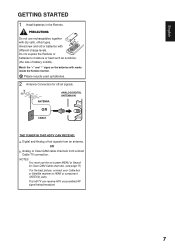
...use rechargeables together with dry cells, other types, mixed new and old or batteries with marks inside the Remote Control. Analog or Clear QAM cable channels from an antenna. This HDTV can receive ANY unscrambled RF signal ...air signals. English GETTING STARTED 1 Install batteries in the Remote. Match the "+" and "-" signs on -screen MENU to Search for off -air signals from a direct Cable...
Owners Manual - Page 9

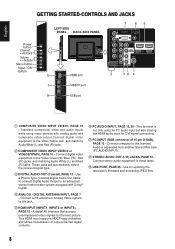
... / OK button LEFT-SIDE PANEL BACK-SIDE PANEL Y PC INPUT PC AUDIO ...INPUT Pb Pr Pb L Pr R L R DEO3 INPUT V DEO2 INPUT Y/VIDEO DV L INPUT1 INPUT2 ANT R COMPOSITE VIDEO INPUT VIDEO1, PAGE 10 - Connect a RF antenna or Analog Cable system to this terminal. A digital AV interface that accepts uncompressed video signals for updating the television...
Owners Manual - Page 10

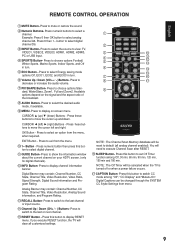
... Buttons- Press this button to display RESET menu. Digital Captions can be canceled when the TV is turned off or when a power failure occurs. Available options depend on your HDTV screen.( only for... Button- You will clear all analog channel enabled). PIX SHAPE Button- English REMOTE CONTROL OPERATION MUTE Button- Press to show the information window about the current channel...
Owners Manual - Page 12

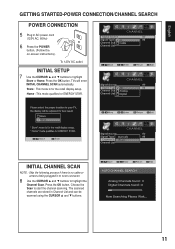
... AC, 60Hz) 6 Press the POWER button, (Follow the on-screen instructions). INITIAL setup 7 Use the CURSOR ▲ and ▼ buttons to highlight Store or Home. TVs will enter INITIAL CHANNEL SCAN automatically. Press the OK button.
Owners Manual - Page 14

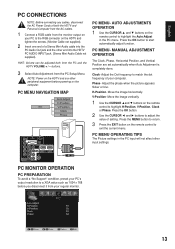
... MAP PC MENU- AUTO ADJUSTMENTS OPERATION 1 Use the CURSOR ▲ and ▼ buttons on the remote control to exit the current menu. Press the OK button. 2 Use the CURSOR ◄ and &#... your PC's output resolution to a XGA value such as 1024 x 768 before powering on the remote control to highlight H-Position, V-Position, Clock or Phase. Adjust the Dot frequency to match the dot...
Owners Manual - Page 15

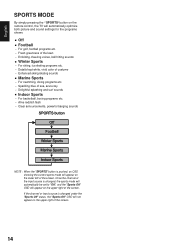
... the current sports mode will appear on the lower left of the screen. English SPORTS MODE By simply pressing the " SPORTS" button on the remote control, the TV will automatically optimize both picture and sound settings for the programs shown. ■■ Off ■■ Football −− For golf, football programs...
Owners Manual - Page 16

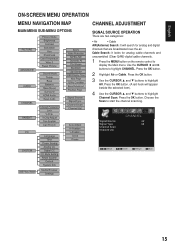
.... Press the OK button. (A red hook will search for analog cable channels and unscrambled (Clear QAM) digital cable channels. 1 Press the MENU button on the remote control to display the Main menu. Press the OK button. 2 Highlight Air or Cable. Move OK Enter MENU Return EXIT Exit 15 Use the CURSOR...
Owners Manual - Page 17

...show more unshowed channels. 3 Use the CURSOR ▲ and ▼ buttons to select and highlight the channel you want to rename. 4 Press the INFO button. 5 Use 0 ~ 9 buttons to type the channel renaming with following...word, numbers, and symbols by deleting or adding channels. 1 Press the MENU button on the remote control to display the Main menu. 2 Use the CURSOR ◄ and ► buttons to...
Owners Manual - Page 18

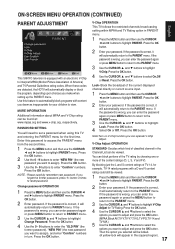
...wrong, you want to the PARENT menu. Press the OK button. Note:Turn on V-Chip function,you want to adjust and press the OK button. (MPAA,Block All,TV-Y,TV-Y7,TV-G,TV-PG,TV-14,and TV-MA.) 5 ... SANYO television is wrong, you forget the former password, press 1-- If you can block portions of the TV rating by choosing one or more of TV-14, for TV Rating. V-Chip OPERATION This TV follows...
Owners Manual - Page 19

... highlight ADVANCED. 5 Use the CURSOR ▲ and ▼ buttons to select the option you want to PARENT menu. This function is correct, it will be grayed out. English ON-SCREEN MENU OPERATION... OK button. 5 Use the CURSOR ▲ and ▼ buttons to select the setting you want to highlight MPAA for digital channels that it is correct, it will appear in the squared region)....
Owners Manual - Page 22

...be boosted or reduced depending on the room brightness. 1 Press the MENU button on the remote control to display the Main menu. 2...9660; buttons to highlight ADVANCED. Try having the TV setting on the remote control to display the Main menu. 2 Use the...turn on the Light sensor function. • Please set PICTURE MODE to User then can turn on this setting to off then can turn on the remote...
Owners Manual - Page 23

... and ► buttons to Off. • When display happened double shadow or Outer Glow ,please turn off the 120Hz CONDITION. Choose from six categories in the squared and blank region. 22 TIME OPERATION ... English, Français, and Español for your choice of menus and messages. 1 Press the MENU button on the remote control to display the Main menu. 2 Use the CURSOR ◄ and ►...
Owners Manual - Page 24

...; buttons to highlight SYSTEM. turn on TV at your HDTV. 1 Press the MENU button on the remote control to display the Main ...5 Use the CURSOR◄ and ► buttons to select hour.Press the OK button. 6 Use the CURSOR◄ and ...TV signal for your panel. 1 Press the MENU button on the remote control to display the Main menu. 2 Use the CURSOR ◄ and ► buttons to select minutes...
Owners Manual - Page 25

...for your choice of setting the desired caption style superimposed on the remote control. RESET SYSTEM OPERATION Reset System- Press the OK button. ...button. NOTE: Be sure you want to transmit). SYSTEM INFO OPERATION System Info- Turning captioning ON causes the HDTV to open these captions (Digital or Analog) and superimpose them on the remote control to display the Main ...
Owners Manual - Page 29

...No USB Media message appears on screen • Check the external equipment connections. • Check the external equipment settings. • Press the INPUT button on the remote control to find...the remote control. 28 up and cool down of TV. 7, 9 Cabinet makes popping sound • This is Plugged in the CHANNEL menu. (Set Signal Type • MUTE function may be turned ...

Similar Questions

Ask a New Question
Use the box below to post a new question about this Sanyo product .
Points & Prizes
  • You can earn points for nearly everything you do on HelpOwl.com
  • You can trade in those points for gift cards at leading retailers such as Amazon.com and Walmart
  • It's that simple!
See How it Works
Create a Free Account

Sanyo Manuals

Find free Sanyo DP55441 manuals and user guides available at ManualOwl.com. Try out our unique manual viewer allowing you to interact with manuals from directly within your browser!

Sanyo Reviews

View thousands of Sanyo user reviews and customer ratings available at ReviewOwl.com.

Contact Information

Complete Sanyo customer service contact information including steps to reach representatives, hours of operation, customer support links and more from ContactHelp.com.

Scoreboard Ratings

See detailed Sanyo customer service rankings, employee comments and much more from our sister site.

Sanyo Recalls

Find comprehensive Sanyo recall information updated hourly on RecallOwl.com.