
Ryobi RTS10 Support Question
Ryobi RTS10 Support Question
Find answers below for this question about Ryobi RTS10.Need a Ryobi RTS10 manual? We have 4 online manuals for this item!
Question posted by kenoeing on April 29th, 2015
Fuses
where are the fuses located in the Ryobi RTS10 10" Table saw?
Current Answers
Answer #1: Posted by hzplj9 on April 29th, 2015 7:09 AM
hzplj9

Member since:
June 25th, 2012 Points: 4,875,710

Member since:
June 25th, 2012 Points: 4,875,710
There is normally not any fuses internally as they would probably blow at start up. The on/off switch has a quick stop function and I would suggest for protection you run the saw through an RCD protector socket. I have attached a link to the user guide if you do not have it.
http://manuals.ryobitools.com/system/files/561/original/RTS10_RTS10G_864_eng.pdf?2014
Related Ryobi RTS10 Manual Pages
English Manual - Page 2

...RYOBI® POWER TOOL - WHAT THIS WARRANTY COVERS: This warranty covers all original equipment packaged with the following conditions: 30-DAY EXCHANGE POLICY: During the first 30 days after date of Terms...9 Features...10-12 Tools...Service Center. You can obtain the location of the Service Center nearest you may exchange any RYOBI® power tool which does not work in a ...
English Manual - Page 3
... use it comes to this tool.
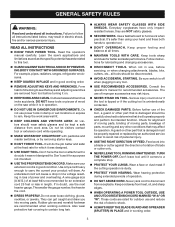
GUARD AGAINST ELECTRICAL SHOCK by removing starter keys.
DON'T FORCE TOOL. Don't use power tools in damp or wet locations or expose to hold work ...61550; NEVER STAND ON TOOL. Learn the saw while it will do a job it was not designed for better and safer performance. The use , before turning it on the saw 's applications and limitations...
English Manual - Page 4
...recommended accessories listed in this manual or addendums. Use of cord location and keep it should be sure all nails from blades. Stay...AWAY FROM CUTTING AREA. Always use common sense. Do not operate tool when you are defective or incorrect. GENERAL SAFETY RULES
... may cause the risk of accessories are included with saw is 10 in doubt as to remove cut , be plugged into...
English Manual - Page 5
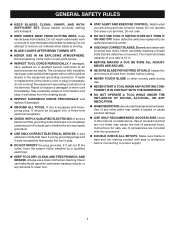
...for any work using the table saw blade. Instructions for wide or long work pieces.
AVOID KICKBACKS (work that are those in line with the path of the saw blade.
NEVER ... the anti-kickback pawls down, and the spreader in place over the saw blade using your hand into the cutting tool.
Use only recommended accessories listed in serious personal injury. When ...
English Manual - Page 6

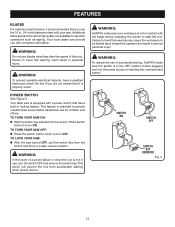
...Read The Operator's Manual Eye Protection
To reduce the risk of these symbols will result in damp locations.
Always wear safety goggles or safety glasses with any hot surface.
Safety Alert No Hands...from the blade will allow you to operate the tool better and safer. To reduce the risk of the following symbols may be used on this tool. SYMBOLS
Some of injury or damage, avoid contact...
English Manual - Page 7
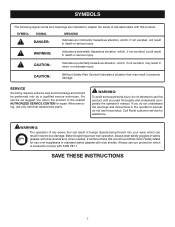
...following signal words and meanings are intended to explain the levels of any power tool can result in foreign objects being thrown into your eyes, which can result...for repair. If you do not use only identical replacement parts.
When servicing, use this product.
Call Ryobi customer service for use eye protection which , if not avoided, may result in death or serious injury.
...
English Manual - Page 8

... rating (on tool data plate) 0-2.0 2.1-3.4 3.5-5.0 5.1-7.0 7.1-12.0 12.1-16.0
Cord Length Wire Size (A.W.G.)
25' 16
16 16 16 14
14
50' 16
16 16 14 14
12
100' 16
16
14 12 10
-
**Used ...product is green with lower voltage. If the saw does not operate when plugged into a matching outlet that is properly grounded. Check with a power tool. SPEED AND WIRING
The no-load speed ...
English Manual - Page 9

... bevel angle.
Resin A sticky, sap-based substance that serves as a guide for table saws) Devices used to prevent kickback.
Miter Cut A cutting operation made with adjustable blades or...or other than the blade, which a blade or cutting tool is being dropped into the tool first.
Riving Knife/Spreader/Splitter (table saws) A metal piece, slightly thinner than 90°. Kerf...
English Manual - Page 11

...saw table shows the distance between the rip fence and the blade. Place the key in a location that will be operated. The rip fence is unlocked before the saw... pieces with a 10 in the locked position, it may jam and bend the locking bolt.
This saw includes a rip ... rides in personal injury. SWITCH ASSEMBLY -
Use this tool.
This miter gauge aligns the wood for the basic cuts...
English Manual - Page 12
...of accidental starting when power returns.
Your table saw . WARNING:
Do not use the 10 in contact with your saw is equipped with complete information. TO TURN YOUR SAW OFF: Press the switch ...heed this warning may cause the workpiece to heed this tool. Additional blade styles of this warning could result in a safe, secure location.
To lock your workpiece is not in ., 24...
English Manual - Page 13

TOOLS NEEDED
The following tools (not included or drawn to scale) are needed for assembly and making adjustments:
WRENCH (2) 10 mm, 12 mm
PHILLIPS SCREWDRIVER
flathead SCREWDRIVER
FRAMING SQUARE
Fig. 4
13
English Manual - Page 16

...on a level work surface. Inspect the tool carefully to make sure the table saw is misuse and could result in the area where the saw will be used. WARNING:
Do not connect to ...requires assembly. Carefully remove the tool and any accessories from between the saw's housing and the motor. The saw is factory set to desired location. If any parts are missing, delay ...
English Manual - Page 18
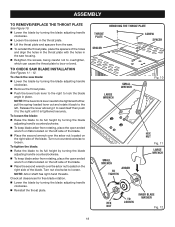
...located on the right side of the blade.
Check all clearances for free blade rotation.
Lower the blade by turning the blade adjusting handle clockwise.
Reinstall the throat plate.
removing the throat plate
throat plate
screw SPACER
SPACER
LARGE WRENCH
SMALL WRENCH
Fig. 10...; Lift the throat plate and spacers from the saw. To reinstall the throat plate, place...
English Manual - Page 20
... Do not modify the plug if it on the other end. Refer to the Electrical section of the TABLE Saw
The 3-prong plug must be plugged into a loose knot or nail.
Always use steady, ... your hands. Keep your workpiece firmly with both for the same operation.
Always use this tool for the cut Cutting warped or wet lumber Using the wrong blade for safely ...
English Manual - Page 32
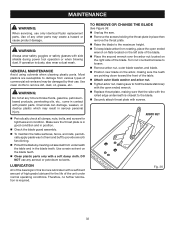
... Figure 36. Unplug the saw. Remove the screws holding ... from underneath the table and in this tool are pointing down ...located on the left side of the blade. Place the second wrench over the arbor nut located...Ryobi replacement parts.
If operation is required. Use clean cloths to the blade. Securely attach throat plate with side shields during power tool...
English Manual - Page 34

...RYOBI® is a registered trademark of work with approved safety equipment, such as those dust masks that are : • lead from lead-based paints, • crystalline silica from bricks and cement and other reproductive harm. Table Saw...that you do this tool will be found on a plate attached to these exposures varies, depending on how often you have purchased your tool, should a need ...
Repair Sheet - Page 5
... will be found on a plate attached to the back panel of the cabinet. RYOBI Table Saw - Always mention the model number in ., SMALL 1
38 0101010313 WRENCH (LARGE ... CLAMP 1 7 410192002 SCREW (M4 x 16 mm PAN HD 6 8 0152011814 GROMMET 1 9 0101140701 POWER CORD 1 10 411072702 LOCK NUT (1/4-20 1 11 0101090302 CORD CLAMP 1 12 0101090201 SWITCH BOX 1 13 410162004 SCREW (M6 x 25...
Repair Sheet - Page 7

...MANUAL 1
9-30-08 (REV:00)
RYOBI Table Saw - Always mention the model number in all correspondence regarding your TABLE SAW or when ordering repair parts. NO. NUMBER
... x 12 mm 6 7 0101015002 BRUSH ASSEMBLY 2 8 0101010208 END CAP (MOTOR 1 9 0101010209 RUBBER PLUG 2 10 0101010502 BRUSH HOLDER 2 11 411012001 HEX NUT (M5 2 12 410272004 SCREW (M5 x 75 mm 2
13 0101010207...
Repair Sheet - Page 8

... HEX LOCK NUT (5/16-18)........ 16
10 410032705 CARRIAGE BOLT (1/4-20 x 1-5/8 in 4
11 411062701 HEX NUT (1/4-20 4
8 No. Description
Qty.
Description
Qty.
1 A101141301 COMPLETE STAND ASSEMBLY (INC. MODEL NO. BTS12S
Figure D
3
6
7
9
4
10 9 6
11
8 9 7
5 8
3
2
3
5
4
9
2
2
8 3
2
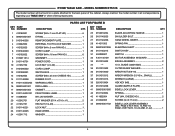
PARTS LIST For FIGURE D
Key Part
Key Part
No. RYOBI TABLE SAW - No.
Repair Sheet - Page 9

RYOBI Table Saw - MODEL NUMBER BTS12S
POWER CORD
BLACK WHITE
SWITCH
BLACK WHITE
MOTOR CORD
MOTOR
WIRING DIAGRAM
9
Similar Questions

Ryobi 10" Table Saw Dado Throat Plate
where can I find a dado throat plate for the Ryobi 10" table saw?
where can I find a dado throat plate for the Ryobi 10" table saw?
(Posted by Rick52757 2 years ago)

Dado Blade Insert For A Ryobi Rts10 Table Saw
Where can I purchase a dado blade insert for my Ryobi RTS10 10" table saw? I am having difficulty fi...
Where can I purchase a dado blade insert for my Ryobi RTS10 10" table saw? I am having difficulty fi...
(Posted by bstilton 9 years ago)

Replacement Of Pad.on A Ryobi Rst #10 Table Saw.
The pad is located behind the knob that locks the blade swivel.
The pad is located behind the knob that locks the blade swivel.
(Posted by tabucher 11 years ago)