Ricoh Aficio MP 5001 Support Question
Find answers below for this question about Ricoh Aficio MP 5001.Need a Ricoh Aficio MP 5001 manual? We have 4 online manuals for this item!
Question posted by 1160Ara on August 18th, 2014
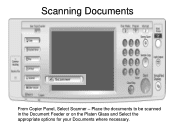
Ricoh 5001 Beeping When Attempting To Scan
The person who posted this question about this Ricoh product did not include a detailed explanation. Please use the "Request More Information" button to the right if more details would help you to answer this question.
Current Answers
Answer #1: Posted by freginold on September 17th, 2014 2:45 AM
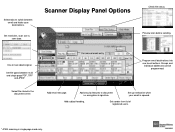
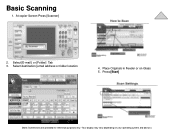
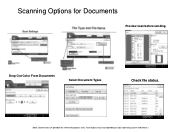
If it's beeping, it's probably also giving you a message on the screen explaining what the beeping signifies. It could be because you need to specify a sender, or choose a destination, or any number of other reasons. Here are some things that will help troubleshoot what the problem is preventing you from scanning:
Won't scan to email:
There are many possible reasons why scanning to email may not work. If it's already been set up and it's suddenly not working, one of these problems may be the culprit:
- The network cable may be unplugged or faulty.
- The SMTP server is down, or the server name/IP address was entered incorrectly.
- The DNS server is down, or the server IP address is wrong.
- The SMTP server may be blocking the copier from sending emails, either because the copier is not on its "trusted" list or because it doesn't recognize the copier's IP address or MAC address.
- SMTP authentication may need to be enabled.
- The SMTP username and password entered into the copier may be incorrect or entered incorrectly.
- The wrong port was chosen for the SMTP server.
- There could be a network firewall blocking the communication.
- The network interface port on the copier could be bad.
- The Ethernet communication speed may need to be changed, either for the copier or a switch or hub it is connected to.
- The email address(es) saved on the copier may be incorrect.
- The SMTP server requires a valid "from" email address, and the administrator's email address on the copier is not valid.
- A sender is required but was not specified
If scanning to email was never fully set up, you can find detailed instructions for setting it up here:
- How to set up scan to email on a Ricoh Aficio MP series copier
If you need to specify a sender, here are two articles that will help you do that:
- How to register an email address as a sender on a Ricoh Aficio MP series copier
- How to specify a default sender on a Ricoh Aficio MP series copier
Won't scan to folder:
There are also many reasons why you may not be able to scan to a folder. Here are some of the more common reasons:
- The folder that you are trying to scan to isn't shared
- The user account you are using to authenticate does not have rights to access that folder (possibly someone changed their password recently)
- There is a network connection problem somewhere between the copier and the computer
- There is a hardware device or software program preventing the copier from reaching that folder (ie. a firewall, anti-virus program, security suite, router, etc.)
- The copier and the computer are not in the same workgroup/domain
- If you are using an IP address for the computer instead of a host name, the computer's IP address has changed
- Make sure the SMB protocol is enabled (User Tools/Counter > System Settings > Interface Settings > Effective Protocols)
If scanning to a folder was never fully set up, you can find instructions for doing so here:
- How to link to a network share folder from a Ricoh Aficio MP series copier
Related Ricoh Aficio MP 5001 Manual Pages
Similar Questions
How Di I Change Default Scan Settings On Ricoh Mp 5001
(Posted by marismet 9 years ago)
Failing To Scan To Folder On Mp 2550 Using Windows 8
failing to scan to folder on MP 2550 using windows 8
failing to scan to folder on MP 2550 using windows 8
(Posted by thonde 10 years ago)
How To Scan On A Aficio Mp 5001 Web Image Monitor
(Posted by RebecAaronj 10 years ago)


