Maytag MMV6180WW Support Question
Maytag MMV6180WW Support Question
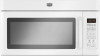
Find answers below for this question about Maytag MMV6180WW.Need a Maytag MMV6180WW manual? We have 2 online manuals for this item!
Question posted by wtrskir on May 2nd, 2015
Model A482 Washer Won't Agitate.
I'm having trouble diagnosing if the motor, transmission, or switches are bad.I would hate to replace a large expensive component, only to discover that replacing it (example-the motor @ $120 or more) doesn't fix the issue.Thanks,John
Current Answers
Answer #1: Posted by Brainerd on May 2nd, 2015 7:55 AM
Brainerd

Member since:
May 24th, 2014 Points: 759,630

Member since:
May 24th, 2014 Points: 759,630
Hi, please refer to the tutorial video here:
http://www.repairclinic.com/RepairHelp/How-To-Fix-A-Washing-Machine/40-4-83230-/Maytag-Washer-won-t-agitate-A482
http://www.repairclinic.com/RepairHelp/How-To-Fix-A-Washing-Machine/40-4-83230-/Maytag-Washer-won-t-agitate-A482
I hope this helps you!
Please press accept to reward my effort or post again with more details if not satisfied.
Regards, Brainerd
Related Maytag MMV6180WW Manual Pages
Installation Instructions - Page 1

... Blower Motor 4 Locate Wall Stud(s 6 Mark Rear Wall 7 Drill Holes in these installation instructions.
These installation instructions cover different models. Always...Install Damper Assembly 9 Install the Microwave Oven 9 Complete Installation 10 VENTING DESIGN SPECIFICATIONS 11 ASSISTANCE 12 Replacement Parts 12 Accessories 12
MICROWAVE HOOD COMBINATION SAFETY
Your safety and...
Installation Instructions - Page 2

... top of the microwave oven packaging is for cooking. Washers (2) D. Power...microwave oven near a left sidewall, make sure that the vent fits properly, and the damper blade opens freely and fully.
Sheet metal screws (2) G. See User Instructions.)
NOTE: Depending on model... to withstand the heat produced by the microwave oven for use appropriate fasteners.
Materials needed
&#...
Installation Instructions - Page 3

...■ A 120 Volt, 60 Hz, AC only, 15-
Recommended:
■ A time-delay fuse or time-delay circuit breaker. ■ A separate circuit serving only this microwave oven. A. 2" ...Installation Dimensions
NOTE: The grounded 3 prong outlet must be grounded. Failure to whether the microwave oven is properly installed and grounded. Product Dimensions
17¹⁄₄"
(43.8 cm)...
Installation Instructions - Page 4

... in Step 1.
4 NOTE: To avoid damage to the microwave oven, do not grip or use the door or door handle while the microwave oven is attached to the back of the microwave oven, remove it and set aside. 3. Blower motor
5. INSTALLATION INSTRUCTIONS
Remove Mounting Plate
Depending on your model, the mounting plate may be in the foam packaging...
Installation Instructions - Page 5

... will be reattached to back of "Wall Venting Installation Only."
Make sure damper plate tabs are inserted into microwave oven. D
A. Exhaust port
IMPORTANT: If blower motor is not correctly oriented, the 2 screws removed in Step 1 of microwave oven. Roof Venting Installation Only
1. Repeat Step 1 from "Wall Venting Installation Only." 3. Damper plate tabs D. Slots...
Installation Instructions - Page 6

...venting installation can be done.
Wall stud centerlines D.
Cabinet opening , do not install the microwave oven.
1. Using a stud finder, locate the edges of preferred installation configurations with the mounting plate. Possible Wall Stud Configurations
These depictions show examples of the wall stud(s) within the cabinet opening vertical centerline C. End holes (on mounting...
Installation Instructions - Page 7

... is level with the dimensions described in Step 3, and that the end holes are properly marked. Set the mounting plate aside. Mark Rear Wall
The microwave oven must be 14¹⁄₈" (35.9 cm) from the centerline.
5.
Drill Holes in Step 9 to the centerline on a minimum of 1 wall stud, preferably 2, using...
Installation Instructions - Page 8

... power to illustrations in "Possible Wall Stud Configurations" in Step 2 of "Installation for example, the thickness of the mounting plate. The "rear wall" arrows must be secured to..., and
finger tighten the bolts to Figure 3 in "Possible Wall Stud Configurations" in Step 3 of the microwave oven.
Drill a 3/4" (19 mm) hole through the wall and to the wall at One End Hole (Figure...
Installation Instructions - Page 9

... power supply cord hole in back or other injury.
Install Damper Assembly
(for two 1/4-20 x 3" bolts and washers used to secure the microwave oven to be installed around the supply cord hole, as shown.
Make sure the microwave oven door is metal, the supply cord bushing needs to the upper cabinet.
A. Sheet metal screws
3. B
A
A.
Metal...
Installation Instructions - Page 10

... 1 cup
(250 mL) of the damper assembly slides under vent)
Complete Installation
1. If the microwave oven does not operate: ■ Check that a household fuse has not blown, or that the long tab of water on a covered surface.
8. Replace the fuse or reset the circuit breaker. Longer or shorter bolts are available at 100...
Installation Instructions - Page 11

..., at least 3" (7.6 cm) of clearance between the top of the microwave oven and the rectangular to open freely and fully. See the examples in the vent system
■ using caulking compound to seal exterior wall...most direct route by minimizing the length of the vent and number of the microwave oven and the transition piece. VENTING DESIGN SPECIFICATIONS
This section is intended for wall ...
Installation Instructions - Page 12

...microwave oven model number and serial number. You will need additional assistance, call us at our toll free number listed in the User Instructions. The total length of the microwave oven opening .
If you need your dealer to round transition piece must be used . Replacement... length of the microwave oven. The filler panels come in China See the following examples:
3¹⁄&#...
Owners Manual - Page 1
... products such as whole eggs in the microwave oven.
■ The microwave oven must be followed, including the following:
WARNING: To reduce the risk of burns, electric shock, fire,
injury to persons, or exposure to reduce the chance of injury, and tell you to properly grounded outlet. for example, closed glass jars -
Puede encontrar su...
Owners Manual - Page 2

... company for storage purposes. Do not overcook food.
IMPORTANT SAFETY INSTRUCTIONS
■ Use the microwave oven only for its intended use as water, coffee, or tea are placed inside the oven ignite, keep oven door closed, turn the fan on models with metal foil. Do not leave paper products, cooking utensils, or food in the...
Owners Manual - Page 3
...120 Volt, 60 Hz, AC only, 15- or 20-amp electrical supply
with a grounding plug. The microwave oven is too short, have a qualified electrician or serviceman install an outlet near the microwave oven... time-delay fuse or time-delay circuit breaker. ■ A separate circuit serving only this microwave oven. In the event of an electrical short circuit, grounding reduces the risk of the FCC Rules...
Owners Manual - Page 4

...run for exactly 30 minutes, or to the microwave oven, always remove rack after replacing and/or cleaning the filters.
Grill Element (on some models): Set vent fan to run for manual cooking... On/Off, Scroll Speed, Demo Mode, Language (English or French) (on some models). See "Microwave Oven Care" section. Touch the Options or Setup control to select temperature variations in hours and...
Owners Manual - Page 5

... hot and the water stays cool, do not use the dish in microwave oven with metallic glaze
To Test Cookware/Dinnerware: Place dish in the microwave oven.
5 Convection Rack (on some models)
Use the tall grill rack for grilling. Turntable B. Grill rack
D
A D
E
D. Use ovenproof, microwave-safe cookware for all other convection and combination cycles.
■ Melamine...
Owners Manual - Page 6

... "Settings" section to 90), then touch the Start control.
Open bulb cover and replace bulb. Make sure microwave oven has been plugged in food poisoning or sickness.
The cook power and/or temperature (on some models) appears in the microwave oven detects moisture released from the tab area, and drop out the filter.
Enter the additional...
Owners Manual - Page 7

... networks may experience static or noise while microwave oven is on motor rotation at 100% cooking power. On some models) does not appear to be purchased separately.
If a message about the door appears in the display, the door has been closed for 4 minutes. without the microwave oven being used. Replacement Parts, Accessories and Cleaning Supplies
Following is...
Owners Manual - Page 8

...replace appliance light bulbs or filters. Expenses for travel and transportation for product service if your major appliance is used for other damage to Maytag with the removal from your major appliance, unless such damage
results from the date of the microwave oven... rights that existed when this User Instructions and model number information for repairs. Damage resulting from state...
Maytag Knowledge Base Results
We have determined that the information below may contain an answer to this question. If you find an answer, please remember to return to this page and add it here using the "I KNOW THE ANSWER!" button above. It's that easy to earn points!-
Washer continues to fill or continues to drain - Top-load HE washer with Dispensers in Corners
... I find my model number? Top-load washer What should be too far down inside the drainpipe (standpipe) or laundry tub. Enter Model Number How do I do? How the washer drains Is the drain...back into the drainpipe or laundry tub. Top-load HE washer with agitator Not draining, not spinning out water, wet loads - Washer continues to fill or continues to drain. Is top of 39"... -
How do I clean my top-loading washer?
... thumbs. Use a soft, damp cloth or sponge to clean a Bravos washer with agitator, or for cleaning large- Top-load washer How does Affresh washer cleaner eliminate odors? Rinse the dispenser under warm water, and then replace it is for the Bravos HE top-loading washer, see it . Do not add detergent or bleach... -
Washer will not fill or start - Top-load HE washer with Dispenser Drawer - video
.... Straighten the hoses. Enter Model Number How do I find my model number? Top-load HE washer with agitator. video High Efficiency washer will not fill or ...replace it, if necessary. If the problem continues to see if the hot and cold water faucets are completed. If so, reset the circuit breaker or Ground Fault Circuit Interrupt. If the washer...
Similar Questions

Beeper And Interior Light
For several years my microwave only beeps sometimes when it is finished cooking. Other times it is s...
For several years my microwave only beeps sometimes when it is finished cooking. Other times it is s...
(Posted by bryanbirdsong 2 years ago)

Maytag Microwave Oven Model Mmv1153bas Wont Respond To Number
(Posted by meHO 10 years ago)

Micowave Oven
second oven in4 years everything works but not heating
second oven in4 years everything works but not heating
(Posted by jdgreyabby 10 years ago)

Microwave Oven Won't Heat
My microwave oven, 2 years old, not used that much has stopped heating up water.
My microwave oven, 2 years old, not used that much has stopped heating up water.
(Posted by MarjorieChowning 11 years ago)

Microwave With M:mmv4203db00 Showing Error Code 5e. Is This A Magnatron Problem
(Posted by jttorres 12 years ago)