Maytag MMV6180WW Support Question
Maytag MMV6180WW Support Question
Find answers below for this question about Maytag MMV6180WW.Need a Maytag MMV6180WW manual? We have 2 online manuals for this item!
Question posted by jdgreyabby on May 1st, 2013
Micowave Oven
second oven in4 years everything works but not heating
Current Answers
Related Maytag MMV6180WW Manual Pages
Installation Instructions - Page 1

... Damper Assembly 9 Install the Microwave Oven 9 Complete Installation 10 VENTING DESIGN SPECIFICATIONS 11 ASSISTANCE 12 Replacement Parts 12 Accessories 12
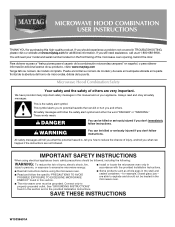
MICROWAVE HOOD COMBINATION SAFETY
Your safety ... alert symbol and either the word "DANGER" or "WARNING." Table of Contents
MICROWAVE HOOD COMBINATION SAFETY 1 INSTALLATION REQUIREMENTS 2
Tools and Parts 2 Remove Cardboard Template ...
Installation Instructions - Page 2

...; 1½" (3.8 cm) diam. Sheet metal screws (2) G.
Washers (2) D. Set the cardboard template to the side and refer to withstand the heat produced by the microwave oven for wood studs. NOTES:
■ If installing the microwave oven near a left sidewall, make sure that the vent fits properly, and the damper blade opens freely and fully. See "Rectangular...
Installation Instructions - Page 3

... reduces the risk of range/cooktop below. Required:
■ A 120 Volt, 60 Hz, AC only, 15- The microwave oven is too short, have a qualified electrician or serviceman install an outlet near the microwave oven.
Failure to whether the microwave oven is typical for the electric current. Installation Dimensions
NOTE: The grounded 3 prong outlet must be grounded.
Installation Instructions - Page 4

... Installation Only 1. Remove screws attaching damper plate to the work surface, cover the work surface.
1. Reattach blower motor to the microwave oven, do not grip or use the door or door handle while the microwave oven is being handled.
4.
Damper plate B. Screws C. Remove any remaining contents from the microwave oven cavity.
2. NOTE: To avoid damage to back of...
Installation Instructions - Page 5

... Step 4 from "Wall Venting Installation Only." 2. Repeat Step 1 from "Wall Venting Installation Only." 5. Repeat Step 3 from "Wall Venting Installation Only." 3. Reattach blower motor to the microwave oven.
7. Repeat Step 2 from "Wall Venting Installation Only." 4.
Exhaust port
IMPORTANT: If blower motor is not correctly oriented, the 2 screws removed in Step 3 cannot be poor.
Installation Instructions - Page 6

... at End Holes Figure 2
B
C
C
C
D
B
D
A
A
A
A
E
E
E
E
F
F
NOTE: If wall stud is within 6" (15.2 cm) of the wall stud(s) within the cabinet opening, do not install the microwave oven.
1. Wall stud centerlines D.
Cabinet opening vertical centerline C.
Locate Wall Stud(s)
NOTE: If no wall studs exist within the opening. End holes (on mounting plate) B. Mark...
Installation Instructions - Page 7

... on the wall, making sure its top is level with front edge of cabinet. If the end holes are properly marked. Mark Rear Wall
The microwave oven must be installed on at least 1 wall stud, the mounting plate must attach to the wall at both sides of the centerline, and mark.
10...
Installation Instructions - Page 8

...on the template is level. 7.
Mounting plate C. Push the 2 bolts with the holes in Step 6 of the microwave oven. Start a toggle nut on a second wall stud, insert a lag screw into the wall stud at the other ...tighten all contents from the rear wall to use as guides. ■ If the wall behind the microwave oven (as at One End Hole" in the "Drill Holes in Step 2 of "Mark Rear Wall."...
Installation Instructions - Page 9

B
A
A. Power supply cord bushing
6.
Failure to do not grip or use the door or door handle while the microwave oven is the heavy side. IMPORTANT: The control side of microwave oven B. A. Back of the microwave oven is being handled. A
B
A. 5. Cut the 1¹⁄₂" (3.8 cm) diameter hole at the top, and the damper blade opens away from...
Installation Instructions - Page 10

...be installed if the damper assembly is not positioned as the space between upper cabinet and microwave oven.
Replace the fuse or reset the circuit breaker. Repeat steps 3-6.
10. NOTE: The...; Check that a
circuit breaker has not tripped.
A
2. Do not use an adapter. Plug microwave oven into a grounded 3 prong outlet. Test vent fan and exhaust by placing 1 cup
(250 mL...
Installation Instructions - Page 11

... cm) of clearance between the top of the microwave oven and the rectangular to Round Transition NOTE: The minimum 3" (7.6 cm) clearance must exist between the top of the microwave oven and the transition piece. Roof cap: 3¹...high
Recommended Standard Fittings
The following length equivalents are not provided with
microwave hood combination.
■ We do not recommend using a flexible ...
Installation Instructions - Page 12

...dealer or service center for equivalent lengths. If you need additional assistance, call , you need the microwave oven model number and serial number.
W10344702B SP PN W10345004B
© 2010. One 3¹⁄₄" ...section)
A
A. You will need , add the equivalent lengths of the microwave oven opening . Filler panels
Filler Panel Kit Number
8171336 8171337 8171338 8171339 99403
...
Owners Manual - Page 1
... fire,
injury to persons, or exposure to excessive microwave energy:
■ Install or locate the microwave oven only in the microwave oven.
■ The microwave oven must be grounded. Para obtener acceso a "Instrucciones... appliance. If you and others are able to explode and should be heated in accordance with the provided Installation Instructions.
■ Read all safety messages...
Owners Manual - Page 2

... personnel. Remove wire twist-ties from the microwave oven is not working properly, or if it is operated in ...microwave oven should not be boiling. IMPORTANT SAFETY INSTRUCTIONS
■ Use the microwave oven only for its intended use as described in the microwave oven for a short time before removing the container.
- After heating, allow soil or cleaner residue to be inserted in oven...
Owners Manual - Page 3
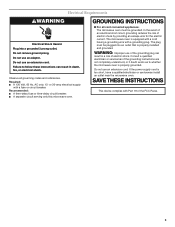
... with a cord having a grounding wire with a grounding plug. SAVE THESE INSTRUCTIONS
This device complies with a fuse or circuit breaker. Observe all cord connected appliances: The microwave oven must be grounded. GROUNDING INSTRUCTIONS
■ For all governing codes and ordinances. In the event of an electrical short circuit, grounding reduces the risk of...
Owners Manual - Page 4

... scroll speed.
Scroll Speed
Scroll speed of the microwave oven cavity, behind the metal screen. To avoid damage to the microwave oven due to the microwave oven, always remove rack after replacing and/or cleaning ...the quartz bulb has a very faint glow that might not be used independently during any heating element (on your model, the grill element has either one 1,000W halogen bulb and ...
Owners Manual - Page 5

....
If dish becomes hot and the water stays cool, do not use the dish in microwave oven with 1 cup (250 mL) of cook time at 100%. Place food directly on the grill rack. Convection rack
E. Use ovenproof, microwave-safe cookware for grilling. Do Not Use ■ Metal cookware and bakeware ■ Straw or...
Owners Manual - Page 6

.... Microwave Oven Care
General Cleaning
Installing/Replacing Filters and Light Bulbs
IMPORTANT: Before cleaning, make sure all non-sensor cycles will cancel the function.
Clean monthly, or as it heats,...The cavity light bulb is located behind the vent grille at the top front of the microwave oven. Microwave Oven Use
For list of each before or after a sensor cycle, the cook power will...
Owners Manual - Page 7

....
Replacement Parts, Accessories and Cleaning Supplies
Following is a list of available parts and supplies which is separate from microwave oven during microwave oven operation. Please refer to avoid unintended starting of the microwave oven. If water does not heat, try the solutions suggested here or visit our website and reference FAQs (Frequently Asked Questions) to inside of...
Owners Manual - Page 8

...damage, including scratches, dents, chips or other than normal, single-family household use of the microwave oven opening, behind the door.
Some states and provinces do not have been removed, altered or... OF MERCHANTABILITY OR IMPLIED WARRANTY OF FITNESS FOR A PARTICULAR PURPOSE, ARE LIMITED TO ONE YEAR OR THE SHORTEST PERIOD ALLOWED BY LAW. If you do not allow the exclusion or ...
Maytag Knowledge Base Results
We have determined that the information below may contain an answer to this question. If you find an answer, please remember to return to this page and add it here using the "I KNOW THE ANSWER!" button above. It's that easy to earn points!-
Recall Information
...by Maytag® Manufactured in the dishwasher's heating element can either directly related to this product ...www.cpsc.gov/talk.html . CPSC's work to ensure the safety of fire and ...Standing range, Double Oven And Oven Microwave Combination 2004 -United States Over The Range Microwave Hood Combination 2001 -... kitchen damage from over the past 30 years. Under federal law, it , inform all... -
Food characteristics and cooking results - Microwave oven
...cooking results - Go Back to 5 years Greater than one year 1 to Search Results Print Email this answer helpful? Less than five years The answer describes my issues, but ...density Foods high in my microwave oven? Starting temperature Room temperature foods will heat faster than refrigerated foods, and refrigerated foods will reach a higher temperature and heat faster than frozen foods. ... -
Control setup and changing default settings - Microwave oven
Microwave oven Changing the default settings on a microwave oven. FAQs Knowledgebase search tips Setting the microwave timer Product Recall Information Best cooking results - You can change weight mode (from lbs. to kg). Touch Control Setup pad. Touch number 2 pad. Touch number 1 pad. Microwave oven Control setup and changing default settings - Microwave Food characteristics and cooking...
Similar Questions

Need To Replace Microwave. It Is Part Of A Built In Wall Oven.
The microwave is part of a wall oven. It was installed in 2006. I need to replace the microwave and ...
The microwave is part of a wall oven. It was installed in 2006. I need to replace the microwave and ...
(Posted by donnahenning 7 years ago)

Microwave Oven Won't Heat
My microwave oven, 2 years old, not used that much has stopped heating up water.
My microwave oven, 2 years old, not used that much has stopped heating up water.
(Posted by MarjorieChowning 11 years ago)

Microwave With M:mmv4203db00 Showing Error Code 5e. Is This A Magnatron Problem
(Posted by jttorres 12 years ago)

Microwave Show Se And No Function Is Working. What Is The Issue?
recently on the display its showing SE and even if we unplugg and restart still showing SE and not f...
recently on the display its showing SE and even if we unplugg and restart still showing SE and not f...
(Posted by tenopaul 12 years ago)
Error Code F-3c
I just got a microwave model MMV6180ww-1. When I tried to set it up for roasting i got an error mess...
I just got a microwave model MMV6180ww-1. When I tried to set it up for roasting i got an error mess...
(Posted by norbaumb2004 13 years ago)