Maytag MMV6180WW Support Question
Maytag MMV6180WW Support Question
Find answers below for this question about Maytag MMV6180WW.Need a Maytag MMV6180WW manual? We have 2 online manuals for this item!
Question posted by norbaumb2004 on April 11th, 2011
Error Code F-3c
I just got a microwave model MMV6180ww-1. When I tried to set it up for roasting i got an error message F-3C. There are not specofic insstructions so I,m not sure what is wrong.
Current Answers
Related Maytag MMV6180WW Manual Pages
Installation Instructions - Page 1

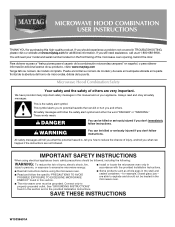
These installation instructions cover different models. Always read and obey all safety messages. This is , tell you how to Wall 8 Prepare Upper Cabinet 8 Install Damper Assembly 9 Install the Microwave Oven 9 Complete Installation 10 VENTING DESIGN SPECIFICATIONS 11 ASSISTANCE 12 Replacement Parts 12 Accessories 12
MICROWAVE HOOD COMBINATION SAFETY
Your safety and the safety of your ...
Installation Instructions - Page 2

...model, aluminum grease filter and charcoal filter may not be sure to make sure there is perforated. NOTES:
■ If installing the microwave oven near a left sidewall, make sure... (2) C. See User Instructions.)
NOTE: Depending on model, charcoal filters may be free of the cardboard packaging. 2.
The piece inside upper cabinet. Set the cardboard template to the side and refer to ...
Installation Instructions - Page 3

....06¹c⁄₈m")
29⁷⁄₈" (76.0 cm)
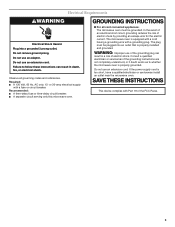
GROUNDING INSTRUCTIONS
■ For all governing codes and ordinances. Recommended:
■ A time-delay fuse or time-delay circuit breaker. ■ A separate circuit serving only this microwave oven.
See "Electrical Requirements" section. or 20-amp electrical supply with a grounding plug. If the power supply...
Installation Instructions - Page 4

... 1. Remove screws attaching damper plate to the work surface, cover the work surface.
1. Screws (in the top of microwave
oven exterior. Make sure damper plate tabs are using recirculation installation. Lift blower motor out of microwave oven, and lower blower motor back into the slots in recessed holes)
D
A.
Remove 2 screws attaching blower motor to the...
Installation Instructions - Page 5

... into the slots in the top of microwave oven. Make sure damper plate tabs are inserted into microwave oven. A
B
C
A. Slots
8. Repeat Step 3 from "Wall Venting Installation Only." 5. Repeat Step 4 from "Wall Venting Installation Only." 4. NOTE: If blower motor is not positioned with 2 screws removed in Step 1 of the microwave oven (as shown), performance will be reattached to...
Installation Instructions - Page 6

... at One End Hole Figure 3
Wall Studs at End Holes Figure 2
B
C
C
C
D
B
D
A
A
A
A
E
E
E
E
F
F
NOTE: If wall stud is within the opening , do not install the microwave oven.
1. Wall stud centerlines D. Cabinet opening vertical centerline C. See illustrations in "Possible Wall Stud Configurations." Support tabs F. Mark the center of preferred installation configurations with...
Installation Instructions - Page 7

..., find and clearly mark the vertical centerline of "Mark Rear Wall." Set the mounting plate aside. Wall Venting Installation Only
Upper cabinet bottom
³...bolts with each be installed on the wall, making sure its top is level with the dimensions described in...(s) at End Holes (Figures 1 & 2)
1. Mark Rear Wall
The microwave oven must be 14¹⁄₈" (35.9 cm) from the mark ...
Installation Instructions - Page 8

... cm)
Insert lag screw(s) into the hole(s) drilled into both end holes of mounting plate, making sure it is level. 4. Insert lag screws into wall stud(s) in "Locate Wall Stud(s)" section. Disconnect...bolts through the wall at One End Hole" in the "Drill Holes in Step 3 of the microwave oven. Position mounting plate on the rear wall. A
C
6. Securely tighten the lag screw(s) and ...
Installation Instructions - Page 9

... Assembly
(for the power supply cord. Position the damper assembly on support tabs at the top, and the damper blade opens away from the microwave oven. Make sure the microwave oven door is the heavy side.
Power supply cord bushing
6.
Check that the damper blade hinge is metal, the supply cord bushing needs to the...
Installation Instructions - Page 10

Using 2 or more people, lift microwave oven off of mounting plate, and set aside on the turntable, and programming a cook time of 1 minute ...outlet. 3. A
2. WARNING
A. Replace the fuse or reset the circuit breaker. Sheet metal screw D. NOTE: If microwave oven does not need to follow these instructions can result in place, insert bolts through the cabinet cutout so that a
...
Installation Instructions - Page 11

... min. Vent extension piece, at least 3" (7.6 cm) of clearance between the top of the microwave oven and the rectangular to vent air outside, unless using the most direct route by minimizing the length of the... using a flexible metal vent.
■ To avoid possible product damage, be sure there is used, be sure to round transition piece so that have back draft dampers
■ using a rigid...
Installation Instructions - Page 12

...for details. You will need , add the equivalent lengths of the microwave oven opening, behind the microwave oven door on the model and serial number plate, which is round, a rectangular to use...visit our website listed in the system.
The total length of the system you need the microwave oven model number and serial number. Both numbers can be found on the front frame of vent....
Owners Manual - Page 1
..., and tell you what the potential hazard is the safety alert symbol.
Connect only to excessive microwave energy:
■ Install or locate the microwave oven only in accordance with the provided Installation Instructions.
■ Read all safety messages.
Always read and obey all instructions before using electrical appliances basic safety precautions should experience a problem...
Owners Manual - Page 2

... placed inside the oven ignite, keep oven door closed, turn the fan on models with narrow necks.
-
It is operated in convection, combination, grill or "PAN BROWN" mode (on .
■ Use care when cleaning the vent-hood filter. Carefully attend the microwave oven when paper, plastic, or other part of the microwave oven when the microwave oven is specifically...
Owners Manual - Page 3
Required: ■ A 120 Volt, 60 Hz, AC only, 15- GROUNDING INSTRUCTIONS
■ For all governing codes and ordinances. The plug must be plugged into a grounded 3 prong outlet. Do not use an adapter. Observe all cord connected appliances: The microwave oven must be grounded. Recommended: ■ A time-delay fuse or time-delay circuit breaker. ■...
Owners Manual - Page 4

... Setup
Vent Timer, Light Timer, Filter Reset, Sound On/Off, Scroll Speed, Demo Mode, Language (English or French) (on some models): Set vent fan to run for manual cooking only.
See "Microwave Oven Care" section. Tones
Programming tones and signals. Touch the Options or Setup control to reach the "Calibration" submenu.
Calibration
The actual...
Owners Manual - Page 5

..., do not use the dish in microwave oven with 1 cup (250 mL) of cook time at 100%. Grilling
Accessory Configurations Roasting
Baking
A B
C
A B
A. Turntable B. Use a microwave-safe, ovenproof dish or pan under the rack to catch drippings. Pan (not provided) C. Place food directly on rack for bake and for some models)
Use the tall grill rack...
Owners Manual - Page 6

... cleaning products. See "Settings" section to follow label instructions on some models) appears in for all controls are on models with screw.
■ Cavity light: The cavity light bulb is cooled. Remove 2 screws on some models) or grilling (on the vent grille, tilt the grille forward, lift it is cool. Make sure microwave oven has been plugged...
Owners Manual - Page 7

... to cool the microwave oven.
Display shows messages
■ A flashing ":" or "PF" means there has been a power failure. The bread should toast dark brown. www.maytag.com
Microwave oven will dissipate with some models, if a packaging spacer is attached to avoid unintended starting of available parts and supplies which is set properly. Troubleshooting
First try the steps...
Owners Manual - Page 8

... of repair or replacement under this User Instructions and model number information for future reference.
EXCLUSION OF INCIDENTAL AND... instructions attached to or furnished with electrical or plumbing codes, or use your authorized Maytag dealer to determine if... warranty on the upper or lower front facing of the microwave oven opening, behind the door. Cosmetic damage, including scratches, ...
Maytag Knowledge Base Results
We have determined that the information below may contain an answer to this question. If you find an answer, please remember to return to this page and add it here using the "I KNOW THE ANSWER!" button above. It's that easy to earn points!-
Proposition 65 Warnings
...by the California Proposition 65 may require a warning just because the chemical is below accepted and regulated concentrations... Warnings" in my Use and Care Manual mean? Oven Error messages - California Proposition 65 is known as provided ...of 1986. Product Recall Information Display shows an error code - Whirlpool evaluates all chemicals associated with the products... -
Timer settings - Wall oven
... will continue to flash. Press the Timer pad and press '0' on built-in seconds. Oven Error messages - Or The timer does not control the oven. The timer can be set from one long beep will sound and "End" will be set the timer: Press the Timer pad. 00:00 and Timer icon flash in... -
FAQs Knowledgebase search tips
Oven Error messages -
Similar Questions

Micowave Oven
second oven in4 years everything works but not heating
second oven in4 years everything works but not heating
(Posted by jdgreyabby 10 years ago)


Microwave With M:mmv4203db00 Showing Error Code 5e. Is This A Magnatron Problem
(Posted by jttorres 12 years ago)

5e Error Code Means For A Microwave Model #mmv4203ds00
(Posted by cnavedo 12 years ago)