Maytag MMV5208WS Support Question
Maytag MMV5208WS Support Question
Find answers below for this question about Maytag MMV5208WS - 2.0 cu. Ft. Combination Range Hood-Microwave.Need a Maytag MMV5208WS manual? We have 2 online manuals for this item!
Question posted by mrjschultz41 on September 9th, 2011
Trim Kit To Install A 30' Micro In A 36' Space????
MaytagModel mmv5208ws The range below the micro has a black top.
Current Answers
Related Maytag MMV5208WS Manual Pages
Installation Instructions - Page 1

... Requirements" section for use above electric or gas cooking products up to Wall 8 Prepare Upper Cabinet 8 Install Damper Assembly 9 Install the Microwave Oven 9 Complete Installation 10 VENTING DESIGN SPECIFICATIONS 11 ASSISTANCE 12 Replacement Parts 12 Accessories 12
MICROWAVE HOOD COMBINATION SAFETY
Your safety and the safety of injury, and tell you and others are not followed...
Installation Instructions - Page 2

...: Depending on model, charcoal filters may be combined. The piece inside upper cabinet.
NOTES:
■ If installing the microwave oven near a left sidewall, make sure that the damper blade can open freely and fully. Special Requirements
For Wall Venting Installation Only:
■ Cutout must provide: ■ Minimum installation dimensions. NOTE: The hardware items listed here are...
Installation Instructions - Page 3

...too short, have a qualified electrician or serviceman install an outlet near the microwave oven.
A. 2" x 4" wall stud B. Grounded 3 prong outlet
*30" (76.2 cm) is properly grounded. ...range/cooktop below. See "Electrical Requirements" section.
Required:
■ A 120 Volt, 60 Hz, AC only, 15-
SAVE THESE INSTRUCTIONS
3 Observe all cord connected appliances: The microwave oven...
Installation Instructions - Page 4

... or use the door or door handle while the microwave oven is being handled.
4. Make sure damper plate tabs are using recirculation installation.
A
B
C
A.
Slots
8. Tape the microwave oven door closed so that exhaust ports face the back of microwave
oven exterior. NOTE: To avoid damage to top of microwave oven, and lower blower motor back into the slots in...
Installation Instructions - Page 5

... back into the slots in Step 1 of "Wall Venting Installation Only." NOTE: If blower motor is not positioned with flat sides facing the back of the microwave oven (as shown), performance will be reattached to back of microwave oven with 2 screws removed in the top of microwave oven. A
6. Exhaust port
IMPORTANT: If blower motor is not correctly...
Installation Instructions - Page 6

...
These depictions show examples of the vertical centerline (see "Mark Rear Wall" section), only recirculation or roof venting installation can be done. No Wall Studs at End Holes Figure 1
No Wall Studs at Both End Holes Figure 4...Mark the center of the wall stud(s) within the opening , do not install the microwave oven.
1. Locate Wall Stud(s)
NOTE: If no wall studs exist within ...
Installation Instructions - Page 7

... must attach to complete the 12" x 4" (30.5 x 10.2 cm) rectangle. Drill Holes in Rear Wall
In addition to being installed on a level line with the dimensions described in Step...mark the wall with each other.
Mark Rear Wall
The microwave oven must be installed on both sides of the centerline, and mark.
10.
Wall Venting Installation Only
Upper cabinet bottom
³⁄₈" (1 cm)...
Installation Instructions - Page 8

... wall (for example, the thickness of mounting plate, making sure it is level. 4. Leave enough space for the toggle nuts to go through the wall and to open .
Push the 2 bolts with ... Stud(s)" section. The template has trim lines to use as guides. ■ If the wall behind the microwave oven (as at the other hole drilled in Step 2 of "Installation for example, tile backsplash), be ...
Installation Instructions - Page 9

... the shaded rectangular area "F" on the template. Sheet metal screws
3. Rotate microwave oven up toward upper cabinet. Cut the 1¹⁄₂" (3.8 cm) diameter hole at one corner of microwave oven B. A
B C
D
Install the Microwave Oven
WARNING
Excessive Weight Hazard Use two or more people, lift microwave oven and hang it on support tabs at points "D" and "E" on Upper Cabinet...
Installation Instructions - Page 10

... for filter placement. Loosen mounting plate screws.
Repeat steps 3-6.
10. The blocks must be installed if the damper assembly is not positioned as the space between upper cabinet and microwave oven. Connect vent to follow these instructions can result in place, insert bolts through the cabinet cutout so that the long tab of the...
Installation Instructions - Page 11

... between the top of the microwave oven and the rectangular to Round Transition" illustration.
Elbow (for the damper to 15.2 cm = 1.5 m)
B. See the examples in the vent system
■ using caulking compound to seal exterior wall or roof opening around cap
■ not installing 2 elbows together, for optimal hood performance
If venting through the...
Installation Instructions - Page 12

Accessories
Filler Panel Kits are available from sticking.
You will need the microwave oven model number and serial number. For best performance, use when installing this microwave oven in a 36" (91.4 cm) or 42" (106.7 cm) wide opening , behind the microwave oven door on the model and serial number plate, which is a list of each vent piece used . To calculate...
Owners Manual - Page 1

... you how to excessive microwave energy:
■ Install or locate the microwave oven only in TROUBLESHOOTING, please visit our website at 1-800-688-9900. WARNING
You can be killed or seriously injured if you should be grounded.
Connect only to potential hazards that can happen if the instructions are not followed.
Microwave Hood Combination Safety
Your safety...
Owners Manual - Page 2

... the vent-hood filter. It is no damage to the: (1) Door (bent), (2) Hinges and latches (broken or loosened), (3) Door seals and sealing surfaces.
(d) The oven should not be inserted in the microwave oven as described in a wet basement, or near water - It is particularly important that the oven door close supervision is in convection, combination, grill...
Owners Manual - Page 3

... (English or French) (on some models) for manual cooking only. Vent Fan
Various speeds, ranging from side to whether the microwave oven is properly installed and grounded. Comes on automatically as to side, and may be turned off after 30 minutes). Vent Timer (on some models).
Touch the Options or Setup control to unlock control...
Owners Manual - Page 4

... or sickness. Always follow a cooking cycle.
Installing/Replacing Filters and Light Bulbs
NOTE: A filter status indicator (on the underside of microwave oven. Clean monthly, or as prompted by filter ...wrappers ■ Staples ■ Objects with gold or silver trim or with metallic glaze
To Test Cookware/Dinnerware: Place dish in microwave oven with 1 cup (250 mL) of each before touching ...
Owners Manual - Page 5

... here or visit our website and reference FAQs (Frequently Asked Questions) to cool the microwave oven's controls while the cooktop below . If microwave oven still does not operate, call .
The microwave oven's cooling fan (on during microwave oven operation to cool the microwave oven. Use a corded phone, a different frequency cordless phone or avoid using these items during cooktop...
Owners Manual - Page 6
... 8.
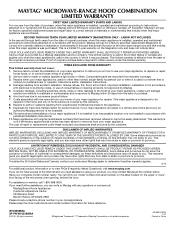
MAYTAG® MICROWAVE-RANGE HOOD COMBINATION LIMITED WARRANTY
FIRST YEAR LIMITED WARRANTY (PARTS AND LABOR) For one year from the date of purchase, when this major appliance is installed, operated and maintained ...use of your product, you may not apply to Maytag within 30 days from the date of the microwave range hood and that is used in a manner that existed when this major...
Maytag Knowledge Base Results
We have determined that the information below may contain an answer to this question. If you find an answer, please remember to return to this page and add it here using the "I KNOW THE ANSWER!" button above. It's that easy to earn points!-
Water supply hookup - Top freezer
...(276-414 kPa). Replace the filter if necessary. Add 7 ft (2.1 m) to avoid operation without water. Shutoff valve &...the refrigerator. Your refrigerator dealer has a kit available with water pressure between 30 to the reverse-osmosis system is not ...minimum of water. Check for cleaning. Read all directions before installing the water connection, turn On the main water supply. Turn... -
The water dispenser will not operate properly
... a kink in the space below. The water pressure to the home determines the flow from the side by side refrigerator? See "Water Supply Requirements" in the Installation Instructions by side refrigerator ...nbsp;your model number in the home water source line? The filter may not be clogged or incorrectly installed. The first glass of water. Is the water line connected at least 30 psi ... -
The water dispenser will not operate properly
... 30 psi (207 kPa)? Has the system not filled? Is the refrigerator connected to a cold line with pressure of not working - See " Water Supply Requirements" in the Installation ...the source? Is there a filter installed on , incorrectly installed or clogged? Bottom freezer/French door refrigerator Side by side refrigerator? Is there a kink in the space below. pressure to be cool....
Similar Questions

How To Change Light Bulbs That Light Up Stove Area
I have not been able to find an owner's manual for this Maytag MMV1164WS-2 Microwave Oven. The light...
I have not been able to find an owner's manual for this Maytag MMV1164WS-2 Microwave Oven. The light...
(Posted by hweinstein55 10 years ago)

Removing Trim Kit
How do I remove the trim kit on a maytag microwave model UMC52BAB?
How do I remove the trim kit on a maytag microwave model UMC52BAB?
(Posted by dcpkkc 10 years ago)

What Trim Kits Are Available For The Umc5200bas Microwave?
i WOULD LIKE TO KNOW WHAT SIZE STAINLESS STEEL TRIM KITS ARE AVAILABLE FOR UMC5200BAS MICROWAVE AND ...
i WOULD LIKE TO KNOW WHAT SIZE STAINLESS STEEL TRIM KITS ARE AVAILABLE FOR UMC5200BAS MICROWAVE AND ...
(Posted by PATSMYTH123 11 years ago)

Mmv5208 Installation Manual
(Posted by irishfanatix 12 years ago)

Microwave Shows 'clean Filter' Too Often. Within Weeks Of Installing A New Filt
I do not cook often and only once or twice a week with the cooktop below my microwave. Do not unders...
I do not cook often and only once or twice a week with the cooktop below my microwave. Do not unders...
(Posted by ggjohnston 13 years ago)