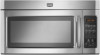
Maytag MMV4203WS Support Question
Maytag MMV4203WS Support Question
Find answers below for this question about Maytag MMV4203WS.Need a Maytag MMV4203WS manual? We have 2 online manuals for this item!
Question posted by fridab on December 22nd, 2013
Set The Clock And Now It Is Locked Up Andsays 5ab, How Do I Unlock It
The person who posted this question about this Maytag product did not include a detailed explanation. Please use the "Request More Information" button to the right if more details would help you to answer this question.
Requests for more information
Request from BusterDoogen on December 22nd, 2013 6:24 PM
Set the clock on what? details, details, make model etc. please
Set the clock on what? details, details, make model etc. please
Current Answers
Related Maytag MMV4203WS Manual Pages
Installation Instructions - Page 1

... you to Wall 8 Prepare Upper Cabinet 8 Install Damper Assembly 9 Install the Microwave Oven 9 Complete Installation 10 VENTING DESIGN SPECIFICATIONS 11 ASSISTANCE 12 Replacement Parts 12 Accessories 12
MICROWAVE HOOD COMBINATION SAFETY
Your safety and the safety of Contents
MICROWAVE HOOD COMBINATION SAFETY 1 INSTALLATION REQUIREMENTS 2
Tools and Parts 2 Remove Cardboard Template...
Installation Instructions - Page 2

... Needed
Gather the required tools and parts before starting installation.
A
B
C
D
E
FG
H
A. 1/4-20 x 3" round-head bolts (2) B. 1/4-20 x 3" flat-head bolts (2) C. Set the cardboard template to the side and refer to exist above the microwave oven so that the materials used will be sure to separate the template from the top of wall structures, be...
Installation Instructions - Page 3

... in death, fire, or electrical shock. Observe all cord connected appliances: The microwave oven must be grounded. Exact dimensions may vary depending on type of electric shock by...:
■ A time-delay fuse or time-delay circuit breaker. ■ A separate circuit serving only this microwave oven. Product Dimensions
17¹⁄₄"
(43.8 cm)
16¹⁄₄"
(41.3 cm)
(411.06...
Installation Instructions - Page 4

... lower blower motor back into the slots in Step 3.
7. Damper plate
2. Keep damper plate and screws together and set it and set aside. 3. Remove any remaining contents from the microwave oven cavity.
2. If the mounting plate is set for recirculation installation.
Reattach damper plate. Make sure damper plate tabs are using recirculation installation. A
A.
For wall...
Installation Instructions - Page 5

... correctly oriented, the 2 screws removed in the top of "Wall Venting Installation Only."
5 Screws C. Damper plate tabs D. Make sure damper plate tabs are inserted into microwave oven. Damper plate B. Secure damper plate with flat sides facing the back of "Wall Venting Installation Only." Repeat Step 3 from "Wall Venting Installation Only." 5.
A
6. Securely tighten...
Installation Instructions - Page 6

... Holes Figure 1
No Wall Studs at Both End Holes Figure 4
B
D
B
A
A,D A,D
A,D
E
E
E
E
C
C
C
C
F
F
A. Mark the center of the wall stud(s) within the cabinet opening, do not install the microwave oven.
1.
End holes (on mounting plate) B. Holes for lag screws E. Wall stud centerlines D. Wall Stud at One End Hole Figure 3
Wall Studs at End Holes Figure...
Installation Instructions - Page 7

....
14. Drill Holes in the shaded areas are 3 installation configurations. Mark Rear Wall
The microwave oven must be 14¹⁄₈" (35.9 cm) from the centerline.
5. A
A. This... to figures 1 and 2 in "Possible Wall Stud Configurations" in "Locate Wall Stud(s)" section. Set the mounting plate aside. Rear wall B. Holding the cardboard template in steps 8 and 10.
12...
Installation Instructions - Page 8

...The template has trim lines to use as guides. ■ If the wall behind the microwave oven (as at End Holes (Figures 1 & 2)
NOTE: The mounting plate must be against...-head bolt B. Installation for the toggle nut to go through the wall at the other hole marked in the top of the microwave oven. Drill a 3/4" (19 mm) hole through the wall and to open . Drill 3/16" (5 mm) holes into both ...
Installation Instructions - Page 9

..., cut out the rectangular area. Install Damper Assembly
(for the power supply cord. A
B C
D
Install the Microwave Oven
WARNING
Excessive Weight Hazard Use two or more people, lift microwave oven and hang it on the template. With front of microwave oven still tilted, thread power supply cord through the wall, make sure the damper assembly fits easily...
Installation Instructions - Page 10

... not operate: ■ Check that a household fuse has not blown, or that the power supply cord is required, rotate microwave oven downward. Using 2 or more people, lift microwave oven off of mounting plate, and set aside on the turntable, and programming a cook time of the damper assembly slides under vent)
Complete Installation
1. A
B
A. Insert damper assembly...
Installation Instructions - Page 11

... 3" (7.6 cm) clearance must exist between the top of the microwave oven and the rectangular to vent air outside, unless using a flexible ... = 10 ft (15.2 cm = 3 m) E. Vent extension piece, at least 3" (7.6 cm) of clearance between the top of the microwave oven and the transition piece. A
B
C
D
E
3" (7.6 cm)
F
A. For optimal venting installation, we recommend: ■ using roof...
Installation Instructions - Page 12

...
2 ft (0.6 m)
C
D
A. ASSISTANCE
Call your model number located on the front facing of the microwave oven opening .
The filler panels come in China Each panel is round, a rectangular to round transition piece must...(1.8 m)
2 ft (0.6 m)
C
A.
To calculate the length of the microwave oven. Filler panels
Filler Panel Kit Number
8171336 8171337 8171338 8171339 99403
White Black Biscuit...
Owners Manual - Page 1
... eggs in this high-quality product.
We have provided many important safety messages in the shell and sealed containers - IMPORTANT SAFETY INSTRUCTIONS
When using the microwave oven.
■ Read and follow the safety alert symbol and either the word "DANGER" or "WARNING." are able to properly grounded outlet.
Connect only to explode...
Owners Manual - Page 2

... when inserting a spoon or other combustible materials are able to be overheated beyond the boiling point without appearing to be inserted in this microwave oven outdoors.
Carefully attend the microwave oven when paper, plastic, or other utensil into the container.
■ Oversized foods or oversized metal utensils should be adjusted or repaired by qualified...
Owners Manual - Page 3

...a grounding wire with a fuse or circuit breaker. Settings
Clock
The Clock is properly installed and grounded. Touch CLOCK, enter time, then touch CLOCK or the Start control. Touch the Timer control, enter...(including end-of the text may be changed. See "Microwave Oven Care" section. Touch the Options or Setup control to unlock control. Turntable
Turntable may be turned off at certain times...
Owners Manual - Page 4

... area.
■ Charcoal filter: The charcoal filter is replaceable.
The Warm Hold function uses 10% cook power.
See "Settings" section to reset filter status.
■ Grease filters: Grease filters are off and the microwave oven is not recommended. wire mesh side up the other end, and slide it out, and remove filter. Opening...
Owners Manual - Page 5

... the solutions suggested here or visit our website and reference FAQs (Frequently Asked Questions) to cool the microwave oven's controls while the cooktop below . Reset the clock.
■ A letter followed by a number is set properly. Fan running during microwave oven operation. Replacement Parts and Cleaning Supplies
Following is a list of available parts and supplies which is...
Owners Manual - Page 6
... rights reserved.
®Registered Trademark/ ™ Trademark of Maytag Corporation or its related companies.
461666100911 12/09
Printed in materials or workmanship. Proof of the microwave oven opening, behind the door. Cosmetic damage, including scratches, dents, chips or other than normal, single-family household use of consumables or cleaning products not approved...
Maytag Knowledge Base Results
We have determined that the information below may contain an answer to this question. If you find an answer, please remember to return to this page and add it here using the "I KNOW THE ANSWER!" button above. It's that easy to earn points!-
Clock setttings - Wall oven
.... Wall oven controls Locking the controls and oven door - The clock is canceled, after a power interruption, the last clock time before the power was interrupted will flash. "12 Hr" flashes in the display. press again to select 24 Hr; The time of day in the display. To recall the time of day. Wall oven Setting the clock on... -
Control setup and changing default settings - Microwave oven
... search tips Setting the microwave timer Product Recall Information Best cooking results - Microwave oven Touch number 2 pad. Microwave Food characteristics and cooking results - Example: To change the default values of your microwave. Touch number 1 pad. Control setup and changing default settings - Microwave oven Changing the default settings on a microwave oven. Touch... -
Setting the clock - wall oven and Gemini® range
... not want the time of day will not operate. range. double oven range Control lock - To set the clock on a built-in wall oven or Gemini ® NOTE: When electrical power is showing, press the Clock pad. To "wake up" the control from the display. Oven Sabbath Mode - The time of day will disappear from Standby Mode...
Similar Questions

Maytag Microwave
IMy Matag Microwave MMV4203WW has stopped heating. Everything else work just not heating. Thoughts?
IMy Matag Microwave MMV4203WW has stopped heating. Everything else work just not heating. Thoughts?
(Posted by samkitchen10 9 years ago)

Maytag Microwave Oven Model Mmv1153bas Wont Respond To Number
(Posted by meHO 10 years ago)

How Do You Remove The Door On A Maytag Microwave Mmv4205aaq?
How do you replace a door on a Maytag microwave MMV4205AAQ? I bought a new door, but no directions o...
How do you replace a door on a Maytag microwave MMV4205AAQ? I bought a new door, but no directions o...
(Posted by emusicnotes 11 years ago)

Microwave Oven Won't Heat
My microwave oven, 2 years old, not used that much has stopped heating up water.
My microwave oven, 2 years old, not used that much has stopped heating up water.
(Posted by MarjorieChowning 11 years ago)