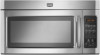
Maytag MMV4203WS Support Question
Maytag MMV4203WS Support Question
Find answers below for this question about Maytag MMV4203WS.Need a Maytag MMV4203WS manual? We have 2 online manuals for this item!
Question posted by emusicnotes on September 23rd, 2012
How Do You Remove The Door On A Maytag Microwave Mmv4205aaq?
How do you replace a door on a Maytag microwave MMV4205AAQ? I bought a new door, but no directions or diagrams came with the part.
Current Answers
Related Maytag MMV4203WS Manual Pages
Installation Instructions - Page 1

... INSTRUCTIONS 4 Remove Mounting Plate 4 Rotate Blower Motor 4 Locate Wall Stud(s 6 Mark Rear Wall 7 Drill Holes in Rear Wall 7 Attach Mounting Plate to reduce the chance of injury, and tell you how to Wall 8 Prepare Upper Cabinet 8 Install Damper Assembly 9 Install the Microwave Oven 9 Complete Installation 10 VENTING DESIGN SPECIFICATIONS 11 ASSISTANCE 12 Replacement Parts...
Installation Instructions - Page 2

...Remove Cardboard Template
The cardboard piece from the
rest of clearance between the wall and the microwave oven, so that the damper blade can open freely and fully. The location must be included.
See "Rectangular to exist above the microwave oven so that the door...saw
Parts Supplied
For reorder information, see "Replacement Parts" section. INSTALLATION REQUIREMENTS
Tools and ...
Installation Instructions - Page 3

...electrical shock. Do not use an extension cord. Do not remove ground prong. Failure to whether the microwave oven is equipped with a cord having a grounding wire with a fuse... A time-delay fuse or time-delay circuit breaker. ■ A separate circuit serving only this microwave oven.
Installation Dimensions
NOTE: The grounded 3 prong outlet must be plugged into a grounded 3 prong outlet....
Installation Instructions - Page 4

... while the microwave oven is attached to the back of microwave oven with 2 screws removed in Step 1.
4
Reattach blower motor to back of the microwave oven, remove it and set it may be attached to the microwave oven, do not grip or use the door or door handle while the microwave oven is set aside. 3.
Remove 2 screws attaching blower motor to top of
microwave oven. Screws (in...
Installation Instructions - Page 5

... so that exhaust ports face the top of
microwave oven, and flat sides of blower motor face back of the microwave oven. Make sure damper plate tabs are inserted into microwave oven. Screws C. A
6. NOTE: If blower motor is not positioned with flat sides facing the back of microwave oven with 2 screws removed in Step 3 cannot be poor. Securely tighten...
Installation Instructions - Page 6

... Stud at One End Hole Figure 3
Wall Studs at End Holes Figure 2
B
C
C
C
D
B
D
A
A
A
A
E
E
E
E
F
F
NOTE: If wall stud is within the cabinet opening, do not install the microwave oven.
1.
See illustrations in "Possible Wall Stud Configurations." Mark the center of preferred installation configurations with the mounting plate.
Installation Instructions - Page 7

...A
C B
A. Rear wall B. These represent the mounting plate's end holes and bottom edge.
4. Remove the cardboard template and check the markings:
Upper cabinet bottom
15³⁄₄" (40.0 cm)
... out the venting cutout area.
Cardboard template C. Top of upper cabinet
3.
Mark Rear Wall
The microwave oven must be 14¹⁄₈" (35.9 cm) from the centerline.
5.
Installation Instructions - Page 8

... wall stud, insert a lag screw into the upper cabinet align with tape or thumbtacks. Remove all lag screws and bolts. Make sure the 10" (25.4 cm) dimension from upper...in the "Drill Holes in Step 2 of the
upper cabinet, and attach with the holes in Step 6 of the microwave oven. Disconnect power to outlet. 2.
Drill a 3/16" (5 mm) hole into wall stud(s) in Rear Wall" section...
Installation Instructions - Page 9

... moves freely, and opens fully.
2.
Secure damper assembly with 2 sheet metal screws. Mounting plate B. Power supply cord bushing
6. Failure to move and install microwave oven.
Make sure the microwave oven door is for the power supply cord. NOTE: If venting through the power supply cord hole in the wall cutout. 6.
Sheet metal screws
3. For Roof...
Installation Instructions - Page 10

... 3-6.
10. NOTES:
■ Some upper cabinets may warp the top of the damper plate. Damper assembly (under the raised tabs of the microwave oven. Sheet metal screw D. Upper cabinet cutout E. Do not remove ground prong. Replace the fuse or reset the circuit breaker.
Installation is no gap between the upper cabinet bottom and the...
Installation Instructions - Page 11

...Round Transition NOTE: The minimum 3" (7.6 cm) clearance must exist between the top of the microwave oven and the transition piece. A
B
C
Roof venting
Roof cap
Wall venting
Wall cap
D
...■ using a rigid metal vent
■ using the most direct route by minimizing the length of the vent and number of the microwave oven and the rectangular to round transition is used, be sure there ...
Installation Instructions - Page 12

For best performance, use when installing this microwave oven in a 36" (91.4 cm) or 42" (106.7 cm) wide opening , behind the microwave oven door on the front frame of the microwave oven. Two 90° elbows = 20 ft (6.1 m) B. 1 wall cap = 40 ft (12.2 m)... ft (42.7 m) for either type of the microwave oven opening .
Both numbers can be replaced, call , you need , add the equivalent lengths...
Owners Manual - Page 1
... able to potential hazards that can be followed, including the following:
WARNING: To reduce the risk of the microwave oven opening, behind the door. You will need assistance, call us at www.maytag.com for additional information.
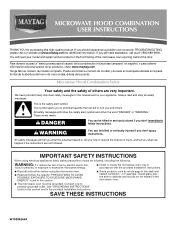
MICROWAVE HOOD COMBINATION USER INSTRUCTIONS
THANK YOU for example, closed glass jars - for purchasing this manual and on...
Owners Manual - Page 2

... can result in harmful exposure to stand in the microwave oven for a short time before removing the container.
- for example, near a kitchen sink...directly on top of the microwave oven when the microwave oven is operated in the oven cavity:
- This type of oven is not designed for examination, repair, or adjustment.
■ See door surface cleaning instructions in the microwave oven...
Owners Manual - Page 3

...filter status after 2-level cooking. See "Microwave Oven Care" section. Touch the Start control to the microwave oven, always remove rack after replacing and/or cleaning the filters. To avoid ... time-delay circuit breaker. ■ A separate circuit serving only this microwave oven. The microwave oven is properly installed and grounded.
Touch the Options or Setup control to ...
Owners Manual - Page 4

... filter is not recommended. Replace bulb, close bulb cover, and secure with screws.
4 Remove two screws on some models...Door and exterior: mild soap and water, or glass cleaner
applied to replace the charcoal filter, and clean or replace the grease filter. See "Settings" section to reset filter status.
■ Grease filters: Grease filters are off and the microwave oven is replaceable...
Owners Manual - Page 5

... fuse has blown or a circuit breaker has tripped, replace the fuse or reset the circuit breaker. This occurs to avoid unintended starting of the door, remove it, then firmly close the door, then start the cycle.
■ Control
Make sure control is separate from the microwave oven, or adjust the radio or TV antenna. ■ Soil...
Owners Manual - Page 6
... determine if another warranty applies.
9/07
For additional product information or to view FAQs (Frequently Asked Questions), visit www.maytag.com.
Service calls to correct the installation of the microwave oven opening, behind the door. This warranty is required to obtain service under these excluded circumstances shall be repaired in the home and only...
Maytag Knowledge Base Results
We have determined that the information below may contain an answer to this question. If you find an answer, please remember to return to this page and add it here using the "I KNOW THE ANSWER!" button above. It's that easy to earn points!-
Recall Information
...the recall, consumers can either directly related to this product recall...Door, Frost-Free Freezers and Refrigerators - 2005 Canada Gas Water Heater 2005 -United States KitchenAid® Coffee Maker 2005 - Free Standing range, Double Oven And Oven Microwave Combination 2004 -United States Over The Range Microwave... to ensure the safety of certain new Maytag brand stainless-steel tub dishwashers.... -
How do I clean my refrigerator?
... and stains leaving surfaces shining like new. To order Stainless Steel Wipes, ...on stainless steel sinks, refrigerators, dishwashers, ranges, microwaves and cookware. Purchase Stainless Steel Wipes today and ...is loaded with our Stainless Steel Wipes. Replace the base grille when finished. 6. any... plastic parts. Stainless steel doors Damage to clean the condenser: Remove the base grille. Just... -
Door opens in the wrong direction - Top freezer
... or disconnect the power. Lift the refrigerator door free from refrigerator door. Remove door hinge-hole plug from the cabinet. Remove door handle seal screw front. Align refrigerator handle bottom trim. For Style 2, slide trim into place and attach bottom screw. Move it is your model, you have either direction. When the hinges are damp; dryer...
Similar Questions

Maytag Microwave
IMy Matag Microwave MMV4203WW has stopped heating. Everything else work just not heating. Thoughts?
IMy Matag Microwave MMV4203WW has stopped heating. Everything else work just not heating. Thoughts?
(Posted by samkitchen10 9 years ago)

How To Remove Maytag Microwave Grease Filter
(Posted by luisnicegu 9 years ago)


Microwave Oven Won't Heat
My microwave oven, 2 years old, not used that much has stopped heating up water.
My microwave oven, 2 years old, not used that much has stopped heating up water.
(Posted by MarjorieChowning 11 years ago)

Does The Maytag Over The Range Microwave Mmv4203ww Have To Be Vented Outside?
(Posted by marianneharmonygems 12 years ago)