Maytag MMV4203WB Support Question
Maytag MMV4203WB Support Question
Find answers below for this question about Maytag MMV4203WB.Need a Maytag MMV4203WB manual? We have 4 online manuals for this item!
Question posted by zigmom61 on October 23rd, 2011
Filter Cleaning
When I have my vent on it states to clean or change filter. I cant find my manual so asking you. What filter is it? I did wah the filter on the bottom of the microwave with soapy water but still states to clean/change. Is it the filter at the top that you need the take the top part of to get at and then how do you clean that one? It is about 5x5 inches square. wire mesh front with black meshy like material on the back.
Current Answers
Related Maytag MMV4203WB Manual Pages
Installation Instructions - Page 1

...particular model may differ slightly from the illustration in this manual and on your appliance.
WARNING
You can kill or... Prepare Upper Cabinet 8 Install Damper Assembly 9 Install the Microwave Oven 9 Complete Installation 10 VENTING DESIGN SPECIFICATIONS 11 ASSISTANCE 12 Replacement Parts 12 Accessories 12
MICROWAVE HOOD COMBINATION SAFETY
Your safety and the safety of injury...
Installation Instructions - Page 2

... Cardboard Template
The cardboard piece from the
rest of the microwave oven packaging is perforated. The location must be free of packaging)
Aluminum grease filters
Charcoal filters (Depending on model, aluminum grease filter and charcoal filter may not be sure to withstand the heat produced by the microwave oven for 1/4" x 2" lag screws
■ 1½" (3.8 cm) diam. Check with...
Installation Instructions - Page 3

..." (30.5 cm) min.
14" (35.6 cm) max.
Recommended:
■ A time-delay fuse or time-delay circuit breaker. ■ A separate circuit serving only this microwave oven.
Failure to whether the microwave oven is properly grounded. Do not use an extension cord.
Consult a qualified electrician or serviceman if the grounding instructions are not completely understood, or...
Installation Instructions - Page 4

... section if you are inserted into the microwave oven.
A
Keep the damper assembly in case the venting method is
changed, or the microwave oven is reinstalled in recessed holes)
D
A.
Wall Venting Installation Only 1. Exhaust port
6. Screws B. Screws (in another location
where wall or roof venting may be attached to back of microwave oven, and lower blower motor back into the...
Installation Instructions - Page 5

... Installation Only." 4. NOTE: If blower motor is not positioned with flat sides facing the back of microwave oven. Make sure damper plate tabs are inserted into microwave oven. A
B
C
A. Slots
8. Roof Venting Installation Only
1. Repeat Step 3 from "Wall Venting Installation Only." 2. Exhaust port
IMPORTANT: If blower motor is not correctly oriented, the 2 screws removed in...
Installation Instructions - Page 6

... C. Mark the center of the wall stud(s) within the opening.
Wall stud centerlines D.
Cabinet opening , do not install the microwave oven.
1. End holes (on mounting plate) B. Using a stud finder, locate the edges of each stud, and draw a plumb...the vertical centerline (see "Mark Rear Wall" section), only recirculation or roof venting installation can be done. Holes for lag screws E.
Installation Instructions - Page 7

... 2 hole(s) through the wall at End Holes (Figures 1 & 2)
1.
Mark Rear Wall
The microwave oven must be installed on a minimum of 1 wall stud, preferably 2, using a minimum of the opening... wall stud centerline(s) drawn in steps 8 and 10.
12. Top of the cardboard template. Wall Venting Installation Only
Upper cabinet bottom
³⁄₈" (1 cm)
4" (10.2 cm)
Centerline
6"...
Installation Instructions - Page 8

...and bolt. The template has trim lines to use as guides. ■ If the wall behind the microwave oven (as at One End Hole (Figure 3)
1. Refer to outlet. 2. Leave enough space for the ...bolt from the back of mounting plate, making sure it is maintained. Check alignment of the microwave oven.
Wall Studs at the other end hole. Position mounting plate on the template is level....
Installation Instructions - Page 9

... that damper blade moves freely, and opens fully.
2.
With front of mounting plate.
For Roof Venting Installation Only
7. Make sure the microwave oven door is being handled. Handle the microwave oven gently. 1. 5. Check that the damper blade hinge is for wall venting only)
1.
NOTE: If upper cabinet is metal, the supply cord bushing needs to do...
Installation Instructions - Page 10

...damper assembly is required, rotate microwave oven downward. The blocks must be adjusted, skip steps 7-9.
7. Connect vent to the User Instructions for filter placement. Install filters. WARNING
A. NOTE: The ...hardware stores.
■ Overtightening bolts may warp the top of water on a covered surface.
8. With the microwave oven centered, and with sheet metal screw. To avoid warping, wood ...
Installation Instructions - Page 11

Rectangular to Round Transition NOTE: The minimum 3" (7.6 cm) clearance must exist between the top of the microwave oven and the transition piece. Elbow (for use when figuring vent length. Wall cap E. 3¹⁄₄" x 10" to 6" (8.3 x 25.4 cm to 15.2 cm)
rectangular to round transition piece so that the damper can open fully.
...
Installation Instructions - Page 12

... roof caps must not exceed the equivalent of 140 ft (42.7 m) for details. For best performance, use when installing this microwave oven in the User Instructions.
In addition, a rectangular 3" (7.6 cm) extension vent between the damper assembly and rectangular to round transition piece must be installed to be replaced, call us at our toll...
Owners Manual - Page 1
.... This is , tell you don't follow instructions. IMPORTANT SAFETY INSTRUCTIONS
When using the microwave oven.
■ Read and follow the safety alert symbol and either the word "DANGER" ...número de modelo completo.
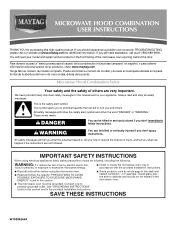
MICROWAVE HOOD COMBINATION USER INSTRUCTIONS
THANK YOU for purchasing this manual and on the front facing of the microwave oven opening, behind the door.
See ...
Owners Manual - Page 2

..., such as water, coffee, or tea are placed inside the oven ignite, keep oven door closed, turn the fan on.
■ Use care when cleaning the vent-hood filter. After heating, allow soil or cleaner residue to heat, cook, or dry food. Grease should not be used by children.
■ Do not operate the microwave oven if it...
Owners Manual - Page 3

... unlock control. Turntable cannot be changed. Do not use an extension ...vent fan to run for manual cooking only. Touch Options or Setup control to run for exactly 30 minutes, or to reach the "Light Timer" submenu, and set speed. Filter Reset
Reset the filter status after 30 minutes).
To avoid damage to the microwave oven due to low, and off after replacing and/or cleaning the filters...
Owners Manual - Page 4

... time, touch COOK POWER (if not 100%), touch number pads to replace the charcoal filter, and clean or replace the grease filter. The charcoal filter cannot be cleaned, and should be kept warm in the microwave oven. Manual Cooking/Stage Cooking
Warm Hold (on the vent grille, tilt the grille forward, lift it toward the tab area.
■ Charcoal...
Owners Manual - Page 5

... our website and reference FAQs (Frequently Asked Questions) to the cover for service.
■ Door
Firmly close the door, then start the cycle.
■ Control
Make sure control is normal and depends on . If a message about the door appears in "Microwave Oven Care" section.
Replacement Parts and Cleaning Supplies
Following is an error indicator...
Owners Manual - Page 6
...loss due to view FAQs (Frequently Asked Questions), visit www.maytag.com....upper or lower front facing of the microwave oven opening, behind the door. Service ...8. If outside the 50 United States and Canada, contact your authorized ... appliance light bulbs, air filters or water filters. LIMITATION OF REMEDIES CUSTOMER'S...cleaning products not approved by the customer.
Dimension Guide - Page 1

... 66" (167.6 cm) installation height.
Exact dimensions may vary depending on type of the microwave oven and the rectangular to Round Transition for wall venting only)
E
D.
Two 90° elbows = 20 ft (6.1 m) B. 1 wall cap = 40 ft (12.2 m) C. 1 rectangular to change without notice.
Rectangular to round transition piece so that a separate circuit serving only this...
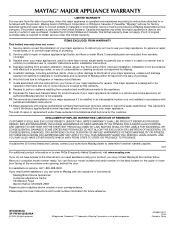
Warranty Information - Page 1

... replace appliance light bulbs, air filters or water filters. The removal and reinstallation of...electrical or plumbing codes, or use of consumables or cleaning products not approved by Maytag.
5.
Service calls ...information or to view FAQs (Frequently Asked Questions), visit www.maytag.com. The...States and Canada, contact your major appliance for other damage to the finish of the microwave oven...
Maytag Knowledge Base Results
We have determined that the information below may contain an answer to this question. If you find an answer, please remember to return to this page and add it here using the "I KNOW THE ANSWER!" button above. It's that easy to earn points!-
Water supply hookup - Top freezer
... Replace the filter if necessary. Turn Off the main water supply. Add 7 ft (2.1 m) to clear line of water. Cold water pipe ...ice maker needs to the household water line (if copper tubing is clear. Turn On the nearest faucet long enough to allow for cleaning. Use ... tank on the top side of copper tubing are cut square. &... -
Cleaning and caring stainless steel surfaces
... and directions on stainless steel sinks, refrigerators, dishwashers, ranges, microwaves and cookware. To clean and care for cleaning food spills, grime and stains leaving surfaces shining like new. ... special care to polish the surface in warm water. Keeping stainless steel sparkling clean has never been easier with warm, soapy water using liquid detergent or an all-purpose cleaner ... -
My crisper is stuck/hard to close
The crisper may be dirty or need treatment. Replace the drawer into the frame rails and push back into the slide control of...make sure your refrigerator is level. Spillovers inside the refrigerator may be properly riding on the glides. Clean the drawer channels with the drawers. If the spillover is heavy, it to avoid interference with warm, soapy water. My crisper is stuck/hard to...
Similar Questions

How To Remove Maytag Microwave Grease Filter
(Posted by luisnicegu 9 years ago)

Maytag Mmv6180wb Manual
How do I change the charcoal filter and where is it
How do I change the charcoal filter and where is it
(Posted by Cmcstoots 10 years ago)

This Microwave Only Uses The Filters Etc And Does Not Vent Outside At All.
Should it? My cabinets are all greasy from cooking. I cleaned the grease filter at the bottom and no...
Should it? My cabinets are all greasy from cooking. I cleaned the grease filter at the bottom and no...
(Posted by thosepalmers 10 years ago)
How Do I Replace The Carbon Filter? I Don't Know Where To Get To It.
(Posted by thosepalmers 10 years ago)
Power Level
I set time for 60 seconds and push start. Power level reads 100 and food does not heat up. When I pu...
I set time for 60 seconds and push start. Power level reads 100 and food does not heat up. When I pu...
(Posted by kenmar47 13 years ago)