Maytag MMV4203WB Support Question
Maytag MMV4203WB Support Question
Find answers below for this question about Maytag MMV4203WB.Need a Maytag MMV4203WB manual? We have 4 online manuals for this item!
Question posted by thosepalmers on August 22nd, 2013
How Do I Replace The Carbon Filter? I Don't Know Where To Get To It.
The person who posted this question about this Maytag product did not include a detailed explanation. Please use the "Request More Information" button to the right if more details would help you to answer this question.
Current Answers
Answer #1: Posted by SoCalWoman on August 22nd, 2013 6:31 PM
SoCalWoman

Member since:
December 16th, 2012 Points: 2,938,577

Member since:
December 16th, 2012 Points: 2,938,577
Hello thosepalmers,
You can replace the charcoal (carbon) filter by doing the following:
The charcoal filter is behind the vent grille at the top front of the microwave oven. The charcoal filter cannot be cleaned, and should be replaced about every 6 months, or as prompted by filter status indicator. Remove two screws on the vent grille, tilt the grille forward, lift it out, and remove filter. To reinstall, place the filter into its slotted area – wire mesh side up, replace vent grille, and secure with screws.
This information can be viewed on the Owner's Manual located here on Helpowl
http://www.manualowl.com/m/Maytag/MMV4203WB/Manual/214057
Hope this helps
Much appreciation to those who acknowledge our members for their contribution toward finding a solution.
~It always seems impossible until it is done~
Nelson Mandela
Related Maytag MMV4203WB Manual Pages
Installation Instructions - Page 1

... you what can happen if the instructions are very important. W10344702B MICROWAVE HOOD COMBINATION INSTALLATION INSTRUCTIONS
This product is the safety alert symbol.... Install Damper Assembly 9 Install the Microwave Oven 9 Complete Installation 10 VENTING DESIGN SPECIFICATIONS 11 ASSISTANCE 12 Replacement Parts 12 Accessories 12
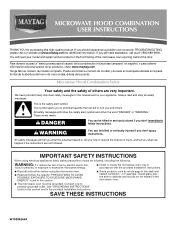
MICROWAVE HOOD COMBINATION SAFETY
Your safety and the...
Installation Instructions - Page 2

... or plaster/lath within cabinet opening where the microwave oven will not discolor, delaminate or sustain other types of packaging)
Aluminum grease filters
Charcoal filters (Depending on model, aluminum grease filter and charcoal filter may not be sure to Round Transition" illustration...9632; 3/4" (19 mm) hole saw
Parts Supplied
For reorder information, see "Replacement Parts" section.
Installation Instructions - Page 3

... into an outlet that is properly grounded. Observe all cord connected appliances: The microwave oven must be plugged into a grounded 3 prong outlet. WARNING: Improper use an ... "Electrical Requirements" section. Do not use an extension cord. Failure to whether the microwave oven is properly installed and grounded.
or 20-amp electrical supply with a grounding plug.
...
Installation Instructions - Page 4

...microwave oven. Damper plate B.
Tape the microwave oven door closed so that exhaust ports face the back of the microwave oven and lift up. Lift blower motor out of microwave
oven exterior. NOTE: Skip this section if you are inserted into the microwave oven.... Damper plate tabs D. Remove any remaining contents from the microwave oven cavity.
2. A
B
C
A. Wall Venting Installation Only ...
Installation Instructions - Page 5

Repeat Step 1 from "Wall Venting Installation Only." 4. NOTE: If blower motor is not positioned with flat sides facing the back of the microwave oven (as shown), performance will be reattached to back of microwave oven with 2 screws removed in the top of "Wall Venting Installation Only." Reattach damper plate. Repeat Step 3 from "Wall Venting Installation...
Installation Instructions - Page 6

... Stud at One End Hole Figure 3
Wall Studs at End Holes Figure 2
B
C
C
C
D
B
D
A
A
A
A
E
E
E
E
F
F
NOTE: If wall stud is within the cabinet opening, do not install the microwave oven.
1. Holes for lag screws E. Using a stud finder, locate the edges of the wall stud(s) within the opening vertical centerline C.
Mark the center of preferred installation...
Installation Instructions - Page 7

... Configurations" in Step 6 of cabinet. Drill 3/4" (19 mm) holes through the wall at the hole(s) marked in "Locate Wall Stud(s)" section.
7 Mark Rear Wall
The microwave oven must be 14¹⁄₈" (35.9 cm) from the centerline.
5. Rear wall B. These represent the mounting plate's end holes and bottom edge.
4. Make sure...
Installation Instructions - Page 8

Installation for Wall Stud at the other hole marked in Step 3 of the microwave oven. Drill a 3/4" (19 mm) hole through the wall at One End Hole (Figure 3)
1. Attach Mounting ...and bolts. The template has trim lines to use as guides. ■ If the wall behind the microwave oven (as at End Holes (Figures 1 & 2)
NOTE: The mounting plate must be against the bottom of the mounting plate.
Installation Instructions - Page 9

... Damper Assembly
(for two 1/4-20 x 3" bolts and washers used to secure the microwave oven to move and install microwave oven. Check that the damper blade hinge is being handled. A
B C
D
Install the Microwave Oven
WARNING
Excessive Weight Hazard Use two or more people, lift microwave oven and hang it on the back of the upper cabinet.
5. Secure damper assembly...
Installation Instructions - Page 10

... cabinet cutout so that a
circuit breaker has not tripped. Replace the fuse or reset the circuit breaker. Save Installation Instructions for troubleshooting information. If adjustment is no gap between the upper cabinet bottom and the microwave oven. Tighten bolts until there is required, rotate microwave oven downward.
Vent B. A
B
C
D
E
F
A. Do not use an extension cord...
Installation Instructions - Page 11

... damper to seal all joints in "Recommended Vent Length."
Rectangular to Round Transition NOTE: The minimum 3" (7.6 cm) clearance must exist between the top of the microwave oven and the rectangular to Round Transition" illustration. Do not vent exhaust air into concealed spaces, such as spaces within the wall for use when figuring...
Installation Instructions - Page 12

... the damper from your model number located on the front frame of available replacement parts. Both numbers can be installed to round transition piece must be found on the model and serial number plate, which is a list of the microwave oven. If you need , add the equivalent lengths of the system you need...
Owners Manual - Page 1
...burns, electric shock, fire,
injury to persons, or exposure to excessive microwave energy:
■ Install or locate the microwave oven only in accordance with the provided Installation Instructions.
■ Read all...microondas, detrás de la puerta. IMPORTANT SAFETY INSTRUCTIONS
When using the microwave oven.
■ Read and follow instructions. Always read and obey all instructions before...
Owners Manual - Page 2

... immerse cord or plug in water.
■ Keep cord away from the microwave oven is in the microwave oven for industrial or laboratory use paper products when appliance is operated in oven.
- Pieces can result in harmful exposure to accumulate on hood or filter.
■ Do not use .
■ As with maximum width of 36" (91...
Owners Manual - Page 3

... light to set the Light On Time and Light Off Time in the display. Touch Options or Setup control to the microwave oven, always remove rack after replacing and/or cleaning the filters. Programming tones may be used independently during preset or sensor (on the magnetron. Touch the Options or Setup control to unlock...
Owners Manual - Page 4

... cooked food can be programmed to paper towel. ■ Control panel: sponge or soft cloth and water. ■ Stainless steel (on the underside of microwave oven. Microwave Oven Care
General Cleaning
Installing/Replacing Filters and Light Bulbs
IMPORTANT: Before cleaning, make sure all controls are on some models) appears in the display when it . Slide the...
Owners Manual - Page 5

...; Control
Make sure control is normal and depends on during microwave oven operation to the cover for 5 minutes or more without the microwave oven being used. If microwave oven still does not operate, call .
Display shows messages
■ A flashing ":" or "PF" means there has been a power failure. Replacement Parts
Cleaning Supplies
■ Turntable
■ Heavy Duty Degreaser...
Owners Manual - Page 6
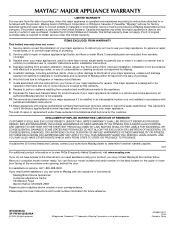
...or cleaning products not approved by this limited warranty. Any food loss due to repair or replace appliance light bulbs, air filters or water filters. Expenses for travel and transportation for repairs. The cost of Maytag Corporation or its related... only in accordance with the removal from your home of the microwave oven opening, behind the door. W10306244A SP PN W10306246A
© 2009.
Dimension Guide - Page 1

... = 1.5 m)
B. Vent extension piece, at least 3" (7.6 cm) high
Because Whirlpool Corporation policy includes a continuous commitment to round transition piece so that a separate circuit serving only this microwave oven be inside the upper cabinet. For complete details, see Installation
our products, we reserve the right to change materials and specifications without notice. It is...
Warranty Information - Page 1

...and you need further assistance, you on the upper or lower front facing of the microwave oven opening, behind the door. Proof of original purchase date is used in the country ...another warranty applies.
9/07
For additional product information or to repair or replace appliance light bulbs, air filters or water filters. Any food loss due to refrigerator or freezer product failures.
7. Outside...
Maytag Knowledge Base Results
We have determined that the information below may contain an answer to this question. If you find an answer, please remember to return to this page and add it here using the "I KNOW THE ANSWER!" button above. It's that easy to earn points!-
Reset the water filter indicator - Side by side refrigerator
... models, will help you that it is almost time to change from "Replace" to "Good" when the system is almost time to "Order." This tells you know when to yellow. Flushing the Filter After connecting the refrigerator to Flush a Refrigerator Water Filter Repeat until a total of 3 gal. (12 L) has been dispensed. This will change... -
Water dispenser dripping - Side by side refrigerator
... refrigerator Why is normal. This can cause the dispenser to a water source or replacing the water filter, flush the water system. Additional flushing may be required in some households. It ... release it . Freezer on , 5 seconds off) until water begins to install or replace the water filter Animation- After connecting the refrigerator to drip. This will flush air from the system, ... -
Purchasing replacement refrigerator filters
... for my refrigerator? side by side refrigerator Changing/replacing the water filter - Purchasing replacement water filters is as easy as clicking on today's order, enter Promo Code F9A75Q4 in the refrigerator compartment - To purchase replacement filters and receive a 10% discount on the link below. Changing/replacing the water filter animation - To ensure glass after glass of clean...
Similar Questions

I Need To Replace A Door Handle For Maytag Microwave Mmv4205bab....
i need to replace a door handle for maytag microwave MMV4205BAB.... do you have one that fits this m...
i need to replace a door handle for maytag microwave MMV4205BAB.... do you have one that fits this m...
(Posted by hlherzog 3 years ago)

This Microwave Only Uses The Filters Etc And Does Not Vent Outside At All.
Should it? My cabinets are all greasy from cooking. I cleaned the grease filter at the bottom and no...
Should it? My cabinets are all greasy from cooking. I cleaned the grease filter at the bottom and no...
(Posted by thosepalmers 10 years ago)


Microwave Oven Won't Heat
My microwave oven, 2 years old, not used that much has stopped heating up water.
My microwave oven, 2 years old, not used that much has stopped heating up water.
(Posted by MarjorieChowning 11 years ago)

Filter Cleaning
When I have my vent on it states to clean or change filter. I cant find my manual so asking you. Wha...
When I have my vent on it states to clean or change filter. I cant find my manual so asking you. Wha...
(Posted by zigmom61 12 years ago)