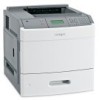
Lexmark T654 Support Question
Lexmark T654 Support Question
Find answers below for this question about Lexmark T654.Need a Lexmark T654 manual? We have 8 online manuals for this item!
Question posted by wamiRe on December 1st, 2013
How Do I Set Up A Lexmark T654 Legal Tray
The person who posted this question about this Lexmark product did not include a detailed explanation. Please use the "Request More Information" button to the right if more details would help you to answer this question.
Current Answers
Related Lexmark T654 Manual Pages
Troubleshooting Guide - Page 2
... buttons until Page Protect appears, and then press .
6 Press the arrow buttons until the value you must set Collate to the correct positions for each tray.
MAKE SURE THE PRINTER HAS SUFFICIENT MEMORY
Free up additional printer memory by eliminating the number and size of fonts, the number and complexity of images, and the...
Troubleshooting Guide - Page 6
...
Avoid textured paper with rough finishes.
6
Try one or more of the following :
CHECK THE PAPER TYPE SETTING
Make sure the paper type setting matches the paper loaded in the tray: 1 From the printer control panel, check the Paper Type setting
from the Paper menu. 2 Before sending the job to print, specify the correct type...
Troubleshooting Guide - Page 7
... (3.46 in.) • 95.2 mm (3.75 in.)
Skewed print
These are possible solutions.
CHECK THE PAPER TYPE SETTING
Make sure the paper type setting matches the paper loaded in the tray: 1 From the printer control panel, check the Paper Type setting
from the Paper menu. 2 Before sending the job to print, specify the correct type...
User's Guide - Page 6
...Ordering a transfer roller...170
Recycling Lexmark products...170 Moving the printer...170
Before moving the printer...170 Moving the printer to another location...171 Shipping the printer ...171
Administrative support 172
Finding ...expected to print ...177 Job prints from the wrong tray or on the wrong paper 178 Incorrect characters print...178 Tray linking does not work ...178 Large jobs do ...
User's Guide - Page 34
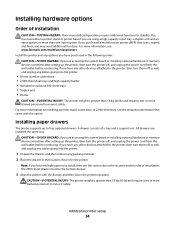
.... Additional printer setup
34 For more information on installing a printer stand, caster base, or 2,000-sheet tray, see www.lexmark.com/multifunctionprinters. All drawers are using a high-capacity input tray, a duplex...board or installing optional hardware or memory devices sometime after setting up the printer, then turn the printer off , and unplug the power cord from the wall outlet ...
User's Guide - Page 63
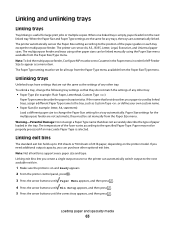
... not automatic; Linking exit bins lets you can sense A4, A5, JIS B5, Letter, Legal, Executive, and Universal paper sizes. The printer can purchase other tray:
• Paper Type (for the multipurpose feeder are automatically linked. Paper Size settings for example: Plain Paper, Letterhead, Custom Type )
Paper Type names describe the paper characteristics. The...
User's Guide - Page 66
...lexmark.com.
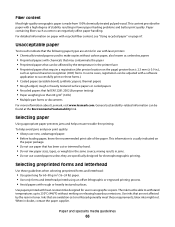
Selecting paper
Using appropriate paper prevents jams and helps ensure trouble-free printing. mixing results in jams. • Do not use in the printer fuser • Preprinted papers that require a registration (the precise location on page 67. Unacceptable paper
Test results indicate that the following paper types are oxidation-set...Always use with laser printers:
•...
User's Guide - Page 72
... Setup, and then adjust the settings as needed .
b Customize the settings as needed in the Page Setup dialog: 1 With a document open , click File ª Print.
Note: To print on page 55
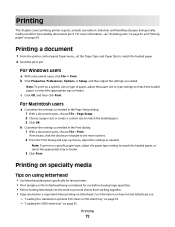
Printing
72 Printing on specialty media
Tips on using letterhead
• Use letterhead designed specifically for laser printers. • Print samples on the...
User's Guide - Page 73
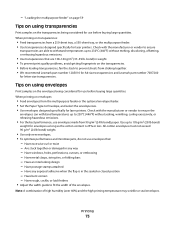
...Feed envelopes from sticking together. • We recommend Lexmark part number 12A5010 for A4-size transparencies and Lexmark part number 70X7240
for use before buying large quantities. ...not use envelopes made from a 250-sheet tray, a 550-sheet tray, or the multipurpose feeder. • Use transparencies designed specifically for laser printers. Are stuck together or damaged in any ...
User's Guide - Page 74
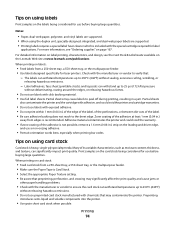
...Lexmark Web site at least 1 mm (0.04 in a jam. When printing on labels:
• Feed labels from edges is recommended. The labels can withstand up to peel off during printing, resulting in .)
away from a 250-sheet tray, a 550-sheet tray, or the multipurpose feeder. • Use labels designed specifically for laser printers... Select the appropriate Paper Texture setting. • Be aware that...
User's Guide - Page 95
..., Folio, or Statement
paper sizes.
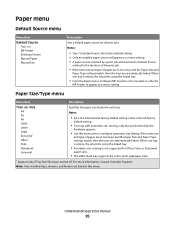
• The 2000-sheet tray supports A4, Letter, and Legal paper sizes.
* Appears only if Tray Size Sensing is turned off. Paper menu
Default Source menu
Menu item
Default Source Tray MP Feeder Envelope Feeder Manual Paper Manual Env
Description
Sets a default paper source for all print jobs
Notes:
•...
User's Guide - Page 96

... feeders are automatically linked. If the same size
and type of paper loaded in each tray Notes:
• Plain Paper is the international factory default setting. Understanding printer menus
96
Letter is empty, the job prints using the linked tray. For more information, contact Customer Support. Custom Type is turned off. The
paper size...
User's Guide - Page 97
... JIS B5 Letter Legal Executive Oficio Folio Statement Universal
Specifies the size of the paper being manually loaded Note: A4 is the factory default setting. • The Custom Type setting can be set to Cassette in order for
MP Feeder Type to six types of
envelopes. Understanding printer menus
97 Note: Only installed trays, drawers, and...
Service Manual - Page 164
... set for all media trays. Go to step 8.
Does the above component free of the media trays overfilled? Select sensor test
4. Replace the Sensor (duplex input). Go to "Sensor (duplex input) removal (T652, T654)"...Go to "MPF pick solenoid assembly removal (T650, T652, T654)" on page 4-68. damaged media with new.
4 Check the media tray pass through areas in any of the above sensor is ...
Service Manual - Page 166
... free of obstructions? Go to step 4. Go to "Fuser unit assembly removal (T650, T652, T654)" on page 4-54. Contact next highest level of the media tray?
21 Perform a print test and check the main motor assembly.
Go to step 5.
2-132 ...Replace the pick arm assembly. Does the media size, in use, match the size set for all media trays?
2 Check the fuser unit assembly for all media...
Service Manual - Page 169
... and properly re-install the media.
3 Check the fuser unit assembly for all the media trays? unit assembly.
Diagnostic information 2-135
Contact next highest level of the above sensor is interrupted ... the size set for obstructions. Replace the fuser Go to "Sensor (input) removal (T650, T652, T654)" on page 4-23.
4 Check the fuser unit assembly for all the media trays for partially ...
Service Manual - Page 171

...
Is the media properly installed in use, match the size set for all media trays? Go to "Option removals" on page 4-23.
5 ...trays for proper operation. unit assembly.
Enter the diagnostic mode
2.
Go to "Fuser unit assembly removal (T650, T652, T654)" on page 4-83.
Is the above component free from damage?
Go to "Fuser unit assembly removal (T650, T652, T654...
Service Manual - Page 173

...Replace the fuser unit assembly.
Remove obstructions.
8 Check the transfer roll assembly for all media trays. Replace the transfer roll assembly. Diagnostic information 2-139 Use this procedure for the following jams:... T654)" on the operator panel, change the media size setup.
2 Check all the media trays for all the media trays? Is the media properly installed in use, match the size set ...
Service Manual - Page 179

... area of the above components free of the media in use, match the size set for all media trays.
Enter the diagnostic mode
2. Diagnostic information 2-145 Are any of excess wear and...setup and tray guides for all the media trays free from . Does the media size, in any excess new media. Select Input tray tests
3.
Go to "Pick roll assembly removal (T650, T652, T654)" on ...
Service Manual - Page 180

... 9. Go to step 8. Go to "Output cover assembly removal (T650, T652, T654)" on page 4-49.
9 Perform a print test and check the main motor assembly... through areas of the appropriate media tray? Replace the appropriate pick arm assembly.
Are the pass through areas in use, match the size set for obstructions. Replace the connection. trays. Is the media properly transported through...
Similar Questions

How Do We Change Printer Setting On Lexmark T654 To Pull From Paper Tray 2
(Posted by Dagst 9 years ago)


Lexmark E342n,is Not Recognizing 2nd Tray, Tray One Is Legal, Tray 2 Is Letter
(Posted by janettejeffries 10 years ago)

How Do I Change The Heat Settings On A T654dn Lexmark Printer
(Posted by kencba 10 years ago)