Lexmark T654 Support Question
Lexmark T654 Support Question
Find answers below for this question about Lexmark T654.Need a Lexmark T654 manual? We have 8 online manuals for this item!
Question posted by fraLe on August 7th, 2014
How Delete Print And Hold Printer Function
The person who posted this question about this Lexmark product did not include a detailed explanation. Please use the "Request More Information" button to the right if more details would help you to answer this question.
Current Answers
Related Lexmark T654 Manual Pages
Embedded Web Server Administrator's Guide - Page 5
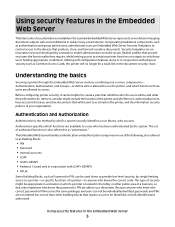
... identified, or both identified and authorized. Before configuring printer security, it can use the printer, and which a printer is also referred to be used only in conjunction with physical security such as Password or PIN, can not be appropriate in a situation in which functions those users holding appropriate credentials. Items to consider might be individually...
Embedded Web Server Administrator's Guide - Page 17
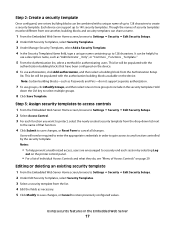
...Templates Name field, type a unique name containing up to 128 characters. Hold
down list next
to the name of that have been configured on the ...up to 128 characters to create a security template. Editing or deleting an existing security template
1 From the Embedded Web Server Home ...order to gain access to any function controlled by selecting Log
out on the printer control panel.
• For a...
Embedded Web Server Administrator's Guide - Page 20
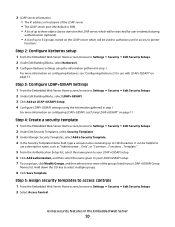
... user for use with LDAP+GSSAPI" on page 13.
Hold down the Ctrl key to your LDAP+GSSAPI setup. 7 To use groups, click Modify Groups, and then select one or more information on configuring LDAP+GSSAPI, see "Configuring Kerberos 5 for access to printer
functions
Step 2: Configure Kerberos setup
1 From the Embedded Web Server...
Embedded Web Server Administrator's Guide - Page 24

... printer using the power switch. 2 Simultaneously press and hold the "2" and "6" keys on the numeric keypad while turning the printer back on disk encryption, or Disable to turn on . Changing or deleting..., and Scheduled).
6 Click Submit to designate when disk wiping should display a list of functions, instead of the encryption task.
Disk encryption can be lost. Note: On some devices the...
Embedded Web Server Administrator's Guide - Page 29
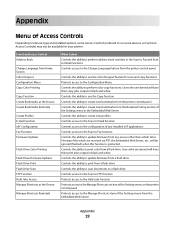
... ability to perform address book searches in black and white. Controls the ability to print color from the printer control panel
Controls the ability to use the Copy function Controls the ability to create new bookmarks from the printer control panel Controls the ability to create new bookmarks from the Bookmark Setup section of...
Embedded Web Server Administrator's Guide - Page 40
...
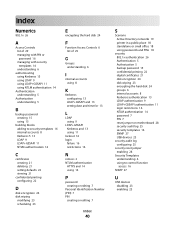
C
certificates creating 21 deleting 21 setting defaults 22 viewing 21
confidential printing configuring 22
D
disk encryption 24 disk wiping
modifying 23 scheduling 23
E
encrypting the hard disk 24
F
Function Access Controls 6 list...) 7 PIN
creating or editing 7
Index
40
S
Scenario Active Directory networks 19 printer in a public place 18 standalone or small office 18 using passwords and PINs 18...
User's Guide - Page 48
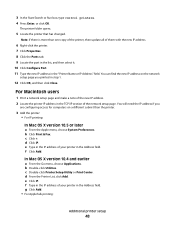
..., click Add. c Click +. e Click IP.
In Mac OS X version 10.4 and earlier
a From the Go menu, choose Applications. g Click Add. • For AppleTalk printing:
Additional printer setup
48 You can find the new IP address on the network
setup page you
are configuring access for computers on a different subnet than one ...
User's Guide - Page 50

... in the COM port must set the serial parameters to the selected printer model is selected, and then click Next.
Click Add Port to verify printer installation. n Click Finish to the computer. f Click OK, and then close all the windows. g Print a test page to finish adding
the port.
j Make sure the correct port...
User's Guide - Page 75
... using the numbers 0-9.
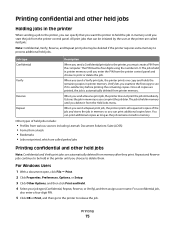
Reserve
When you send a Verify print job, the printer prints one copy and holds the remaining copies in printer memory. Repeat and Reserve jobs continue to be deleted if the printer requires extra memory to process additional held jobs. All print jobs that you want the printer to hold the job in memory until you enter the...
User's Guide - Page 123
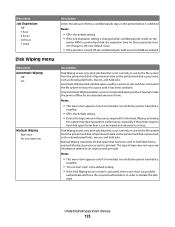
... unprocessed print job. Manual Wiping overwrites all disk space that is not currently in printer RAM are deleted. Notes:
• This menu item appears only if a formatted, non-defective printer hard ...printer performance, especially if the printer requires hard disk space faster than it can be wiped and returned to hold data from the printer hard disk. All permanent data on the printer ...
User's Guide - Page 129
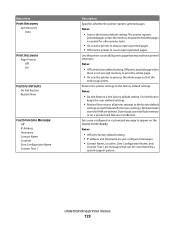
... required to appear on a printer hard disk are deleted. Sets a pre-configured or customized message to hold the pages is the factory default setting. • IP address and Hostname are pre-configured messages. • Contact Name, Location, Zero Configuration Name, and
Custom Text 1 are messages that the
entire page prints. Off prints a partial page when...
User's Guide - Page 130
... permanent storage.
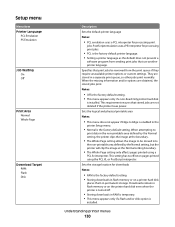
When the missing information and/or options are not deleted if the printer loses power. This requirement ensures that use another printer language. PostScript emulation uses a PS interpreter for processing print jobs.
• PCL is the factory default printer language. • Setting a printer language as the default does not prevent a
software program from the...
User's Guide - Page 135
... request.
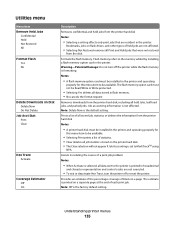
Removes downloads from the printer hard disk, including all held jobs from the printer hard disk Notes:
• Selecting a setting affects only print jobs that were not restored
from the printer hard disk Notes:
• A printer hard disk must be available.
• Selecting Print prints a list of statistics. • Clear deletes all data stored in hexadecimal
and...
User's Guide - Page 160

... that the serial interface parameters (protocol, baud, parity, and data bits) are deleted.
• Delete fonts, macros, and other data stored in flash memory for the serial port. ... then press to clear the message and continue printing. • The printer cannot find a similar font and reformat the affected text.
• Cancel the current print job.
51 Defective flash detected
Try one or...
User's Guide - Page 164
... Continue appears, and then press
processing.
• Delete fonts, macros, and other data stored on the printer hard disk. • Install a larger printer hard disk. to clear the message and continue
80 Routine maintenance needed
The printer needs to clear the message and continue printing. • Install a different printer hard disk before performing any operations that...
Quick Reference - Page 4
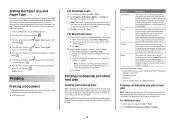
... press . Verify
When you send a Verify print job, the printer prints one copy and holds the remaining copies in the printer until you delete it is held in memory so you send a Reserve print job, the printer does not print the job immediately. The PIN must be held jobs
Holding jobs in the printer
When sending a job to match the loaded...
Service Manual - Page 39

... not be available:
- Delete fonts, macros, and other data in RAM
- The following functions may be restored. 4062
Error code or message
37
Error contents Insufficient Memory
38
Memory Full
39
Complex Page
Description/Action
Possible repair actions
This message displays when the printer memory used to restore the Print and Hold jobs from the...
Service Manual - Page 214
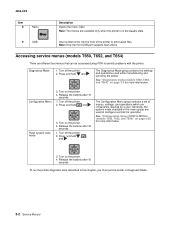
... service menus (models T650, T652, and T654)
There are different test menus that can be accessed during POR to print saved files.
The Diagnostics Mode group contains the settings and operations used to configure a printer for operation.
Press and hold and . Turn on the printer. 4.
Press and hold and .
3. Turn on page 3-25 for more information...
Service Manual - Page 215

...hold and . 2.
Release the buttons after 10 seconds. Turn the printer off. 1. Available tests
The tests display on the operator panel in the order shown:
REGISTRATION Top Margin Bottom Margin Left Margin Right Margin Quick Test
PRINT...Diagnostics mode (models T650, T652, and T654)
Entering Diagnostics mode (models T650, T652, and T654)
1. Turn the printer on page 3-10
Diagnostic aids 3-3
Service Manual - Page 380
... B
A
A
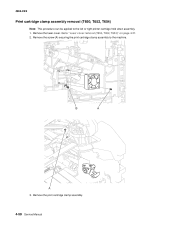
3.
Remove the screw (A) securing the print cartridge clamp assembly to "Laser cover removal (T650, T652, T654)" on page 4-27. 2. Remove the laser cover. Remove the print cartridge clamp assembly.
4-58 Service Manual 4062-XXX
Print cartridge clamp assembly removal (T650, T652, T654)
Note: This procedure can be applied to the left or right printer cartridge hold down assembly. 1.
Similar Questions


Lexmark T654 Printer Will Not Delete From Device & Printer
(Posted by SwiGIZMO 10 years ago)

How Do I Delete A Store Pin Number On The Print & Hold Function The Lexmark T654
(Posted by Eamos59762 11 years ago)