Get support for KitchenAid KUDK03ITBL - 24 Inch Full Console Dishwasher

KitchenAid KUDK03ITBL Support Question

KitchenAid KUDK03ITBL Support Question

Find answers below for this question about KitchenAid KUDK03ITBL - 24 Inch Full Console Dishwasher.
Need a KitchenAid KUDK03ITBL manual? We have 3 online manuals for this item!
Question posted by panfilconstruction on June 12th, 2015

How To Remove Lower Sprayer Arm On Dishwasher

The person who posted this question about this KitchenAid product did not include a detailed explanation. Please use the "Request More Information" button to the right if more details would help you to answer this question.

Current Answers

Answer #1: Posted by TommyKervz on June 13th, 2015 4:33 AM
This answer was accepted by the poster of the original question.
TommyKervz

Member since:
January 10th, 2013

Points: 17,776,813
1,100
points
Follow the instructions on the link https://www.youtube.com/watch?v=MCWvxGmK3eM


Hope that is helpful.
Kervz at www.satechhelp.co.za

Related KitchenAid KUDK03ITBL Manual Pages

User Instructions - Page 2

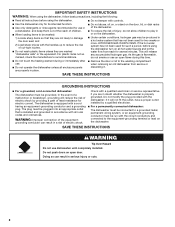
.... Do not modify the plug provided with the handles up to the washing compartment when removing an old dishwasher from each for two weeks or more. If the hot water system has not been... on all local codes and ordinances. and 2) Load sharp knives with the dishwasher; The plug must be produced in place. ■ Remove the door or lid to reduce the risk of injury, do not smoke ...
User Instructions - Page 3

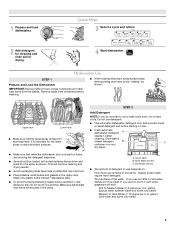
... detergent. A. If you use depends on the items - 1 Prepare and load dishwasher. Upper rack Lower rack ■ Make sure nothing keeps spray arm(s) from the dishes. Soft to run a wash cycle soon, run a rinse cycle. Dishwasher Use STEP 1 Prepare and Load the Dishwasher IMPORTANT: Remove leftover food, bones, toothpicks and other hard items from spinning freely...
User Instructions - Page 6

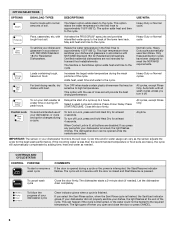
... and time to meet the NSF/ANSI requirements. Heavy Duty or Normal cycle To sanitize your dishwasher, or cycle and option changes during the wash portions of rinse aid will provide the best ...Heat Dry for at least 4 seconds. Press 4 Hour Delay. To follow the progress of the lower level rack. Pans, casseroles, etc. When Control Lock is interrupted, or the water could not be sensitive ...
User Instructions - Page 7

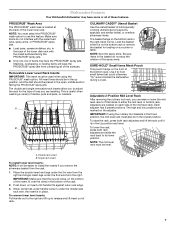
...items do not stop the rotation of the spray arms. SURE-HOLD® Small Items Mesh Pouch This pouch hangs on the adjuster. Removable Lower Level Rack Inserts IMPORTANT: This insert must also be..." around inside the dishwasher during a cycle. Push down on insert until it is on the bottom of the insert, fit over the wires in the right-hand corner. To remove lower level inserts: Pull ...
User Instructions - Page 8

...forward in the lower level rack. Insert holding clip on either side of the center in the bottom of the rack. To move a clip: 1. Removable Mid Level Rack Inserts Your dishwasher has two removable mid level ...open track stops, flip the track stop to the outside of the rack to removing the mid level rack from dishwasher. Place the back rack rollers on each side of the rack into the track...
User Instructions - Page 9

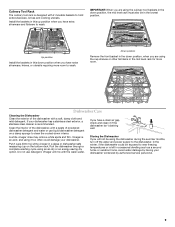
... this down interior. Culinary Tool Rack The culinary tool rack is recommended. Down position Remove the front basket in the lowest position. Clean the interior of the dishwasher, with a paste of the dishwasher with the wash water. Run the dishwasher through a complete washing cycle using the cup shelves or other tall items in a glass...
User Instructions - Page 11

... pump or spray arm clogged by hand washing. Home water pressure should be too delicate for automatic dishwashing. Are high suds slowing the wash arm? Use recommended dishwasher detergents only. Heavy... is 13 grains or above, it enters the dishwasher. Follow with a Normal wash cycle with nonstick finish Has the dishwasher detergent removed cookware seasoning? It may be possible to sit ...
User Instructions - Page 12

... or Canada. 6. For assistance or service in remote locations. 9. KITCHENAID® DISHWASHER WARRANTY ONE YEAR LIMITED WARRANTY For one year from the date of purchase, when ...according to instructions attached to parts or systems resulting from warranty coverage. 3. The removal and reinstallation of your major appliance, to instruct you need assistance using your authorized...
Installation Instructions - Page 2

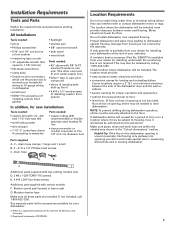
... to meet all safety messages. Remove shipping materials, drain hose and lower rack. All safety messages will tell you what can result in cabinet opening where there are not followed. Doing so can happen if the instructions are no existing utility hookups 7 Install moisture barrier 9 Prepare dishwasher 10 Make electrical connection 16 Connect...
Installation Instructions - Page 3

... conduit connector to freezing, have it may also be installed. The location where the dishwasher will be left unused for installing your household wiring to dishwasher against freezing. Protect dishwasher and water lines leading to 16-gauge wiring in lower rack) G. external threads on wire connectors which are the proper size to connect your...
Installation Instructions - Page 4

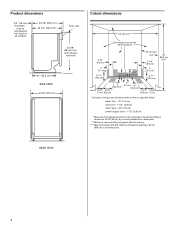
... point. Product dimensions 3/4" (1.9 cm) insulation - REAR VIEW 4 May be reduced to 6-5/8" (16.6 cm) if height of countertop. may be increased to 33-7/8" (86 cm) by removing wheels from dishwasher. ** Minimum, measured from the lowest point on all models) 24-7/8" (63.2 cm) 24-1/2" (62.2 cm)* front vent 33-7/8" (86 cm) min.
Installation Instructions - Page 5

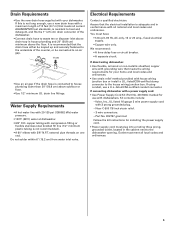
...for your home and local codes and ordinances. • Use strain relief method provided with your dishwasher. We recommend: • A time-delay fuse or circuit breaker. • A separate ...steel braided fill line (1/2" minimum plastic tubing is connected to house plumbing lower than 20" (50.8 cm) above the floor. Neer C-500 7/8 inch strain relief. - 3 wire connectors. - air gap • Use...
Installation Instructions - Page 7

... the counter. Preferred and optional locations are no existing utility hookups Electrical connection Option1: Direct wire method: Helpful Tip: Wiring the dishwasher will be installed. Wood cabinet: Sand hole until smooth. Remove the disposer knockout plug. Cut end of the counter. optional preferred locations locations 2. with grommet, not provided. 3. It is recommended...
Installation Instructions - Page 10

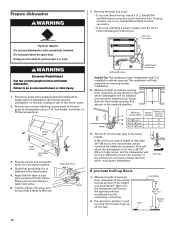
... clearance. wheel 1 Minimum cutout height Wheel position Number of countertop to the lower panel. 5. Put wheels in serious injury or cuts. Remove two screws attaching access panel and lower panel to dishwasher using conduit, use dishwasher until it faces to floor where dishwasher will be installed (you have built-up floor. Put corner posts from underside...
Installation Instructions - Page 14

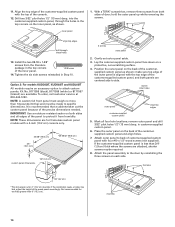
...panel is for frameless custom panel models with the top of the customer-supplied custom panel with a 4-inch (10.2 cm) console only. 23-3/8" (59.3 cm) 3/4" (19.1 mm) *25-29/32" (65.8 cm) ... needed. Align the top edge of the console. 12. To order, call customer service at 800-444-1230. NOTE: These dimensions are available. remove outer panel and drill 3/32" pilot holes...
Installation Instructions - Page 15

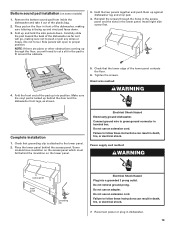
...remove the brackets from tipping, open dishwasher door and place towel over pump assembly and spray arm of the dishwasher. Repeat this step for marble, granite or other side of dishwasher. With another person holding the rear of the dishwasher...dishwasher. The screw can be secured at back of brackets with pliers, and pull the brackets out of dishwasher should be attached to a lower...
Installation Instructions - Page 16

...Remove cardboard from side to connect your cabinets. Close and latch the door, and place level against top front opening . 4. Do not pre-twist bare wire. • Twist connector. • Gently tug on the console... dishwasher fits tightly into cabinet opening . NOTE: It is on connector. Check that dishwasher is plumb. 4. Align front of the dishwasher by raising, lowering or...
Installation Instructions - Page 17

...and positioning the copper tubing, it will go , use an adapter. Turn on the end of dishwasher tub. 3. Form bare ground wire into a grounded 3 prong outlet. Slide ferrule onto the ... so that power supply cord does not touch dishwasher motor or lower part of the tubing. d. Place paper towel under the washer. 5. Do not remove ground prong. Connect ground wire to water supply...
Installation Instructions - Page 18

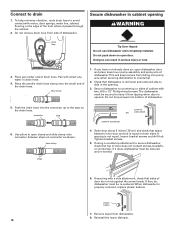
... and spray arm of the drain hose. If they do not rub against the screw heads. Reinstall the lower dishrack. 18 Pan will keep it from dishwasher. 8. Secure dishwasher to countertop. 2. Place pan under end of cabinet with a side attachment, check that top of dishwasher. 5. connector stop on connector as shown. Open door about 3 inches (7.6 cm...
Installation Instructions - Page 19

.... Do not use an adapter. Remove the bottom sound pad from inside the dishwasher and take it will go, making sure lettering is attached to proper position. Do not use an extension cord. Reinstall the screws through the floor, you will open to the lower panel. 2. Place the lower panel behind the door and...

KitchenAid Knowledge Base Results

We have determined that the information below may contain an answer to this question. If you find an answer, please remember to return to this page and add it here using the "I KNOW THE ANSWER!" button above. It's that easy to earn points!

  • Removing the lower level rack inserts
    ... the front of medium-sized plates and bowls. KUDS02SR, KUDS02FR, KUDU02FR, KUDU02VSPA, KUDS02FSPA, KUDS02IS, KUDS03FS Your dishwasher is shipped with two removable lower level rack inserts. (See illustration below). The double and single removable rack inserts allow you to adjust the rack for smaller plates and bowls to release. Double rack...
  • Dish racks do not move freely
    ...Make sure that all shipping material is removed from the dishwasher Upper rack features FAQs Knowledgebase search tips Culinary Tool Rack (Third Level Rack) Removing the lower level rack inserts << Email ...improved Thank you Not Helpful Helpful Answers others found helpful Removing the top rack from inside the dishwasher. Check for obstructions. Was this answer more useful. Go...
  • ProScrub&#174; feature
    ...., with the water feed tube or mid-spray arm. Position the tines in the 3-position back row vertically, at the back of the lower dish rack. Select this wash option. To maximize... spray jets from reaching all of items may have removable lower rack inserts or Flexi-Fold Down TM  flexible tines.  Your dishwasher may face the ProScrub spray jets. Load items so...

Similar Questions

How To Remove Lower Spray Arm?
How do I remove the spray arm assembly at the bottom of the dishwasher?
(Posted by bmoore6970 2 years ago)
Attaching New Lower Sprayer.
Trying to put on a new lower sprayer. It does not want to thread onto the shaft.
(Posted by rossdwindom1 9 years ago)
Kitchenaid Kudk03itbl3 Starts To Fil And Stops In All Cycles
My KUDK03ITBL3 starts to fill and stops. Any ideas?
(Posted by lcone32 12 years ago)
Ask a New Question
Use the box below to post a new question about this KitchenAid product .
Points & Prizes
  • You can earn points for nearly everything you do on HelpOwl.com
  • You can trade in those points for gift cards at leading retailers such as Amazon.com and Walmart
  • It's that simple!
See How it Works
Create a Free Account

KitchenAid Manuals

Find free KitchenAid KUDK03ITBL - 24 Inch Full Console Dishwasher manuals and user guides available at ManualOwl.com. Try out our unique manual viewer allowing you to interact with manuals from directly within your browser!

KitchenAid Reviews

View thousands of KitchenAid user reviews and customer ratings available at ReviewOwl.com.

Contact Information

Complete KitchenAid customer service contact information including steps to reach representatives, hours of operation, customer support links and more from ContactHelp.com.

Scoreboard Ratings

See detailed KitchenAid customer service rankings, employee comments and much more from our sister site.

KitchenAid Recalls

Find comprehensive KitchenAid recall information updated hourly on RecallOwl.com.