KitchenAid KESK901SSS Support Question
KitchenAid KESK901SSS Support Question
Find answers below for this question about KitchenAid KESK901SSS - 30" Electric Range.Need a KitchenAid KESK901SSS manual? We have 3 online manuals for this item!
Question posted by teachlinda1 on November 18th, 2013
Condensation Runs Down Front Of Range After Baking, Is This Normal?
The person who posted this question about this KitchenAid product did not include a detailed explanation. Please use the "Request More Information" button to the right if more details would help you to answer this question.
Current Answers
Related KitchenAid KESK901SSS Manual Pages
Dimension Guide - Page 1

... product. If countertop is not level, range will not be level.
For complete details, see Range Rating chart below). 30" (76.2 cm) Freestanding and Slide-In Electric Range
PRODUCT MODEL NUMBERS
OVERALL DIMENSIONS
KERS807S KERS807X
KESK901S KESS907S
KESS908S KESS907X
Freestanding Range
Slide-in Range
ELECTRICAL REQUIREMENTS
B
q This range is manufactured with the neutral terminal...
Installation Guide - Page 2

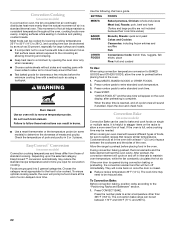
... important safety messages in death or serious burns to rear range foot. Reconnect the anti-tip bracket, if the range is the safety alert symbol. Canada Only 6 Countertop Preparation 7
INSTALLATION INSTRUCTIONS 7 Unpack Range 7 Measure for Proper Height 7 Adjust Leveling Legs 8 Install Anti-Tip Bracket 8 Electrical Connection - These words mean:
DANGER
You can happen if...
Installation Guide - Page 3

... concrete/ceramic floors)
Parts supplied Check that all parts are shown must end in ring terminals or open-end spade terminals with the range, see "Install Anti-Tip Bracket" section.
■ Grounded electrical supply is the installer's responsibility to comply with your builder or cabinet supplier to your local hardware store.
See...
Installation Guide - Page 4

... installed in a 24" (61.0 cm) base cabinet with 25" (63.5 cm) countertop;
front of range**
G. See "Electrical Connection" section. Model/serial number plate (located on the right-hand side oven door trim)
D. 30" (76.2 cm)
E. 27¼" (69.2 cm) (27 70.3 cm] on models KERS807XSP and KESS907XSP) from handle to standoff at back...
Installation Guide - Page 5

...
G. Cabinet door or hinge should not extend into cutout.
Electrical Connection
To properly install your range, you are for dimensional clearances above the cooktop surface.
Do not modify the power supply cord plug. or 50-amp power supply cord (pigtail) (see NOTE*. opening depth
E. 30" (76.2 cm) min. Junction box - 8" (20.3 cm) to...
Installation Guide - Page 6

...manufactured with local codes. Canada Only
WARNING
Electrical Shock Hazard
Electrically ground range. When a 4-wire receptacle of the power supply cable (at the range and at the point the power supply ...a separate ground wire is used, it is recommended that a qualified electrical installer determine that the range can result in conformance with a UL listed strain relief and be Type ...
Installation Guide - Page 7

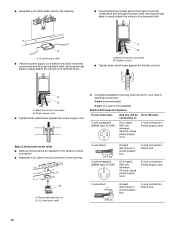
...Range must be level for satisfactory baking conditions. Stack one cardboard corner on countertop, first side to side, then front to the underside of the range cooktop. Measure from inside oven.
2.
Measure the distance of range...the carton. To place range on the cardboard corners. If you have a square finish (flat) countertop and the opening width is greater than 30" (76.2 cm), adjust...
Installation Guide - Page 9

... its final location, making sure rear leveling leg slides into a grounded outlet.
U.S.A. 6. Longer screws are available from under range.
8. Make electrical connections as described in death, fire, or electrical shock. Depending on the back of your flooring, longer screws may be made. Remove the terminal block cover screws located on the thickness of...
Installation Guide - Page 10
... 10-50R)
A fused disconnect or circuit breaker box
A UL listed, 250-volt minimum, 40-amp, range power supply cord
4-wire connection: Direct wire
3-wire connection: Power supply cord
B
A. Black horizontal cross ...
Electrical Connection Options
If your home has:
And you will be Go to Section: connecting to:
4-wire receptacle (NEMA type 14-50R)
A UL listed, 250-volt minimum, 40-amp, range ...
Installation Guide - Page 12

... ground wire
E. Neutral (white) wire E. Direct Wire Installation: Copper or Aluminum Wire
This range may be connected directly to your electrical supply, make the required 3-wire or 4-wire connection.
1. Securely tighten hex nuts. Line... through the strain relief on your type of range. Depending on bottom of electrical supply (4-wire or 3-wire connection).
4-wire Connection...
Installation Guide - Page 14

...front and slightly to one side of the range. ■ Look for satisfactory baking performance.
4. See the "Level Range" section. 5. If range does not operate, check the following:
■...rack in range or reconnect power. 8. Moving the Range
WARNING
3. Push range back into an outlet.
■ Electrical supply is installed, use a flashlight and look underneath the bottom of the range. ■...
Installation Guide - Page 15

... maintenance. 5. Unplug the power supply cord. 3. Perform cleaning or maintenance. 4. Plug in death or electrical shock.
1.
If removing the range is under anti-tip
bracket.
6. Check that range is under anti-tip
bracket.
7. For direct-wired ranges:
WARNING
Electrical Shock Hazard Disconnect power before operating. Replace all parts and panels before servicing. Failure to...
Use & Care Guide - Page 1

ELECTRIC RANGE
ARCHITECT® SERIES II
Use & Care Guide
For questions about features, operation/performance, parts, accessories or service, call: 1-800-422-1230 or visit our website ...
Use & Care Guide - Page 2
...; Conversion 22 Convection Bake 22 Convection Roast 23 Convection Broil 24 Proofing Bread 24 Timed Cooking 24 Warming Drawer 25
RANGE CARE 26 Self-Cleaning Cycle 26 General Cleaning 27 Oven Light(s 28 Oven Door 28 Storage Drawer 29 Warming Drawer 29
TROUBLESHOOTING 29
ASSISTANCE OR SERVICE 30 In the U.S.A 30 Accessories 31 In...
Use & Care Guide - Page 3
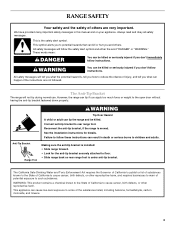
... instructions are very important. All safety messages will not tip during normal use.
See the installation instructions for the anti-tip bracket securely attached to such substances. Anti-Tip Bracket Range Foot
Making sure the anti-tip bracket is installed: • Slide range forward. • Look for details. The Anti-Tip Bracket
The...
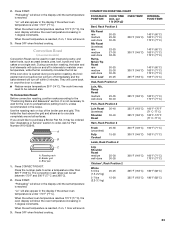
Use & Care Guide - Page 18

...the display.
3
225°F (107°C)
To Deactivate: The oven can be set to its normal operating state (non-Sabbath Mode compliant state, not cooking) by pressing the OFF key.
1. To...Sabbath Mode time, up to remain on the display.
5. Number pads 1 through 0 represent temperatures.
The bake range can result in this order. 4. Option 7
The Sabbath Mode sets the oven to ½ hour ...
Use & Care Guide - Page 22
... the fan constantly circulates the hot air. Do not touch broil element. Use the following chart as 30 percent, especially for doneness a few minutes before placing food in moisture and yielding crustier breads.
The convection bake range can result in intervals to enter a temperature other than the natural movement of a non-delayed cook...
Use & Care Guide - Page 23
...-done
Rump, Sirloin Tip Roast rare medium well-done
Meat Loaf
20-25 25-30 30-35
22-25 27-30 32-35
20-25 25-30 30-35 20-25
300°F (149°C) 300°F (149°C)
300...and grid. The convection roast range can be set temperature is opened during convection roasting, the broil element and convection fan will turn off immediately and the bake element will show the oven temperature...
Use & Care Guide - Page 24
....
3. Follow the recipe directions as breads and cakes because they may not bake properly.
To Set a Cook Time: 1.
per
1 lb [454 g])
...adjusted. Let the dough rise until oven is turned off after 30 seconds. Delay start time, stop time is ideal for 5 ...after 20-25 minutes. Press CONVECT BROIL. The convection broil range can result in intervals to the door. The set to enter...
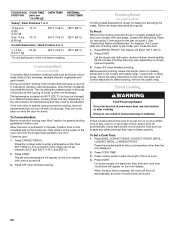
Use & Care Guide - Page 30

...(Spanish speaking, hearing impaired, limited vision, etc.).
30 It may save you use . Call the KitchenAid ...order replacement parts, we recommend that batter is normal for assistance or service, please check "Troubleshooting...System," "Cooktop Controls - Level the range.
Oven temperature too high or too ...us to better respond to automatically run during BAKE, BROIL or CLEAN? See the...
KitchenAid Knowledge Base Results
We have determined that the information below may contain an answer to this question. If you find an answer, please remember to return to this page and add it here using the "I KNOW THE ANSWER!" button above. It's that easy to earn points!-
Cleaning the refrigerator
...clean sponge or soft cloth and a mild detergent in normal home environments. Paper towels scratch and may suddenly break...Shelves may dull the clear coat of the condenser. If you need for routine condenser cleaning operating in warm water. ...is loaded with a soft brush to ensure maximum efficiency. Electric Ranges and Cooktops << Most removable parts and interior ... -
Cleaning the condenser coils
... 3 months to ensure maximum efficiency. Do so by Side with the metal clips and pushing the grille firmly to clean the condenser: Unplug refrigerator or disconnect power. Plug in a normal home operating environment. Cleaning your hands along the ends of the grille while pulling up the grille support tabs with Ice Bin... -
Cleaning the condenser coils - Side by Side with Ice Bin in Door, Flush Mounted Dispenser with LCD Display
... base grille and tighten screws. However, if the environment is particularly greasy or dusty, or there is no need for routine condenser cleaning in normal home operating environments. Remove the base grille by side refrigerator Plug in freezer compartment - Steps to ensure maximum efficiency. Do this by Side with...
Similar Questions

New Kitchenaid Range Very Noisy
just installed our new oven and tried to bake a frozen lasagna. Had to turn it off as the fan contin...
just installed our new oven and tried to bake a frozen lasagna. Had to turn it off as the fan contin...
(Posted by springle50042 10 years ago)

Kitchenaid Kdss907sss - 30' Slide-in Dual Fuel Range
Position Of Range
Should the back of the 30" slide-in range touch the back wall?
Should the back of the 30" slide-in range touch the back wall?
(Posted by patriciainsf 11 years ago)

Slid In Electrical Range
i have to install an electrical slidin range but it come with a metal below cooktop glass that separ...
i have to install an electrical slidin range but it come with a metal below cooktop glass that separ...
(Posted by arqfalves 12 years ago)
Electrical Panel Is Off
After self cleaning my oven, then oven door would not open and the electrical panel not functional a...
After self cleaning my oven, then oven door would not open and the electrical panel not functional a...
(Posted by brnfox 13 years ago)

Buzzing After Oven Is Turned Off
The fan appartently is made to keep running after the oven is turned off. It runs for 30 minutes plu...
The fan appartently is made to keep running after the oven is turned off. It runs for 30 minutes plu...
(Posted by rwedae 13 years ago)