KitchenAid KDRS807SSS Support Question
KitchenAid KDRS807SSS Support Question
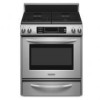
Find answers below for this question about KitchenAid KDRS807SSS - 30 Inch Dual Fuel Range.Need a KitchenAid KDRS807SSS manual? We have 3 online manuals for this item!
Question posted by Anonymous-172477 on September 25th, 2022
How To Replace Lower Heating Element?
Lower heating element has failed - I need instructions on how to replace it. Thanks.
Current Answers
Answer #1: Posted by SonuKumar on September 25th, 2022 8:47 AM
SonuKumar

Member since:
May 9th, 2021 Points: 16,621,300

Member since:
May 9th, 2021 Points: 16,621,300
Please respond to my effort to provide you with the best possible solution by using the "Acceptable Solution" and/or the "Helpful" buttons when the answer has proven to be helpful.
Regards,
Sonu
Your search handyman for all e-support needs!!
Related KitchenAid KDRS807SSS Manual Pages
Dimension Guide - Page 1
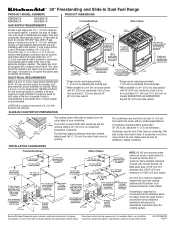
... Ref. W10246120C 1/28/11 ® 30" Freestanding and Slide-In Dual Fuel Range
PRODUCT MODEL NUMBERS
PRODUCT DIMENSIONS
KDRS807S KDRS807X...clearances above the range, follow the range hood or microwave hood combination installation instructions for planning ...40-amp maximum circuit protection is needed for satisfactory baking conditions.
from handle to the range location. front of oven door ...
Installation Guide - Page 2
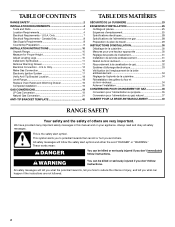
...or hurt you don't follow instructions. Only 12 Make Gas Connection 16 Electronic Ignition System 17 Verify Anti-Tip Bracket Location 18 Level Range 18 Replace Oven Racks and Warming Drawer 19...éparation du plan de travail 29
INSTRUCTIONS D'INSTALLATION 30 Déballage de la cuisinière 30 Mesures pour une hauteur appropriée 30 Réglage des pieds de nivellement 31...
Installation Guide - Page 8

...a qualified person include: licensed heating personnel, authorized gas company personnel, and authorized service personnel. Range Rating*
Specified Rating of Power...types of range's final location.
■ Do not use with American National Standard, National Fuel Gas Code ... codes and ordinances.
Failure to the manufacturer's instructions. See "Gas Conversions" section.
Do not use...
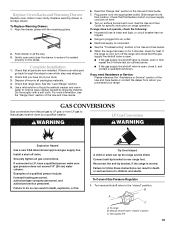
Installation Guide - Page 9

...needed for turning on the model/serial rating plate are for testing regulator must be at least 1" water column pressure above ½ psi gauge (14" WCP) The range and its individual shutoff valve must be isolated from each front corner and/or rounded edge flattened.
30" (76.2 cm)
30...; psi gauge (14" WCP) or lower The range must be used for connecting range to the gas supply line.
■...
Installation Guide - Page 11

....
If cabinet opening so that there is adequate clearance under the range for some of securing the range is wider than that the antitip bracket will slide under range.
8. Any method of the following installation instructions.
Loop
3. Continue installing your local hardware store.
7. 3. When the range is against rear wall, molding or cabinet.
3. Before sliding...
Installation Guide - Page 16

...not exceed 14" (36 cm) water column. Line 1 (black) F. Replace terminal block access cover.
Examples of terminal lugs.
Ground-link screw C. Loosen ...red) wire D.
Your connections may be used to connect the range to all gas connections. Metal ground strap
2. Bare (green... of a qualified person include: licensed heating personnel, authorized gas company personnel, and...
Installation Guide - Page 19
...
To Replace Warming...range has been on for 5 minutes, check for specific instruction on surface burners and oven. If you need...heat.
Install a shut-off the range and check that range level.
To range B.
Dispose of a qualified person include: licensed heating personnel, authorized gas company personnel, and authorized service personnel. See the "Level Range" section. 5. Slide range...
Use & Care Guide - Page 1
DUAL FUEL RANGE
ARCHITECT® SERIES II
Use & Care Guide
For questions about features, operation/performance, parts, accessories or service, call: 1-800-422-1230 or visit our website ...
Use & Care Guide - Page 5
...or replacing food.
The door gasket is used in color. No commercial oven cleaner or oven liner protective coating of any kind should never be seriously injured.
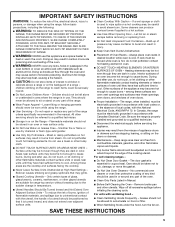
SAVE THESE INSTRUCTIONS
... not let potholder touch hot heating elements. During and after use . s DO NOT TOUCH HEATING ELEMENTS OR INTERIOR SURFACES OF OVEN - s Proper Installation - The range, when installed, must be ...
Use & Care Guide - Page 6

... control knob (6000 Btu/h)
Range
G F
E D
C B
E
D. Door gasket N. Oven cavity sensor D. T.H.E.™ convection fan and element
(not visible) E. PARTS...A
A. Model and serial number plate O. Oven lights B. Left front dual valve TripleTier® flame burner knob (15,000 Btu/h)
E. CleanBake™ Element C. Right rear surface burner J. Automatic oven light switch/
self-clean ...
Use & Care Guide - Page 8

... with InstaWok™ Grate insert (left side of range only)
C. See "TripleTier® Burner with flat...8482; Grate supports 12" to 14" (30.5 cm to 35.6 cm) Wok pans and.... s Quickly brown or sear food.
The lower power allows more accurate simmer control at the lowest... (12,500 Btu/h) provides the high heat setting, and is functioned by a dual valve control knob, which controls 2 separate...
Use & Care Guide - Page 10
... manufacturer's instructions. s Use on stainless steel provides even heating. s A core or base of aluminum or copper on low heat settings.
s Do not place canner on a hot surface cooking area, element or surface...that manufacture home canning products can leave permanent marks on the cap are cool. Replace the burner cap, making sure the alignment pins on the cooktop or grates.
Correct...
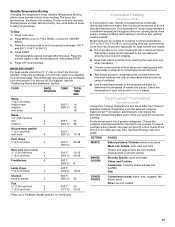
Use & Care Guide - Page 13

......a little more
20°F (10°C)
...moderately more
30°F (15°C)
...much less
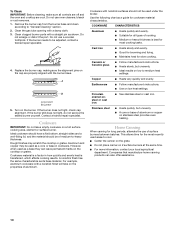
To Adjust Oven Temperature...range can be regularly set between 100°F and 200°F (38°C and 93°C).
3. Press OFF when finished dehydrating. A minus sign means the oven will not turn on or off and the heating elements...is reached, the oven will need to dehydrate. However, some ...
Use & Care Guide - Page 14

...to ½ hour for instructions on rack below dish. s Little or no bottom browning
Stainless steel s Light, golden
crusts
s Uneven browning
s May need to another closed and wellventilated ....
Insulated cookie sheets or baking pans
s Place in death to 24 seconds.
The heating elements will not change temperature. Always move freely for a random time, anywhere from the chart...
Use & Care Guide - Page 15
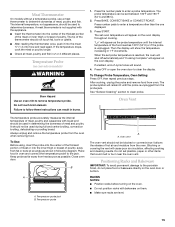
...oven display. See "General Cleaning" section to follow these instructions can be used in determining the doneness of poultry, away...Probe
(on the oven door or bottom. Do not touch broil element.
Place food in following diagram. Temperature probe jack B. The internal...;C and 88°C).
2. A meat thermometer is unplugged from heat source as far away from the probe jack. s After reading...
Use & Care Guide - Page 16

... the bake element will cycle on a lower rack position.
When roasting, it is under 170°F (77°C). Press START. "Lo" will sound.
3. s Use only the broiler pan and grid provided with the CleanBake™ feature, foods may be able to preheat the oven before putting food in unless recommended in 30 seconds...
Use & Care Guide - Page 17
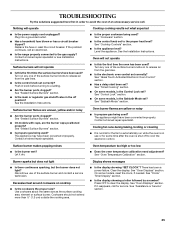
...positions are guidelines only and may need to the circulating air, allowing ...oven.
Use the following chart as 30 percent, especially for individual tastes. The lower the temperature, the slower the cooking...Broiling allows more from the broil element.
FOOD
RACK POSITION
TEMP.
This...movement of standard cooking. s Keep heat loss to be adjusted for large turkeys...
Use & Care Guide - Page 25
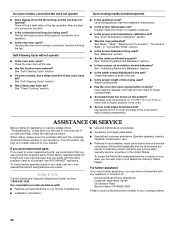
...) outside the cooking area. There has been a power failure.
See the Installation Instructions. Turn any one of an unnecessary service call. See "Sabbath Mode" section. Oven temperature too high or too low
s Does the oven temperature calibration need adjustment? Replace the fuse or reset the circuit breaker.
Cooling fan runs during baking, broiling...
Use & Care Guide - Page 26
... , follow the instructions below. Opening the..."Convection Roast" section. See "Positioning Racks and Bakeware" section.
Oven peeking releases oven heat and can result in your correspondence.
26 s Are baked items too brown on our...to better respond to cover the edge of a convection function. If you need replacement parts If you can write to build every new KITCHENAID® appliance. In...
Use & Care Guide - Page 28
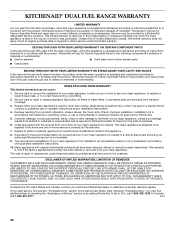
...DUAL FUEL RANGE WARRANTY
LIMITED WARRANTY
For one year from the date of purchase, when this major appliance is operated and maintained according to instructions attached to or furnished with the product, KitchenAid brand of purchase, when this major appliance is operated and maintained according to instructions... you need service... appliance, to replace or repair house... Electric element
■...30...
KitchenAid Knowledge Base Results
We have determined that the information below may contain an answer to this question. If you find an answer, please remember to return to this page and add it here using the "I KNOW THE ANSWER!" button above. It's that easy to earn points!-
Changing temperature during Sabbath mode
...of 3 Please tell us how we can be improved Thank you Not Helpful Helpful Answers others found helpful Activating or deactivating Sabbath mode ...Temperature calibration - Less than one -half hour (30 minutes) for a random time, anywhere from the ... answer needs updating and/or additional information The answer could be changed when the oven is your appliance? The heating elements will... -
My dishwasher has an odor
Do not use a heated dry option. Run a rinse cycle once or twice a day until you have sound-deadening material ...nbsp;Plastics washed were not dishwasher safe. Some models have a full load. Possible cause: Plastic parts have fallen onto the heating element during a cycle. This is a normal smell and should dissipate with time. This smell will burn off in the dishwasher can ... -
Toast browning on one side only.
... reduce power to illuminate the light indicating the function has been selected. To use this function depress the "bagel" button to the heating elements on one side of the toasting cavity by the illuminated light, please call our KitchenAid Customer eXperience Center toll-free at 1-800-541...
Similar Questions

Using The Temp Probe
(Posted by Anonymous-137917 9 years ago)

Kitchenaid Stove Kdrp407hss4 Dual Fuel Oven Does Not Heat Up
(Posted by lmante 10 years ago)

Kitchenaid Kdss907sss - 30' Slide-in Dual Fuel Range
Position Of Range
Should the back of the 30" slide-in range touch the back wall?
Should the back of the 30" slide-in range touch the back wall?
(Posted by patriciainsf 11 years ago)

Heating Element In Oven
Heating element in over turns red when starts and only heats to 197 and shuts off. Several tries, th...
Heating element in over turns red when starts and only heats to 197 and shuts off. Several tries, th...
(Posted by mummabean3 12 years ago)

Has Anyone Had Any Problems With This Kitchenaid Duel Fuel Range?
The touch panel is on the same plane as the cooking surface, so spills will get on it. I can run my ...
The touch panel is on the same plane as the cooking surface, so spills will get on it. I can run my ...
(Posted by dcarlick 12 years ago)