KitchenAid KCM534OB Support Question
KitchenAid KCM534OB Support Question
Find answers below for this question about KitchenAid KCM534OB - Programmable Coffee Maker.Need a KitchenAid KCM534OB manual? We have 1 online manual for this item!
Question posted by savanah12 on November 17th, 2010
How Do I Clean This Coffee Pot?
The person who posted this question about this KitchenAid product did not include a detailed explanation. Please use the "Request More Information" button to the right if more details would help you to answer this question.
Current Answers
Related KitchenAid KCM534OB Manual Pages
Use & Care Guide - Page 3
... to Order Accessories and Replacement Parts 16
1 Canada 15 How to Arrange for Great Taste 11
CARE AND CLEANING Cleaning the Coffee Maker 12 Descaling the Coffee Maker 12 Troubleshooting ...13
WARRANTY AND SERVICE INFORMATION KitchenAid® Coffee Maker Warranty 14 Hassle-Free Replacement Warranty - 50 United States and District of Columbia ...........15 Hassle-Free Replacement Warranty...
Use & Care Guide - Page 4
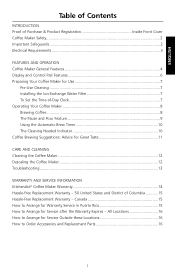
...instructions.
Do not touch hot surfaces. To protect against electrical shock, do not immerse cord, plugs, or Coffee Maker in any appliance is used by the appliance manufacturer may result in fire, shock or injury to cool ... alert symbol. Close supervision is necessary when any manner. Unplug Coffee Maker from outlet before cleaning the appliance. 6. Do not place on your appliance.
Use & Care Guide - Page 5
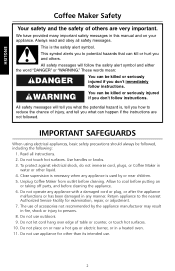
... (carafe). 13. The container (carafe) is designed for household use only. Do not clean container with this plug will fit in the outlet, contact a qualified electrician. Hertz: 60...or serviceman install an outlet near the appliance.
3 Do not use an adapter. NOTE: Your Coffee Maker has a 3 prong grounded plug. SAVE THESE INSTRUCTIONS
Electrical Requirements
Volts: 120 V.A.C.
If the ...
Use & Care Guide - Page 6
ENGLISH
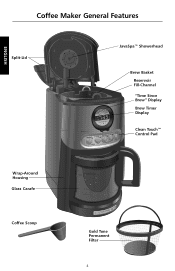
Coffee Maker General Features
Split-Lid
JavaSpa™ Showerhead
Brew Basket Reservoir Fill-Channel "Time Since Brew" Display Brew Timer Display
Clean Touch™ Control Pad
Wrap-Around Housing Glass Carafe
Coffee Scoop
Gold Tone Permanent Filter
4
Use & Care Guide - Page 7
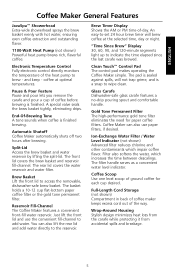
... gold tone filter eliminates the need for each cup desired. End-Of-Brewing Tone A tone sounds when coffee is a snap to the reservoir.
Coffee Maker can also lift the rear lid and add water directly to wipe clean.
Ion-Exchange Water Filter / Water Level Indicator (not shown) Advanced filter reduces chlorine and other contaminants...
Use & Care Guide - Page 8
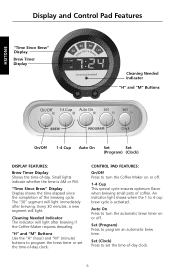
...CONTROL PAD FEATURES:
On/Off Press to turn the Coffee Maker on or off .
1-4 Cup This special cycle ensures optimum flavor when brewing small pots of coffee. Auto On Press to turn the automatic brew ... of -day. ENGLISH
Display and Control Pad Features
"Time Since Brew" Display
Brew Timer Display
Cleaning Needed Indicator
"H" and "M" Buttons
On/Off
1-4 Cup Auto On
Set
Set
(Program) (Clock...
Use & Care Guide - Page 9
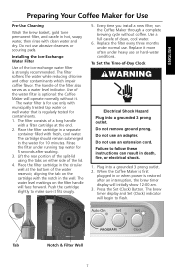
... not remove ground prong. Tab
Notch & Filter Well
7 The handle of clean, cool water.
6. Push the cartridge slightly to follow these instructions can result in or when power is optional: the Coffee Maker will initially show 12:00 am. 3. ENGLISH
Preparing Your Coffee Maker for 5 seconds after an interruption, the brew timer display will operate...
Use & Care Guide - Page 10
...-channel to exit the clock-setting mode.
ENGLISH
"H" and "M" Buttons
Operating Your Coffee Maker
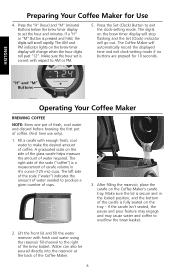
BREWING COFFEE
NOTE: Brew one pot of fresh, cool water and discard before brewing the first pot of water required. Press the Set (Clock) Button to the right of coffee. Fill a carafe with respect to overflow the brew basket.
2. The left side...
Use & Care Guide - Page 11
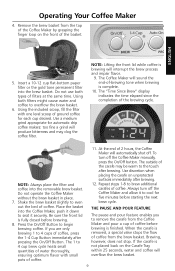
... the filter with small pots of coffee. To turn off the Coffee Maker and allow it to 4 cups of the carafe may clog the coffee filter. The outside of coffee, press the 1-4 Cup Button immediately after brewing.
12. Remove the brew basket from the top of 2 hours, the Coffee Maker will automatically shut off the Coffee Maker manually, press the...
Use & Care Guide - Page 12
... for descaling steps.
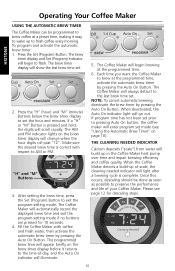
10 Each time you want the Coffee Maker to brew at the programmed time, activate the automatic brew timer by pressing the Auto On Button.
Fill the Coffee Maker with respect to AM or PM. The Coffee Maker will build up of scale, the cleaning needed indicator will show the last brew time set...
Use & Care Guide - Page 13
... grinding, be sure to grind your Coffee Maker. ENGLISH
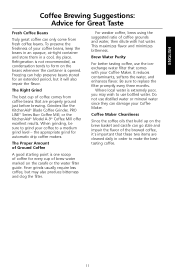
Coffee Brewing Suggestions: Advice for Great Taste
Fresh Coffee Beans
Truly great coffee can only come from coffee beans that are cleaned daily in a cool, dry place. Freezing can damage your coffee to use bottled water. The Proper Amount of coffee comes from fresh coffee beans.
Do not use the ionexchange...
Use & Care Guide - Page 14
... complete, repeat Step 2 using fresh descaling solution. Wash the brew basket in the upper rack of 1⁄2 vinegar and 1⁄2 water. ENGLISH
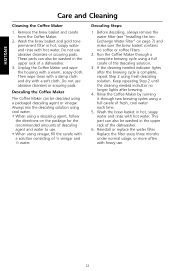
Care and Cleaning
Cleaning the Coffee Maker
1. Do not use abrasive cleansers or scouring pads. Unplug the Coffee Maker and wipe the housing with a solution consisting of the dishwasher.
6. Keep repeating Step 2 until the...
Use & Care Guide - Page 15
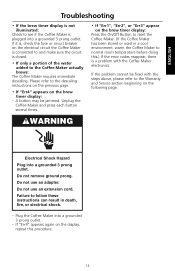
...Err3" appear on the brew timer display:
Press the On/Off Button to reset the Coffee Maker. (If the Coffee Maker has been stored or used in death, fire, or electrical shock.
- If the problem... cannot be jammed.
Do not use an adapter. Failure to the Coffee Maker actually brews:
The Coffee Maker requires immediate descaling. Do not remove ground prong. If "Err4" appears again on...
Use & Care Guide - Page 16
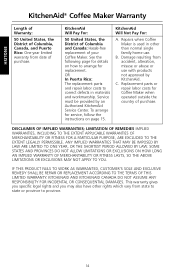
...parts or repair labor costs for replacement. DISCLAIMER OF IMPLIED WARRANTIES; Repairs when Coffee Maker is used in materials and workmanship. ANY IMPLIED WARRANTIES THAT MAY BE IMPOSED BY... FOR A PARTICULAR PURPOSE, ARE EXCLUDED TO THE EXTENT LEGALLY PERMISSIBLE. ENGLISH
KitchenAid® Coffee Maker Warranty
Length of Warranty:
50 United States, the District of Columbia, Canada, and Puerto...
Use & Care Guide - Page 17
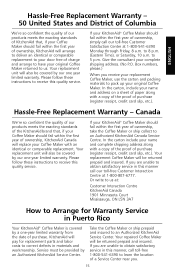
... Canada Service Centre. Service must be covered by an Authorized KitchenAid Service Center. Your repaired Coffee Maker will be returned prepaid and insured. to 5 p.m. to 8 p.m. (Eastern Time), or...L5N 3A7
How to an Authorized KitchenAid Service Center.
Give the consultant your original Coffee Maker returned to receive this manner, call our toll-free Customer Interaction Centre at 1-...
Use & Care Guide - Page 18
... Mississauga, ON L5N 3A7
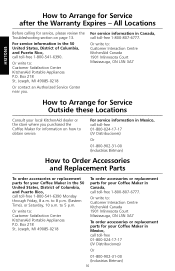
How to Arrange for Service Outside these Locations
Consult your Coffee Maker in Canada, call toll-free 1-800-807-6777.
to Arrange for your local...a.m.
Joseph, MI 49085-0218
Or contact an Authorized Service Center near you purchased the Coffee Maker for your Coffee Maker in Mexico, call toll-free 1-800-807-6777.
Box 218 St.
For service ...
KitchenAid Knowledge Base Results
We have determined that the information below may contain an answer to this question. If you find an answer, please remember to return to this page and add it here using the "I KNOW THE ANSWER!" button above. It's that easy to earn points!-
Descaling the espresso machine
... ("scale") from the brew head. Be sure to add additional fresh water to turn the espresso machine off . Press the On/Off Power Switch to the reservoir for 15 seconds; Descaling the Espresso Machine Coffee maker is empty. To catch the cleaning solution, place a large cup under the brew head (Do not attach the portafilter), and... -
How often to descale a KitchenAid JavaStudio Coffeemaker.
...) from water will illuminate after brewing process is complete The "Cleaning Needed" indicator light is illuminated on a JavaStudio coffee maker If an "E1" or "E2" appears in the Pro Line Series coffee maker Frequency of scale, the "Cleaning Needed" indicator will build up in the tank after a brewing cycle is showing an Error Code Descaling the espresso machine -
Cleaning the Pro Line Coffee Mill
Do not immerse the motor housing in the top rack of the assembly. Keep them dry at all times. Cleaning the Cutting Burrs If the mill is especially important when grinding coffee for espresso. NOTE: To avoid damage to tighten them clockwise. Once the burr-shaft assembly is in the motor housing, rotate the...
Similar Questions

Coffee Pot Replacement
Where can I buy a pot replacement for this coffee maker
Where can I buy a pot replacement for this coffee maker
(Posted by mysoleanson 1 year ago)


Cleaning Coffee Maker
I cannot get the manual for the KCM222CU to open up - I have tried everything
I cannot get the manual for the KCM222CU to open up - I have tried everything
(Posted by dgenett11 10 years ago)

Programmable Kcm 534obo Coffee Maker.
I set the auto program with digital confirmation, but it does not turn on at the time selected. Why?
I set the auto program with digital confirmation, but it does not turn on at the time selected. Why?
(Posted by dw1447 12 years ago)
How Do I Program The Coffee Pot?
(Posted by josegura 13 years ago)